
The Apple Watch Camellia strap—a delicate fusion of elegance and comfort—has become a favorite among users who value both style and functionality. With its soft silicone construction and floral-inspired design, it's perfect for everyday wear, workouts, or formal occasions. But even the most beautiful accessory is only as good as how well it’s installed. A poorly attached strap can slip off, cause discomfort, or damage your device.
This comprehensive guide walks you through every stage of attaching your Apple Watch Camellia strap correctly. Whether you're upgrading from a sport band or switching between styles, these steps ensure a secure, seamless fit that enhances both safety and aesthetics.
Understanding the Camellia Strap Design
The Camellia strap is part of Apple’s collection of premium silicone bands designed specifically for Apple Watch models Series 3 and later. It features:
- A flexible, hypoallergenic silicone body for all-day comfort
- Integrated lugs that slide into the watch case
- A magnetic closure system for easy on-and-off use
- Floral embossing or accent details (depending on color variant)
Unlike traditional leather or nylon bands, the Camellia strap uses a pin-and-spring bar mechanism similar to other Apple Sport Loops and Modern Buckles. However, due to its slightly tapered ends and snug fit, alignment during installation requires precision.
“Getting the strap seated properly isn’t just about looks—it prevents accidental detachment during movement.” — Jordan Lee, Wearable Tech Specialist at GadgetCare Labs
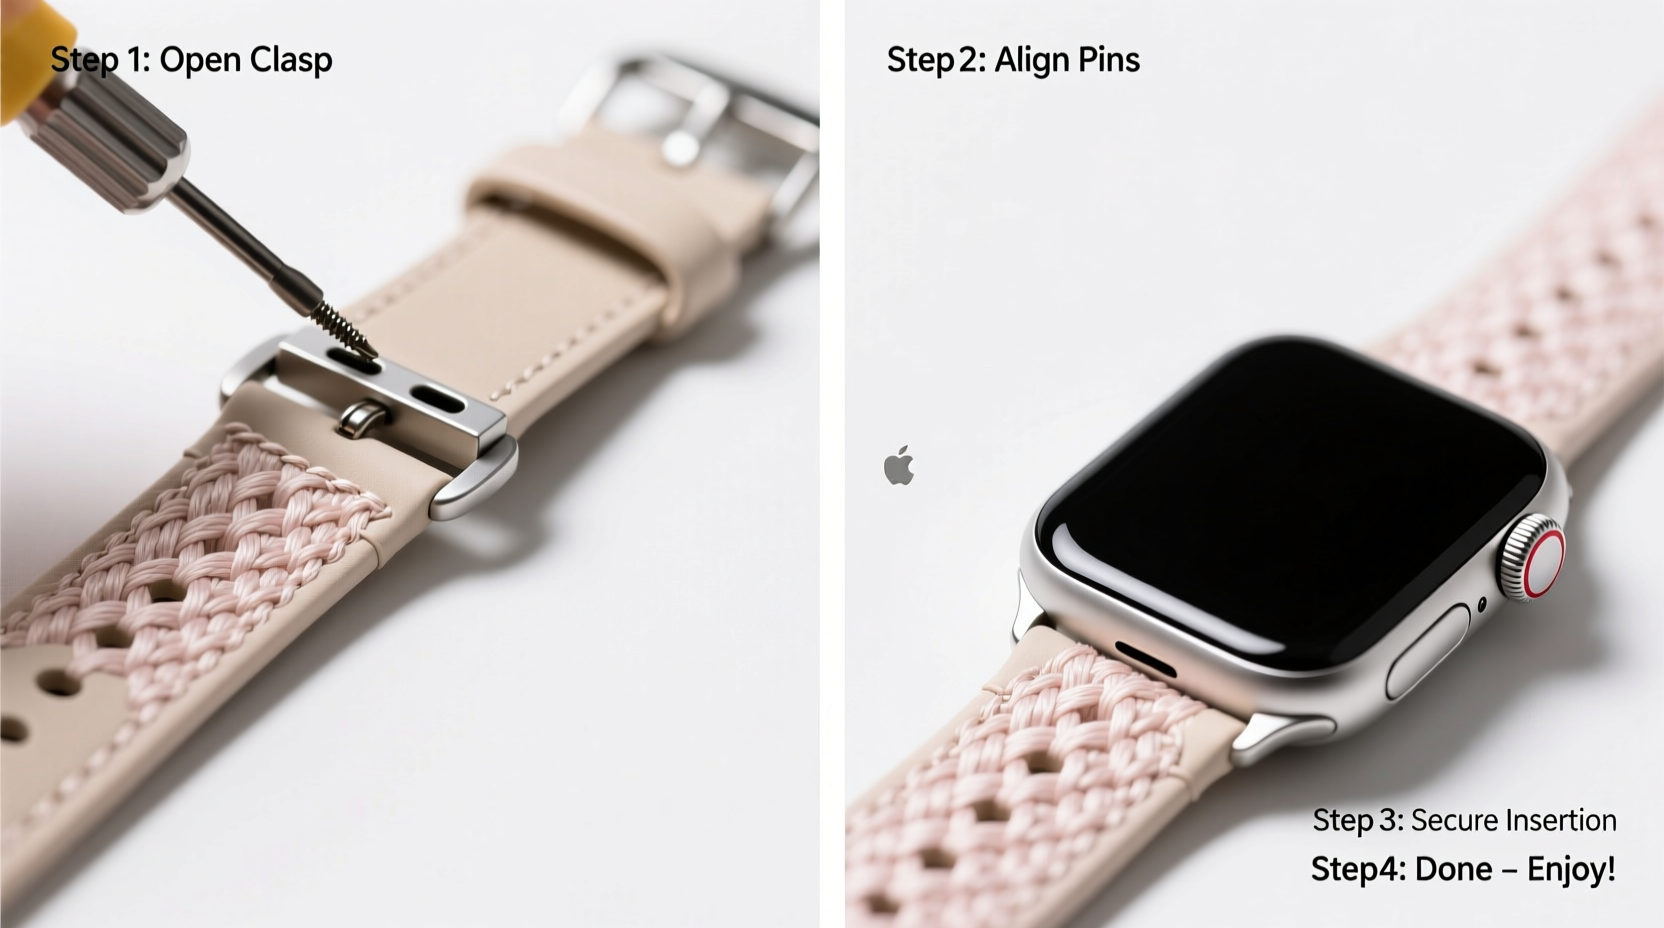
Step-by-Step Installation Process
Follow this detailed timeline to install your Camellia strap safely and efficiently. The entire process takes less than five minutes with the right technique.
- Power Down Your Apple Watch (Optional but Recommended)
While not required, turning off your watch minimizes the risk of accidental screen activation or input during handling. Press and hold the side button, then swipe down on “Power Off.” - Remove the Existing Strap
Locate the release buttons on the underside of the current strap near where it connects to the watch case. These are small, recessed levers made of metal or plastic. Press firmly inward while sliding the strap outward. Repeat on both sides until fully detached. - Inspect the Watch Lugs and New Strap Ends
Check the connection slots on your Apple Watch for dust or debris. Use a dry microfiber cloth to gently clean if needed. Examine the Camellia strap’s connector ends—they should be smooth, free of tears, and aligned straight. - Align the Camellia Strap with One Side First
Hold the watch face securely in one hand. Take the new strap and insert one end into the left or right lug (it doesn't matter which side first). Slide it in until you feel resistance—this means the internal spring bar has engaged partially. - Firmly Seat the First Side
Apply steady pressure until you hear a soft click. This indicates the pin has locked into place within the lug housing. Wiggle the strap lightly to confirm it’s secure. - Attach the Second Side Using Controlled Pressure
Now bring the opposite end of the strap toward the remaining lug. Align carefully—misalignment is the most common cause of failed installation. Push straight in with even force until another distinct click occurs. - Double-Check Both Connections
Gently pull each side of the strap away from the watch body. There should be no wobbling or partial disengagement. If either side feels loose, remove and reattach that side. - Turn On and Test Fit
Power your Apple Watch back on. Adjust the band around your wrist using the magnetic clasp. Ensure the display sits flat against your skin without twisting.
Real-World Example: Sarah’s Smooth Transition
Sarah, a fitness instructor in Portland, recently upgraded her Apple Watch SE with a white Camellia strap for a cleaner look during client sessions. Initially hesitant because she’d damaged a previous band trying to rush installation, she followed the step-by-step method outlined here.
She began by powering down her watch, cleaning the lugs with a cotton swab, and placing the watch on a non-slip mat. By focusing on precise alignment and applying firm, gradual pressure, both sides clicked into place without issue. She now changes straps weekly depending on her outfit and reports increased confidence in the band’s durability—even during high-intensity training.
“I used to think changing straps was risky,” she said. “Now I do it myself in under three minutes. The key was learning to respect the mechanism instead of fighting it.”
Troubleshooting Common Issues
Even with care, minor hiccups may occur. Here’s how to resolve them quickly:
- Strap won’t click into place: Double-check orientation. The textured side of the Camellia strap should face outward; the smooth connector edge goes into the lug. Also, verify that the spring bar isn’t compressed from prior use—let it rest for a few minutes before retrying.
- One side feels looser than the other: Remove both ends and reinstall starting with the loose side. Uneven tension often results from incomplete engagement.
- Magnetic clasp isn’t holding: Ensure the strap is wrapped snugly around the wrist. Over time, repeated stretching can weaken magnetism. Consider replacing the band if adhesion diminishes significantly.
Frequently Asked Questions
Can I wash my Camellia strap?
Yes. Rinse it under lukewarm water with mild soap, then dry thoroughly with a lint-free cloth. Avoid submerging the magnetic clasp area for extended periods to preserve longevity.
Is the Camellia strap compatible with all Apple Watch models?
It fits all Apple Watches with 40mm, 41mm, 44mm, or 45mm cases. However, older models like Series 0–2 have smaller lug widths and are not compatible. Always check size specifications before purchase.
How long does a Camellia strap typically last?
With regular use and proper care, expect 12–18 months of reliable performance. Exposure to sweat, UV light, and frequent friction can shorten lifespan.
Final Thoughts and Next Steps
Installing an Apple Watch Camellia strap doesn’t require tools or technical expertise—just attention to detail and patience. Once properly secured, it delivers a lightweight, breathable fit ideal for daily wear. More importantly, correct installation protects your investment in both the strap and the watch itself.
Now that you know the exact steps, consider exploring other colors or materials in Apple’s lineup—like the Nike Sport Band or Leather Loop—to match different moods and occasions. Rotate your bands regularly to extend their life and keep your style fresh.


 浙公网安备
33010002000092号
浙公网安备
33010002000092号 浙B2-20120091-4
Comments
No comments yet. Why don't you start the discussion?