
Protecting your iPhone 14 Pro is essential, especially given its premium design and advanced features. A high-quality leather case not only enhances grip and style but also safeguards against drops, scratches, and everyday wear. However, even the finest case can underperform if not installed correctly. Improper installation may lead to misaligned ports, reduced button responsiveness, or unintended stress on the phone’s frame. This guide walks you through every detail of fitting a leather case onto your iPhone 14 Pro with precision, ensuring both protection and elegance from day one.
Why Proper Installation Matters
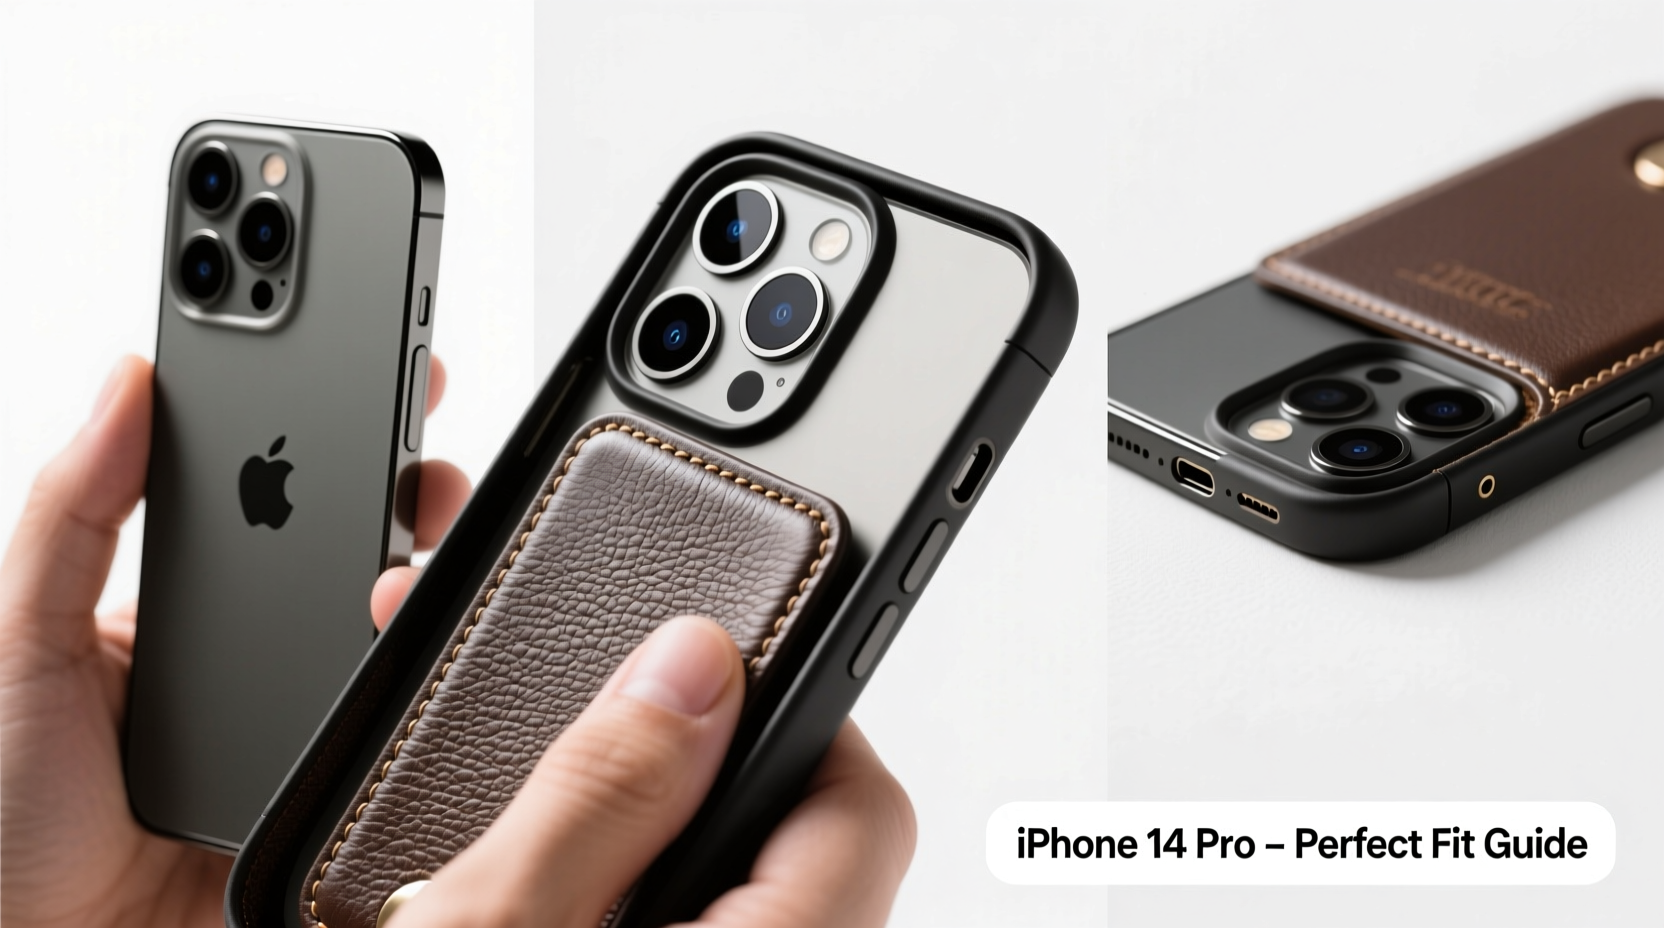
A leather case isn’t just an accessory—it's a tailored shield designed to complement your iPhone’s exact dimensions. The iPhone 14 Pro features precise camera cutouts, flush speaker grilles, and tightly calibrated volume and side buttons. When a leather case is improperly seated, it can obstruct these elements, compromise shock absorption, or create pressure points that damage the finish over time.
Unlike silicone or plastic cases, genuine leather has subtle rigidity and requires careful handling during installation. It molds slightly over time but should never be forced. Taking a methodical approach ensures longevity for both the case and your device.
“Proper alignment during installation preserves functionality and prevents micro-abrasions caused by friction.” — David Lin, Mobile Accessory Design Engineer at TechShield Labs
Step-by-Step Guide to Installing Your Leather Case
Follow this detailed sequence to install your iPhone 14 Pro leather case without risking damage or misalignment.
- Power Down Your Device (Optional but Recommended)
While not strictly necessary, turning off your iPhone eliminates the risk of accidental input during installation. This is particularly useful when aligning the case around the Face ID sensors and side buttons. - Clean Both Phone and Case
Use a microfiber cloth to wipe down the back and edges of your iPhone. Remove any dust, fingerprints, or residue. Similarly, gently clean the interior lining of the leather case with a dry cloth. Even tiny particles can cause scratches or prevent full seating. - Inspect the Case Interior
Check for manufacturing tags, protective films, or stitching irregularities inside the case. Some premium leather cases include a thin fabric liner—ensure it lies flat and isn’t bunched up. - Align the Bottom First
Hold the iPhone so the charging port faces the same direction as the case’s opening. Gently press the bottom edge of the phone into the case, starting with the left corner. Ensure the Lightning port is fully visible and unobstructed. - Secure the Top Edge
Once the bottom is seated, slowly press the top of the phone into place. Pay close attention to the front-facing camera and proximity sensor cutout. The notch should fit snugly within the designated space without resistance. - Engage the Sides Gradually
Work from the bottom corners upward along each side. Apply even pressure with your thumbs, avoiding sudden snaps. Genuine leather cases often have reinforced corners—press these last to allow natural flexing. - Test Button Functionality
Press each button (volume up/down, action button, and side button) to confirm tactile feedback and full actuation. If a button feels stiff or unresponsive, remove the case and recheck alignment. - Verify Camera Clearance
Look at the rear camera module. There should be a small gap between the lens cover and the case’s raised bezel. This prevents lens contact with surfaces and reduces smudging.
Common Mistakes to Avoid
Even experienced users make errors when installing leather cases. These pitfalls are easily preventable with awareness.
| Mistake | Consequence | Solution |
|---|---|---|
| Forcing the phone into the case | Stress on frame, potential screen cracking near edges | Realign and use gradual pressure; never twist |
| Ignoring internal debris | Scratches on glass or aluminum back | Always inspect and clean before insertion |
| Over-tightening around buttons | Reduced button travel, muffled haptics | Ensure cutouts match button height exactly |
| Installing while phone is in a screen protector bubble | Uneven fit, bulging at edges | Install case first, then apply screen protector |
Real-World Example: A Photographer’s Experience
Maya Torres, a professional product photographer based in Portland, uses her iPhone 14 Pro daily for client shoots. After purchasing a luxury Italian leather case, she attempted to snap it on quickly before a shoot. The camera cutout was slightly off-center, causing lens flare in several images due to the case shading part of the wide-angle sensor. She also noticed the mute switch wasn’t fully accessible.
After removing the case and following a slow, deliberate installation process—starting with cleaning, checking alignment, and pressing in corner by corner—she achieved a flawless fit. “It took three extra minutes,” she said, “but now my phone slides perfectly into my bag, all controls work, and I don’t have to edit out shadows from my photos.”
Essential Tips for Long-Term Fit and Care
Installation is just the beginning. To maintain a perfect fit over months and years, follow these maintenance guidelines.
- Break in gradually: During the first week, remove and reinstall the case once every few days to help the leather conform smoothly to the iPhone’s shape.
- Avoid extreme temperatures: Heat can warp leather, while cold makes it brittle. Don’t leave your phone in direct sunlight or freezing cars.
- Condition occasionally: Every 6–8 weeks, apply a pea-sized amount of pH-balanced leather conditioner with a soft cloth. Wipe off excess immediately.
- Rotate usage: If you own multiple cases, alternate them weekly. This reduces continuous tension on one material and extends overall life.
Frequently Asked Questions
Can I install a screen protector after putting on the leather case?
Yes, but it’s better to install the screen protector first. A properly fitted leather case should not interfere with edge-to-edge protectors. If you install the case first, ensure the bezel doesn’t lift the protector’s edges, which could lead to bubbling.
My leather case feels too tight. Will it loosen over time?
Genuine leather naturally stretches slightly with use, typically within 7–10 days of regular handling. However, it should never feel excessively tight to the point of requiring force. If insertion causes discomfort or risks damaging the phone, consider exchanging for a different batch or brand.
Should I remove the case when charging wirelessly?
No. Most high-quality leather cases are designed for MagSafe compatibility and support wireless charging up to 15W. Just ensure the case is centered on the charger for optimal efficiency. Thick or poorly aligned cases may reduce charging speed.
Final Checklist Before Use
Before declaring the installation complete, run through this quick verification list:
- ✅ All ports (Lightning, speaker, microphone) are fully exposed
- ✅ Front and rear cameras sit flush within their cutouts
- ✅ Buttons click cleanly without sticking
- ✅ No gaps or lifting along the edges
- ✅ The phone sits flat on a surface without wobbling
- ✅ Face ID unlocks reliably through the notch
Conclusion: Precision Today, Protection Tomorrow
Installing a leather case on your iPhone 14 Pro might seem straightforward, but the details define the difference between adequate protection and exceptional care. By taking a few extra minutes to align, seat, and verify each component, you preserve both the function and beauty of your device. A well-fitted case doesn’t just guard against drops—it enhances your daily interaction with one of your most valuable tools.


 浙公网安备
33010002000092号
浙公网安备
33010002000092号 浙B2-20120091-4
Comments
No comments yet. Why don't you start the discussion?