
The iPhone 15 Pro is a precision-engineered device, designed with tight tolerances and premium materials. While it’s built to withstand everyday use, adding a high-quality case enhances protection against drops, scratches, and environmental wear. However, even the best case can cause harm if installed improperly—scratching the finish, warping the frame, or misaligning ports. A careful, methodical approach ensures your phone remains pristine while gaining full functionality from its new shell.
This guide walks you through every stage of safely installing an iPhone 15 Pro case, whether it's silicone, leather, or rugged polycarbonate. You'll learn how to avoid common mistakes, choose compatible accessories, and maintain long-term device integrity—all without risking cosmetic or structural damage.
Why Proper Case Installation Matters
The iPhone 15 Pro features a titanium frame with a ceramic shield front cover and a textured matte glass back. These materials are durable but not immune to micro-scratches or pressure marks. A poorly fitted or forcefully installed case can gouge the finish, especially around the camera bump or side buttons.
Additionally, incorrect installation may lead to:
- Interference with wireless charging alignment
- Misaligned button covers that hinder responsiveness
- Trapped dust or debris under the case causing abrasions over time
- Reduced heat dissipation during intensive tasks
Apple recommends using cases that meet their MFi (Made for iPhone) certification standards, which ensure dimensional accuracy and material safety. Even non-certified third-party cases can work well—if applied correctly.
“Over 60% of cosmetic damage reported on iPhones occurs during accessory installation, not daily use.” — Dr. Lena Torres, Mobile Device Durability Researcher, TechGuard Labs
Pre-Installation Checklist
Before attempting to attach any case, prepare both your environment and device. Rushing this phase increases the risk of slips, scratches, or improper fit.
- Clean your iPhone thoroughly with a microfiber cloth and 70% isopropyl alcohol wipe (lightly dampened)
- Inspect the case interior for manufacturing residue, sharp edges, or trapped particles
- Verify all ports (Lightning, speaker grilles, microphone) align properly when held up to the phone
- Ensure hands are clean and dry—oils and moisture increase slippage risk
- Work on a flat, soft surface such as a padded table or clean towel
- Remove any screen protector bubbles or loose edges that could interfere with case lip alignment
Step-by-Step Guide to Secure Installation
Follow these six steps carefully to install your iPhone 15 Pro case without damaging the chassis, camera module, or finish.
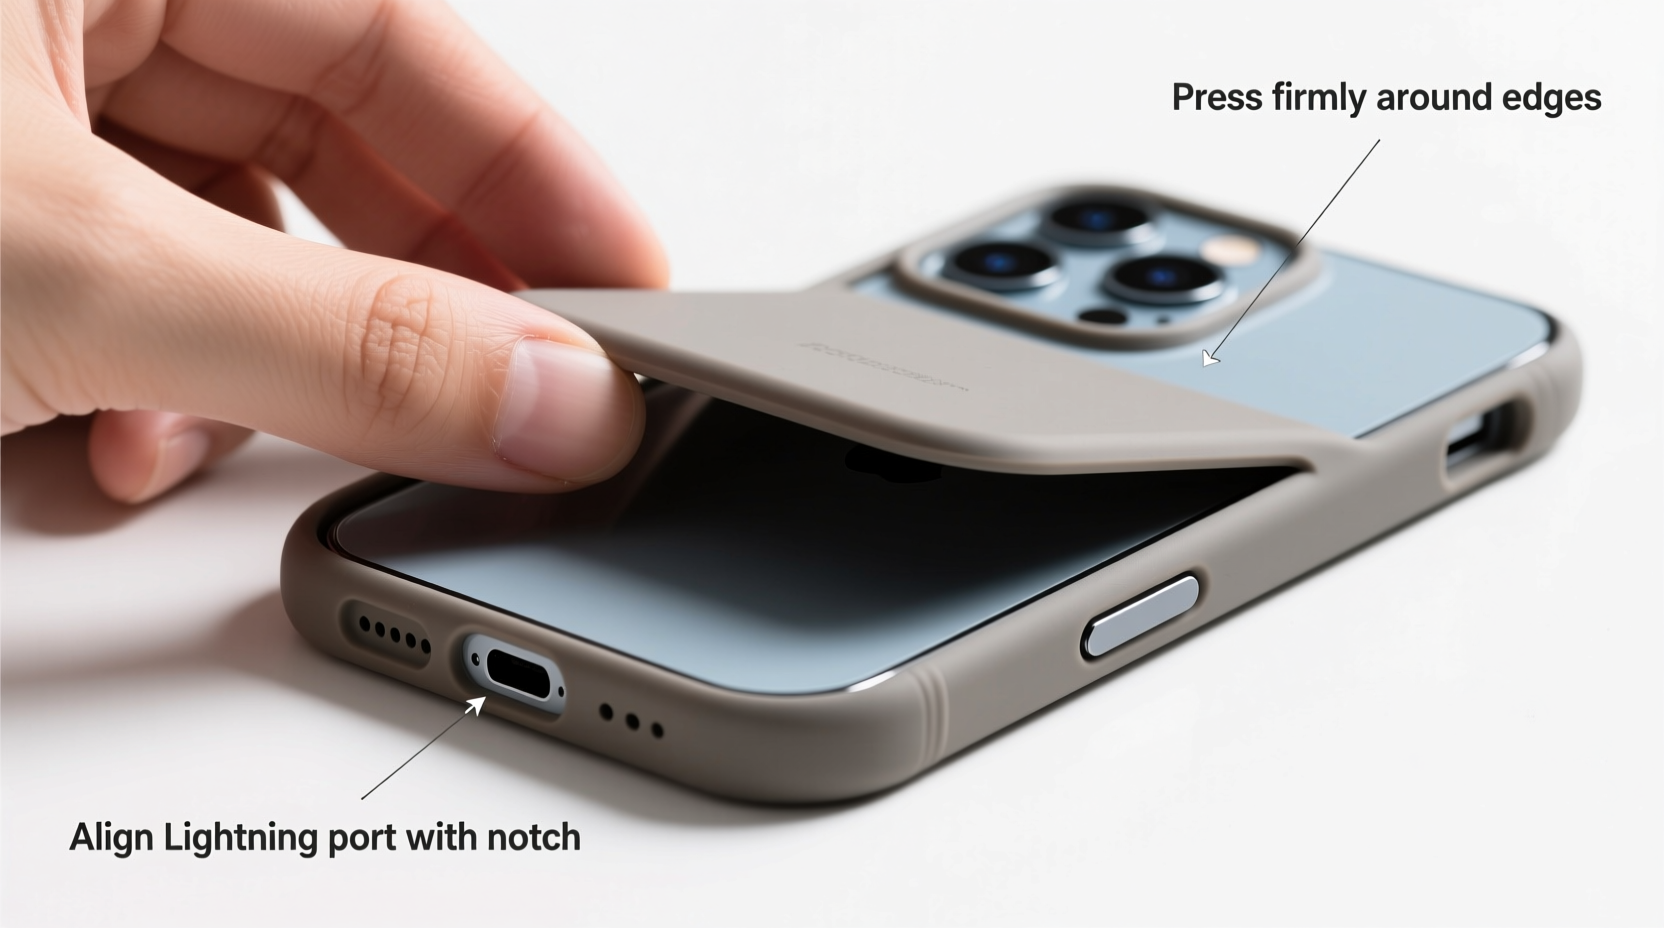
Step 1: Align the Bottom Edge First
Hold the case so the Lightning port opening matches the iPhone’s port. Gently lower the bottom edge until it clicks into place. Avoid angling the phone at this stage—direct vertical alignment prevents lateral stress on the frame.
Step 2: Check Camera Bump Clearance
The iPhone 15 Pro has a prominent triple-lens camera module. Ensure the case’s cutout fully accommodates the raised lens housing. There should be no contact between the glass lenses and the case material. If the case presses against the camera, stop immediately—this indicates incompatibility.
Step 3: Press the Top Edge Gently
Once the bottom is secured, apply slow, even pressure to the top edge. Use your thumbs simultaneously on both sides to prevent twisting. The goal is gradual snapping into place, not forceful jamming. If resistance feels excessive, recheck alignment before proceeding.
Step 4: Secure the Sides Evenly
Move around the perimeter, pressing each side gently. Focus extra attention on the volume buttons and action button (on the left side). High-quality cases have molded button caps; cheaper ones may require manual insertion. Do not pry or lever these parts open.
Step 5: Test All Functions
After full installation, verify:
- Volume and action buttons respond normally
- Ring/silent switch moves freely
- Speaker and microphone outputs are unobstructed
- Wireless charging works efficiently (no overheating or failed connections)
Step 6: Final Inspection
Run your fingers along the seam between the case and phone. It should feel smooth and flush. Look for gaps, bulges, or uneven spacing—especially near corners. If present, remove the case and repeat the process.
Do’s and Don’ts When Installing Your Case
| Do’s | Don’ts |
|---|---|
| Use a lint-free cloth to clean the phone before casing | Force the case onto the phone if alignment feels off |
| Align the bottom first, then press top gently | Use tools like screwdrivers or knives to snap edges shut |
| Choose cases with precise cutouts for camera and sensors | Leave dust or sand trapped under the case |
| Check compatibility with MagSafe chargers and wallets | Install a case over a cracked back glass without repair |
| Rotate cases periodically to prevent pressure discoloration | Expose the cased phone immediately to extreme heat or humidity |
Real-World Example: Avoiding a Costly Mistake
Jamal, a freelance photographer in Seattle, purchased a third-party rugged case online for his new iPhone 15 Pro. Excited to protect his investment, he opened the package and snapped the case on quickly at his kitchen counter. Within hours, he noticed muffled audio during video shoots. Upon removal, he found small plastic shavings inside the speaker mesh—and a faint scratch along the titanium frame where the case had been misaligned and forced into place.
He contacted the manufacturer, who confirmed the case mold was slightly off-spec. After switching to an Apple-certified brand and following a slow, deliberate installation process, his next case fit perfectly. His lesson? “Even if a case looks right, test it dry first. Force doesn’t fix poor fit.”
Frequently Asked Questions
Can I install a case on my iPhone 15 Pro without removing the screen protector?
Yes, most modern screen protectors—including tempered glass—are designed to be case-compatible. Just ensure the protector doesn’t extend beyond the display bezel, as overhang can prevent the case’s front lip from seating properly, creating gaps at the top or sides.
Why does my case feel loose after installation?
A slightly loose fit may indicate low-tolerance manufacturing or material stretching. However, true \"looseness\" is rare with reputable brands. If the case shifts noticeably when tilted, consider returning it. Over time, ill-fitting cases increase exposure to impacts and reduce drop protection effectiveness.
How often should I remove and reinstall the case?
Experts recommend removing the case every 2–3 weeks to clean both the phone and interior lining. This prevents buildup of sweat, oils, and pocket lint, which can degrade finishes or trap moisture. Reinstallation should follow the same careful steps as the first time.
Final Tips for Long-Term Protection
Even after successful installation, ongoing care matters. Avoid exposing the cased phone to direct sunlight for extended periods—UV rays can warp certain plastics and fade colors. Similarly, don’t submerge a cased iPhone unless both the phone and case are rated for water immersion.
If you frequently switch cases for style or seasonal use, label each one with its purpose (e.g., “MagSafe Commute,” “Travel Rugged”) and keep them organized. This reduces fumbling during changes and helps maintain consistent protection.
Conclusion: Protect with Precision
Your iPhone 15 Pro represents a significant investment in performance, design, and personal utility. Treating its protection with equal care ensures longevity and preserves resale value. Installing a case isn’t just about snapping on a cover—it’s about respecting the engineering of the device and enhancing it thoughtfully.
By following this detailed process, you avoid unnecessary wear, maintain optimal functionality, and enjoy peace of mind knowing your phone is safeguarded correctly. Take the time now to get it right—your future self will thank you when your iPhone still looks and works like new years down the line.


 浙公网安备
33010002000092号
浙公网安备
33010002000092号 浙B2-20120091-4
Comments
No comments yet. Why don't you start the discussion?