
A bucket bag is a stylish and functional accessory, but its open interior can quickly become chaotic. Without structure, essentials like keys, lip balm, and phone vanish into the depths with every use. The solution? An organizer insert. When properly installed, it transforms your favorite bag into a streamlined, efficient tool for everyday life. This guide walks you through selecting, preparing, and installing an organizer insert tailored to your bucket bag—so you can reclaim order without sacrificing style.
Why Organizer Inserts Make a Difference
Bucket bags are beloved for their slouchy silhouette and spacious interiors, but those same qualities make them prone to clutter. Unlike structured handbags with built-in compartments, most bucket bags offer little internal organization. As a result, users often waste time digging for small items or carry multiple pouches that shift around unpredictably.
An organizer insert addresses these issues by providing dedicated pockets, dividers, and stability. It maintains the bag’s shape, protects delicate linings, and ensures quick access to essentials. More than just a storage aid, it elevates your bag from casual accessory to purposeful companion.
“An organized bag reduces daily friction. Just five minutes of setup saves hours of frustration over weeks.” — Lena Torres, Productivity Consultant & Lifestyle Designer
Selecting the Right Insert for Your Bag
Not all inserts fit all bags. Choosing the correct one depends on several key factors: size, shape, depth, and material compatibility. Bucket bags vary widely—from compact mini styles to oversized weekend versions—so precision matters.
Measure your bag’s interior at its widest point (diameter) and from base to opening (height). Most inserts are designed to sit flush with the top edge, so aim for an insert that matches your bag’s height within half an inch. Too tall, and it won’t fit; too short, and it will shift inside.
Consider material as well. Felt and neoprene inserts provide lightweight structure and are ideal for soft leather or canvas bags. Rigid acrylic or molded plastic inserts offer maximum stability but may be too stiff for supple designs. Some high-end inserts feature magnetic closures or removable trays for added functionality.
Insert Comparison Table
| Material | Pros | Cons | Best For |
|---|---|---|---|
| Felt | Lightweight, affordable, quiet when handling | Less durable over time, minimal rigidity | Daily use with light loads |
| Neoprene | Flexible yet supportive, water-resistant | Can retain odors if not cleaned | Active lifestyles, travel |
| Acrylic | Extremely sturdy, holds exact shape | Bulky, noisy, limited availability | Premium leather bucket bags |
| Vegan Leather + Foam Core | Sleek look, moderate support, easy to clean | Mid-range cost, may crease under pressure | Work-to-weekend versatility |
Preparing Your Bag and Insert
Before installation, prepare both components thoroughly. Start by emptying your bucket bag completely. Remove any existing pouches, dust bags, or tags. Wipe down the interior with a soft, dry cloth. For fabric linings, avoid moisture; for leather, use a manufacturer-approved cleaner sparingly.
Inspect the insert. Check that all pockets face the correct direction—typically outward so they’re accessible when the insert sits inside the bag. Test-fit it gently. Do not force it. If resistance occurs, recheck dimensions. A proper fit should require slight pressure but not strain.
If your insert has adjustable straps or snap-on handles, attach them now according to the manufacturer’s instructions. These features help secure the insert and align it with your bag’s handle placement.
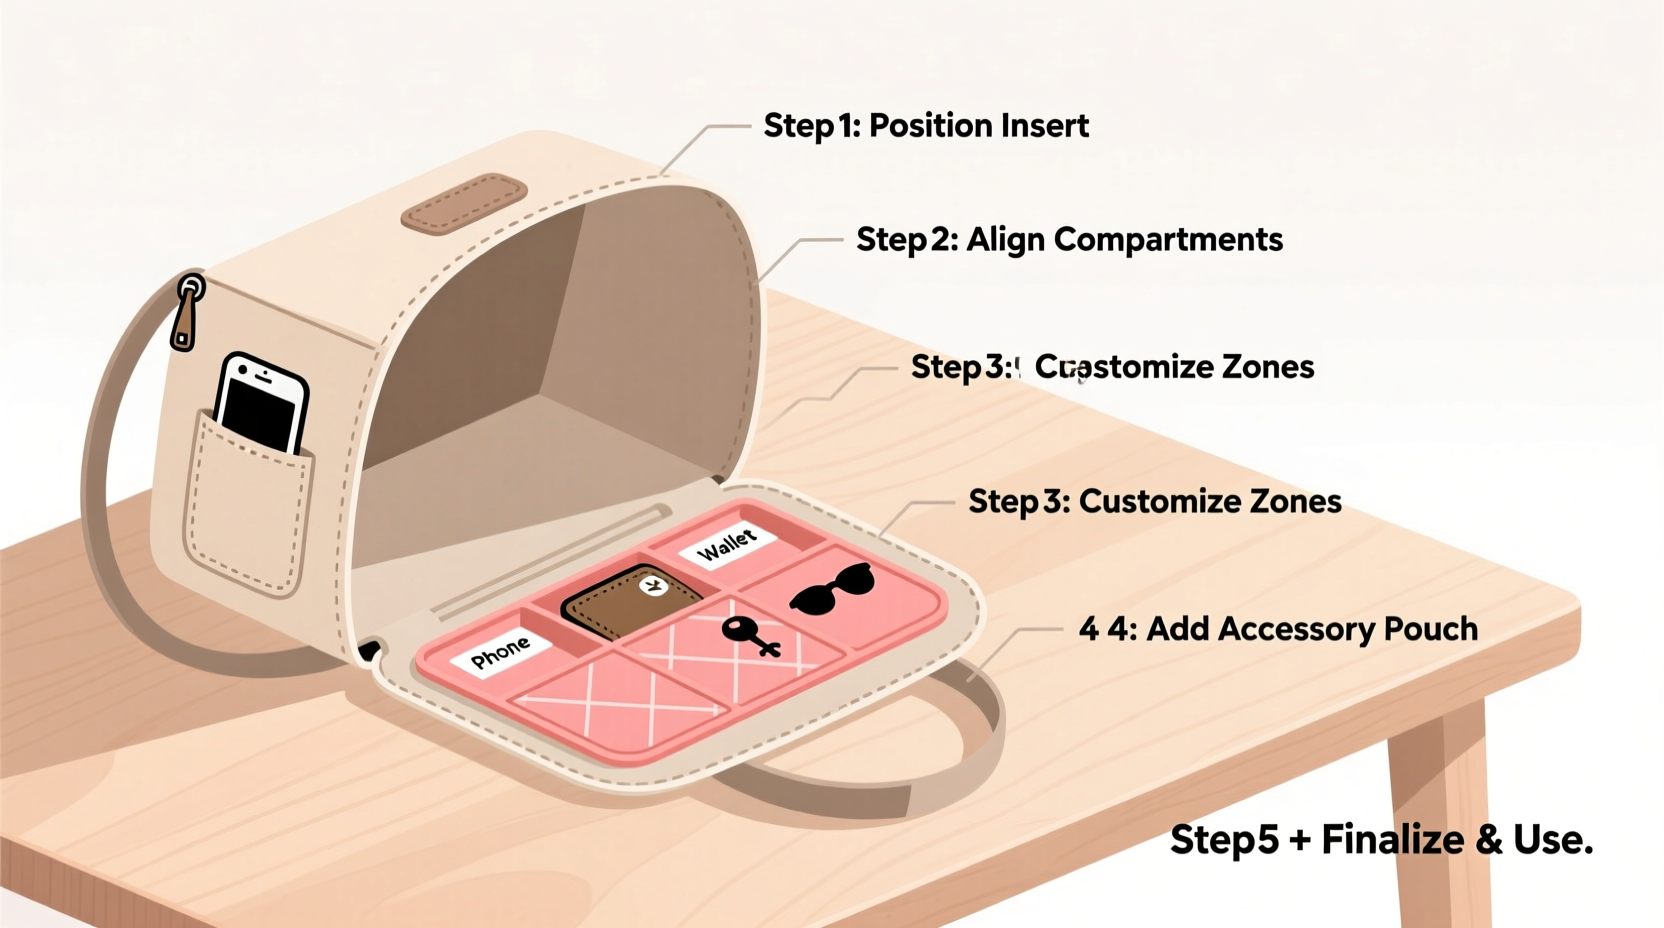
Installing the Organizer Insert: Step-by-Step
Correct installation ensures longevity and usability. Follow this sequence carefully:
- Center the base: Hold the insert vertically and lower it straight down into the center of the bag. Align the bottom evenly with the bag’s base to prevent tilting.
- Adjust width and rotation: Gently press the sides outward until the insert makes full contact with the inner walls. Rotate slightly if needed to match the bag’s natural curve or handle positioning.
- Secure optional fasteners: If your insert includes silicone grips, adhesive tabs, or elastic loops, engage them now. These prevent shifting during use.
- Check accessibility: Open each pocket. Ensure zippers glide smoothly and flaps don’t catch on the bag’s rim. Adjust angle if necessary.
- Load strategically: Begin placing items in designated zones—phone in the top slip pocket, wallet in the zip compartment, keys on the carabiner clip.
Once installed, test the bag in motion. Walk with it, set it down, and retrieve an item. Observe whether the insert remains stable and functional.
Real-Life Example: Sarah’s Commute Upgrade
Sarah, a marketing manager in Chicago, carried a medium-sized canvas bucket bag daily. She frequently misplaced her transit card and spent mornings fumbling for her earbuds. After installing a neoprene insert with labeled pockets, she assigned zones: left side for tech (cables, power bank), right for personal items (tissues, sunglasses), center zip for cards and cash. Within a week, her morning routine shortened by four minutes. “It’s not just about finding things faster,” she said. “It’s about starting the day feeling in control.”
Maximizing Efficiency After Installation
The true benefit of an organizer insert emerges through consistent use. To get the most out of it:
- Assign permanent homes for frequently used items—never let them float freely.
- Use slim cardholders instead of stuffing loose cards into pockets.
- Label pockets with small tags if sharing the bag or switching between roles (e.g., work vs. gym).
- Empty and reset the bag weekly to prevent accumulation.
Checklist: Installing Your Bucket Bag Organizer Insert
- ✅ Measure your bag’s interior diameter and height
- ✅ Choose an insert matching size and material needs
- ✅ Empty and clean the bag thoroughly
- ✅ Inspect insert for damage or misalignment
- ✅ Lower insert straight down, centering the base
- ✅ Adjust for full side contact and proper orientation
- ✅ Attach any stabilizing features (grips, loops)
- ✅ Test pocket access and overall stability
- ✅ Load items into designated zones
- ✅ Evaluate performance after a full day of use
Frequently Asked Questions
Can I use the same insert in multiple bags?
Only if the bags have identical interior dimensions and shapes. Most inserts are designed for a specific fit. Using one across different styles may lead to instability or damage. However, modular inserts with adjustable panels can adapt to various containers.
Will an insert damage my bag’s lining?
High-quality inserts made from smooth, non-abrasive materials (like felt or coated neoprene) protect linings rather than harm them. Avoid inserts with rough edges or exposed stitching. Always check for snagging during initial use.
How do I clean the insert?
Most fabric-based inserts can be spot-cleaned with a damp cloth and mild soap. Neoprene and vegan leather inserts tolerate gentle wipes. Never submerge unless specified by the manufacturer. Allow to air-dry completely before reuse.
Final Thoughts: Transform Function Without Sacrificing Form
An organizer insert isn’t just a storage hack—it’s a commitment to intentionality. By installing one correctly, you turn a stylish but chaotic bucket bag into a reliable extension of your routine. The process takes less than ten minutes, yet the impact lasts months, even years. Whether you're navigating a busy commute, managing errands, or traveling light, a well-organized bag reduces stress and enhances efficiency.


 浙公网安备
33010002000092号
浙公网安备
33010002000092号 浙B2-20120091-4
Comments
No comments yet. Why don't you start the discussion?