
Fascia boards are more than just a finishing touch on your home’s exterior—they play a crucial role in protecting the roofline and supporting gutters. When installed correctly, they enhance curb appeal, prevent water damage, and extend the life of your roofing system. Many homeowners attempt this job themselves but fall short due to overlooked details or improper techniques. This guide walks you through every stage of fascia board installation with precision, offering professional insights and practical tips to achieve a seamless, durable result.
Understanding Fascia: Purpose and Materials
The fascia is the vertical band that runs along the edge of the roof, connecting the ends of the rafters or trusses. It provides a clean edge for the roofline and serves as the mounting surface for gutters. Without proper fascia, rainwater can seep into the roof structure, leading to rot, pest infestations, and costly repairs.
Common materials used for fascia boards include:
- PVC: Resistant to moisture and rot; low maintenance but can expand/contract with temperature shifts.
- Wood (cedar, redwood, pine): Classic look and easy to work with, but requires sealing and regular upkeep.
- Composite: Combines durability with aesthetics; resists warping and insects.
- Aluminum: Lightweight and rust-resistant; often pre-painted and ideal for gutter integration.
“Fascia isn’t just cosmetic—it’s a first line of defense against weather intrusion.” — Mark Reynolds, Licensed Roofing Contractor
Preparation: Tools, Safety, and Inspection
Before installing new fascia, assess the existing condition. Remove any damaged sections and inspect for signs of rot, insect damage, or loose rafters. Address structural issues before proceeding—no amount of skillful installation will compensate for compromised support.
You’ll need the following tools and materials:
- Tape measure and level
- Circular saw or miter saw
- Power drill and screw gun
- Galvanized or stainless steel screws (corrosion-resistant)
- Chalk line and pencil
- Ladder and fall protection (if working at height)
- Safety goggles, gloves, and dust mask
- Backer rod and exterior-grade caulk (for sealing joints)
Checklist: Pre-Installation Steps
- Inspect all rafter tails for damage or decay.
- Remove old fascia boards carefully to avoid damaging soffits or shingles.
- Measure total linear footage needed and account for overlaps or corners.
- Cut pilot pieces to test fit and alignment.
- Ensure gutter brackets or hangers are removed and saved for reinstallation.
- Confirm all new boards are acclimated to outdoor conditions (especially wood and PVC).
Step-by-Step Installation Process
A flawless fascia installation hinges on accuracy, alignment, and attention to detail. Follow these steps to ensure a professional outcome.
Step 1: Measure and Cut Boards to Length
Start by measuring each section of the roofline. Use a chalk line to mark straight reference lines across rafter tails. Cut boards using a miter saw for clean 90° or 45° angles at corners. For longer runs, plan for overlapping joints over a rafter for added strength.
Step 2: Position and Temporarily Secure First Board
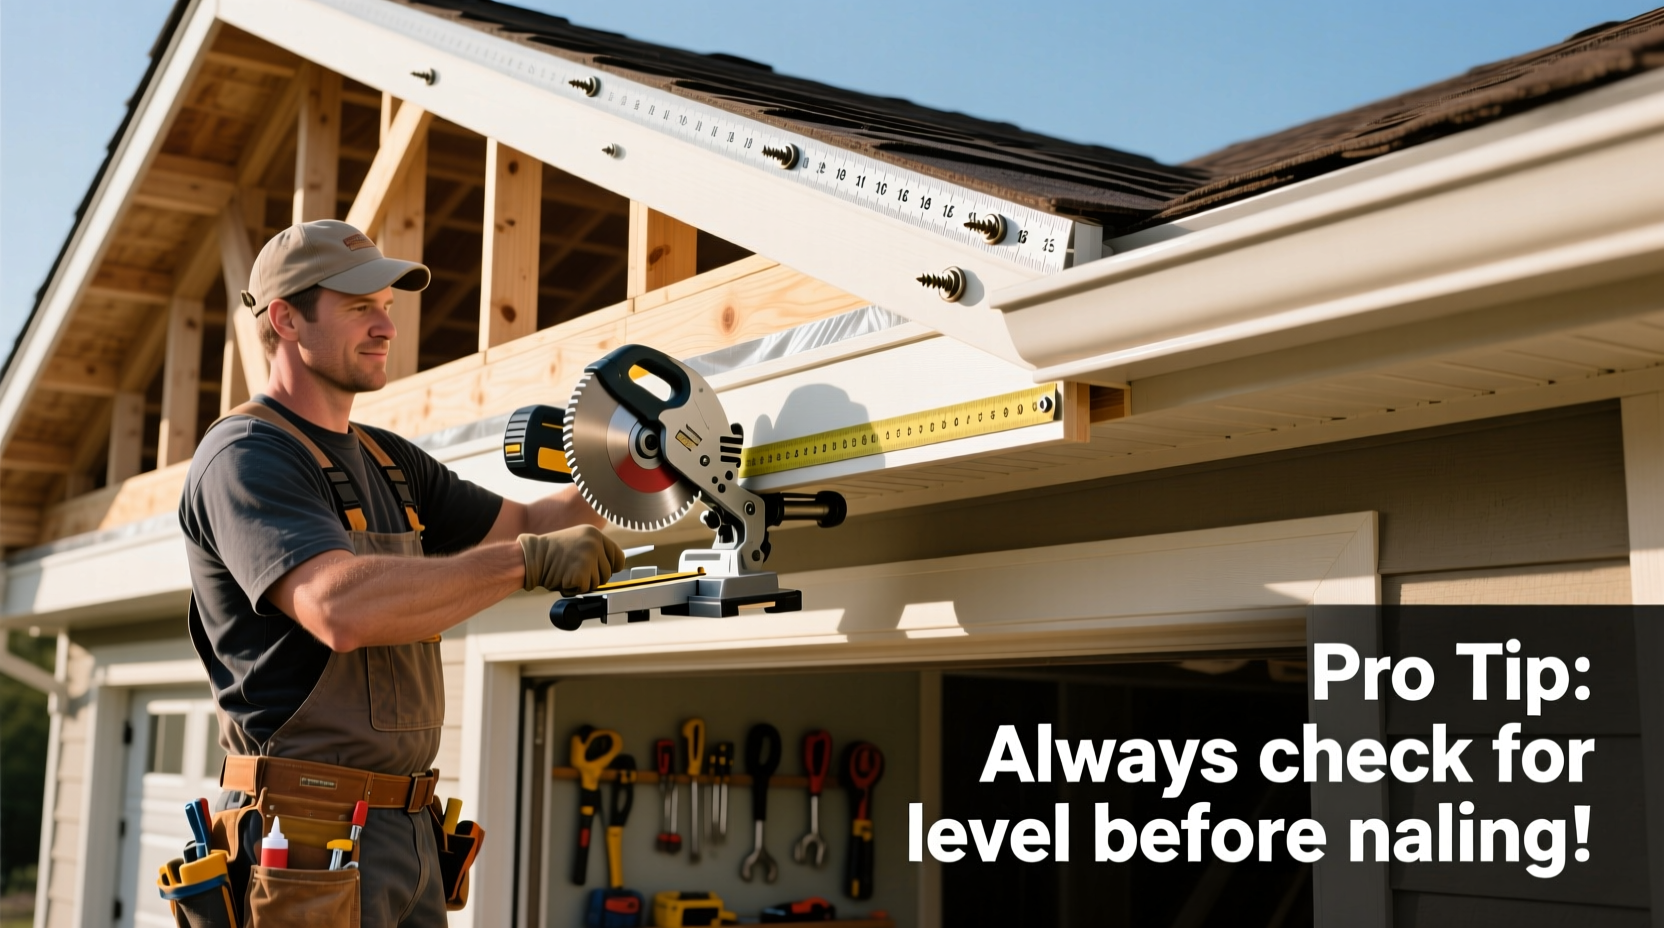
Align the first board flush with the outer edge of the rafter tail and the top edge even with the roof sheathing. Use temporary nails or clamps to hold it in place while checking for level. Even a slight sag will be visible from the ground.
Step 3: Fasten Boards Properly
Drive corrosion-resistant screws through the face of the fascia into each rafter tail. Space fasteners every 16 inches, placing two screws per rafter to prevent warping. Avoid hammering nails directly—they can split wood or crack PVC.
Step 4: Handle Inside and Outside Corners
For outside corners, use a 45° miter joint and secure with corner braces or metal fascia connectors. Inside corners should overlap—one board butts into the other—for better water runoff. Seal all joints with exterior silicone caulk after installation.
Step 5: Install Drip Edge and Prepare for Gutters
Attach a metal drip edge above the fascia to direct water away from the board and into the gutter. Ensure the drip edge extends slightly over the fascia top. This small detail prevents water from backing up under shingles and rotting the board from behind.
Step 6: Caulk and Finish
Apply a continuous bead of paintable acrylic or polyurethane caulk along all seams, screw heads, and joints. Smooth with a damp finger for a clean finish. If painting, prime first and apply two coats for maximum protection.
Do’s and Don’ts: Common Pitfalls to Avoid
| Do’s | Don’ts |
|---|---|
| Use backer rod in wide gaps before caulking | Leave gaps between boards unsealed |
| Fasten into rafter centers, not edges | Nail or screw too close to board edges |
| Allow expansion space for PVC (1/8” gap) | Butt rigid materials tightly together |
| Prime and paint wood before installation | Install untreated lumber exposed to weather |
| Double-check level across long spans | Rely solely on eye-balling alignment |
Real-World Example: A Midwest Home Renovation
A homeowner in Indianapolis replaced rotted pine fascia on a 1950s ranch-style house. The original boards had been painted over multiple times, trapping moisture and accelerating decay. They chose cellular PVC for its longevity and minimal maintenance. By measuring each section individually and using a laser level, they ensured perfect alignment. Corner joints were mitered and reinforced with hidden brackets. After installation, they applied a high-adhesion primer and two coats of exterior paint. Two years later, the fascia remains crack-free, even through harsh winters and heavy rainfall.
This case highlights the importance of material selection and precise execution—even on older homes where framing may not be perfectly uniform.
Frequently Asked Questions
Can I install new fascia over old boards?
No. Installing over damaged or deteriorated fascia compromises structural integrity and creates an uneven surface. Always remove old boards completely and inspect underlying rafters before proceeding.
How far should the fascia extend past the wall?
The fascia should align vertically with the end of the rafter tails. Typically, this projects 1 to 2 inches beyond the exterior wall, depending on roof design. Consistency across all sides is key for visual balance.
Should I hire a professional or DIY?
If you’re comfortable working at heights, have basic carpentry skills, and own the necessary tools, DIY is feasible. However, if your roof has complex angles, significant rot, or you’re using heavy materials like solid wood, hiring a licensed contractor ensures safety and code compliance.
Final Tips for a Pro-Quality Finish
Attention to detail separates amateur work from professional results. After securing all boards, walk around the house at ground level to check for shadows or misalignments. Touch up caulk lines and repaint any scratched areas. Reinstall gutters only after the fascia is fully sealed and cured.
Consider adding integrated lighting or accent trim for enhanced architectural interest—many modern designs incorporate LED strips behind fascia for a soft glow at night.
“Take your time on layout and fastening. A well-installed fascia can last 20+ years with little maintenance.” — Diane Patel, Exterior Remodeling Specialist
Conclusion
Installing fascia boards is a rewarding project that improves both function and appearance. With careful planning, quality materials, and disciplined technique, you can achieve a finish that looks like it was done by a seasoned pro. Whether you're repairing a section or replacing the entire perimeter, follow these steps to build a durable, weathertight edge that protects your home for years to come.


 浙公网安备
33010002000092号
浙公网安备
33010002000092号 浙B2-20120091-4
Comments
No comments yet. Why don't you start the discussion?