
Installing fishing line on a spinning reel may seem straightforward, but doing it incorrectly can lead to poor casting performance, line twist, backlashes, or even premature wear. A properly spooled reel ensures consistent casts, better sensitivity, and longer line life. Whether you're replacing old line or setting up a new rod and reel combo, taking the time to spool your reel correctly makes a tangible difference on the water.
This guide walks through every stage of the process with precision, offering practical insights from seasoned anglers and tackle technicians. Follow these steps to achieve a smooth, evenly layered spool that enhances your fishing experience.
Why Proper Line Spooling Matters
The way line is applied to a spinning reel affects how it leaves the spool during a cast. If the line is twisted, loosely wound, or unevenly layered, it can cause wind knots, reduce casting distance, and increase the likelihood of tangles. Overfilling or underfilling the spool also impacts performance—too much line risks rubbing against the rod guides; too little reduces capacity and alters the line’s release angle.
Moreover, different line types—monofilament, fluorocarbon, and braided—require slightly different handling techniques due to their elasticity, memory, and diameter. Understanding these nuances ensures you get the best results from your gear.
“Spooling a spinning reel isn’t just about filling it with line—it’s about creating a foundation for reliable performance.” — Mark Reynolds, Professional Tackle Technician, Bass Pro Shops
What You’ll Need Before You Begin
Gather the following items before starting:
- Fishing rod and spinning reel
- New fishing line (appropriate type and weight for your target species)
- Scissors or line cutters
- Pliers or hemostats (optional, for tightening knots)
- A second person or line spooler tool (highly recommended)
- Pen or pencil (to create a drag on the line spool)
Step-by-Step Guide to Spooling a Spinning Reel
- Remove Old Line Completely
Open the bail and manually retrieve any remaining line. Use scissors to cut and remove old line in sections. Wipe down the spool with a dry cloth to remove dust and residue. - Attach the New Line to the Spool
Thread about 6 inches of line through the hole in the center of the spool. Pull it through so about 3–4 inches remain inside. Hold the loose end against the spool with your finger or tie a simple overhand knot around the spool arbor. Some reels have rubber O-rings designed to grip the knot—use them if available. - Create Light Tension on the Line Spool
Place the line spool on a flat surface or insert a pen through its center so it spins freely. Have a helper apply gentle, consistent pressure with their fingers, or use a piece of cloth to create friction. This mimics a line spooling tool and prevents line twist during winding. - Close the Bail and Begin Winding
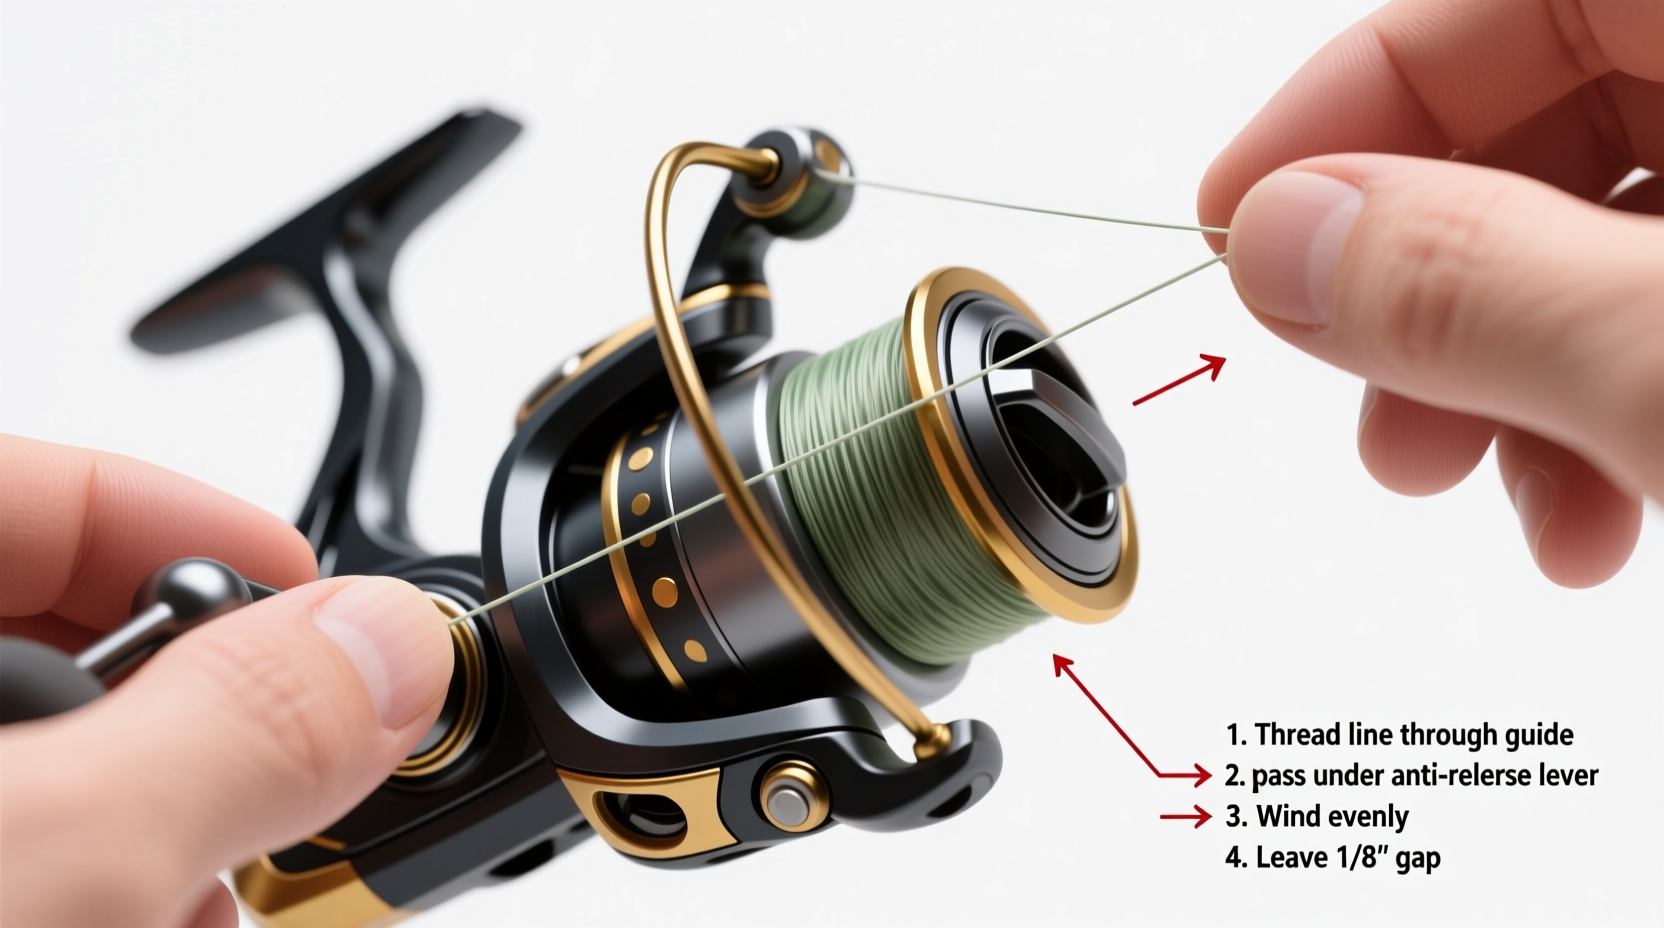
Flip the bail arm closed. Turn the handle slowly and steadily while guiding the line with your index finger. Keep light, consistent tension on the line as it winds onto the spool. Move your finger gently from side to side to distribute the line evenly in layers. - Maintain Even Distribution
Avoid stacking all the line on one side. A pyramid-shaped buildup indicates improper winding. The goal is a smooth, level fill, leaving about 1/8 to 1/4 inch of space between the line and the lip of the spool. This gap prevents line from jumping off during casting. - Cut and Secure the Line
Once the spool is filled to the proper level, cut the line with scissors. Leave about 6 inches extending from the spool. You’ll use this later to tie your leader or lure.
Line Type Considerations
Different lines behave differently when spooled. Here's how to adjust your technique based on material:
| Line Type | Key Characteristics | Spooling Tips |
|---|---|---|
| Monofilament | Elastic, prone to memory and twist | Soak in warm water for 5–10 minutes before spooling to relax coils. Apply steady tension while winding. |
| Fluorocarbon | Stiff, low stretch, sinks faster | Use gloves if needed—it can be abrasive. Wind slowly to avoid cracking or kinking. |
| Braided Line | Thin, strong, no stretch, slippery | Tie a monofilament backing or use tape on the spool first to prevent slippage. Wind tightly and evenly. |
Common Mistakes and How to Avoid Them
- Skipping tension control – Letting the line spool spin freely introduces twist, leading to loops and tangles.
- Overfilling the spool – Excess line flares over the edge and rubs against the rod, degrading performance.
- Winding too fast – Rapid cranking creates heat and uneven layers, especially with braid.
- Ignoring line memory – Not soaking mono or not managing fluorocarbon stiffness leads to coiling upon casting.
“Most casting issues beginners face stem from poor spooling—not bad technique.” — Captain Linda Tran, Freshwater Guide and Educator
Real-World Example: Fixing a Problematic Setup
Tom, an avid panfish angler, struggled with constant wind knots when using 6lb fluorocarbon on his ultralight spinning reel. He assumed the line was faulty. After consulting a local pro shop, he learned he had been spooling the line without tension and skipping the pre-soak step. Following the correct procedure—using a pen to apply drag and winding slowly with even hand guidance—his casting improved dramatically. Within a weekend, he reduced tangles by over 80% and landed more crappie than ever before.
Quick Checklist for Perfect Spooling
- Removed all old line and cleaned the spool
- Chose appropriate line type and weight
- Secured the line to the spool with a knot or tape
- Applied consistent tension during winding
- Evenly distributed line across the spool
- Left 1/8–1/4 inch gap from spool edge
- Trimmed excess and prepared for leader attachment
Frequently Asked Questions
How much line should I put on my spinning reel?
Follow the line capacity markings on the spool. As a rule of thumb, fill to within 1/8 to 1/4 inch of the outer rim. Overfilling causes line to jump off during casts; underfilling reduces casting efficiency.
Do I need backing when spooling with braid?
You don’t necessarily need backing, but because braid is slippery, it’s wise to either use a monofilament filler (10–15 yards of 10–15lb mono) or apply a couple of strips of electrician’s tape to the spool first. This prevents slippage under load.
Can I reuse old fishing line?
It’s not recommended. Monofilament loses elasticity and develops micro-cracks after prolonged UV exposure and use. Fluorocarbon becomes brittle. Braid frays and weakens at abrasion points. Replace line at least once per season, or more often if heavily used.
Final Thoughts and Next Steps
Properly installing fishing line on a spinning reel is a foundational skill that pays dividends every time you cast. It takes only 15–20 minutes, yet directly influences accuracy, distance, and reliability. By respecting the mechanics of line lay and applying consistent technique, you eliminate preventable frustrations and focus on what matters—catching fish.
Now that your reel is perfectly spooled, test it with a few practice casts in an open area. Inspect the line flow and make minor adjustments if needed. When you’re confident, head to the water with greater assurance that your gear is ready to perform.


 浙公网安备
33010002000092号
浙公网安备
33010002000092号 浙B2-20120091-4
Comments
No comments yet. Why don't you start the discussion?