
Home security is no longer limited to traditional alarm systems and locks. Wireless cameras have revolutionized how homeowners monitor their property, offering real-time surveillance, remote access, and easy installation. Unlike wired systems that require drilling and complex cabling, wireless cameras connect via Wi-Fi and can be installed in under an hour. However, a successful setup depends on more than just plugging in a device. Proper placement, network optimization, and ongoing maintenance are essential for reliable performance.
This comprehensive guide walks you through every stage of installing wireless cameras for maximum effectiveness. From selecting the right models to troubleshooting common issues, you’ll gain practical knowledge to create a secure, efficient, and scalable system tailored to your home.
Choosing the Right Wireless Camera System
The first step in building a reliable home security setup is selecting the right cameras. Not all wireless cameras are created equal—differences in resolution, field of view, night vision, weather resistance, and smart features can significantly impact performance.
Consider the following factors when making your selection:
- Indoor vs. Outdoor Use: Outdoor cameras must be weatherproof (look for IP65 or higher rating) and equipped with infrared or color night vision.
- Resolution: Opt for at least 1080p HD video. For critical areas like driveways or entrances, consider 2K or 4K models.
- Field of View: A wider angle (110°–130°) reduces blind spots but may sacrifice detail at distance.
- Power Source: Battery-powered cameras offer flexibility but require recharging. Hardwired models provide continuous power but limit placement options.
- Smart Integration: Cameras compatible with Alexa, Google Assistant, or Apple HomeKit allow voice commands and automation.
Strategic Placement for Maximum Coverage
Even the best camera will fail if placed incorrectly. The goal is to eliminate blind spots while minimizing false alerts from trees, pets, or passing vehicles.
Key entry points should always be covered: front and back doors, garage entrances, ground-floor windows, and side gates. Position cameras at a height of 8–10 feet to deter tampering while maintaining facial recognition capability.
Aim the lens slightly downward to reduce glare and improve image clarity. Avoid pointing directly at bright light sources or reflective surfaces.
“Camera placement is 70% of effective surveillance. A poorly positioned high-end camera is less useful than a mid-range model in the optimal spot.” — Mark Tran, Home Security Systems Engineer
Recommended Camera Locations
| Area | Purpose | Camera Type | Tips |
|---|---|---|---|
| Front Door | Capture deliveries, visitors, suspicious activity | Doorbell cam or outdoor bullet | Add motion zones to ignore sidewalk traffic |
| Backyard | Monitor pets, children, intruders | Weatherproof pan-tilt | Use privacy masking for neighbor’s property |
| Garage Entry | Prevent break-ins, monitor vehicle access | Wide-angle indoor/outdoor | Ensure clear view of handles and locks |
| Driveway | Track visitor arrival, license plates | Long-range with zoom | Mount on eaves or pole for unobstructed view |
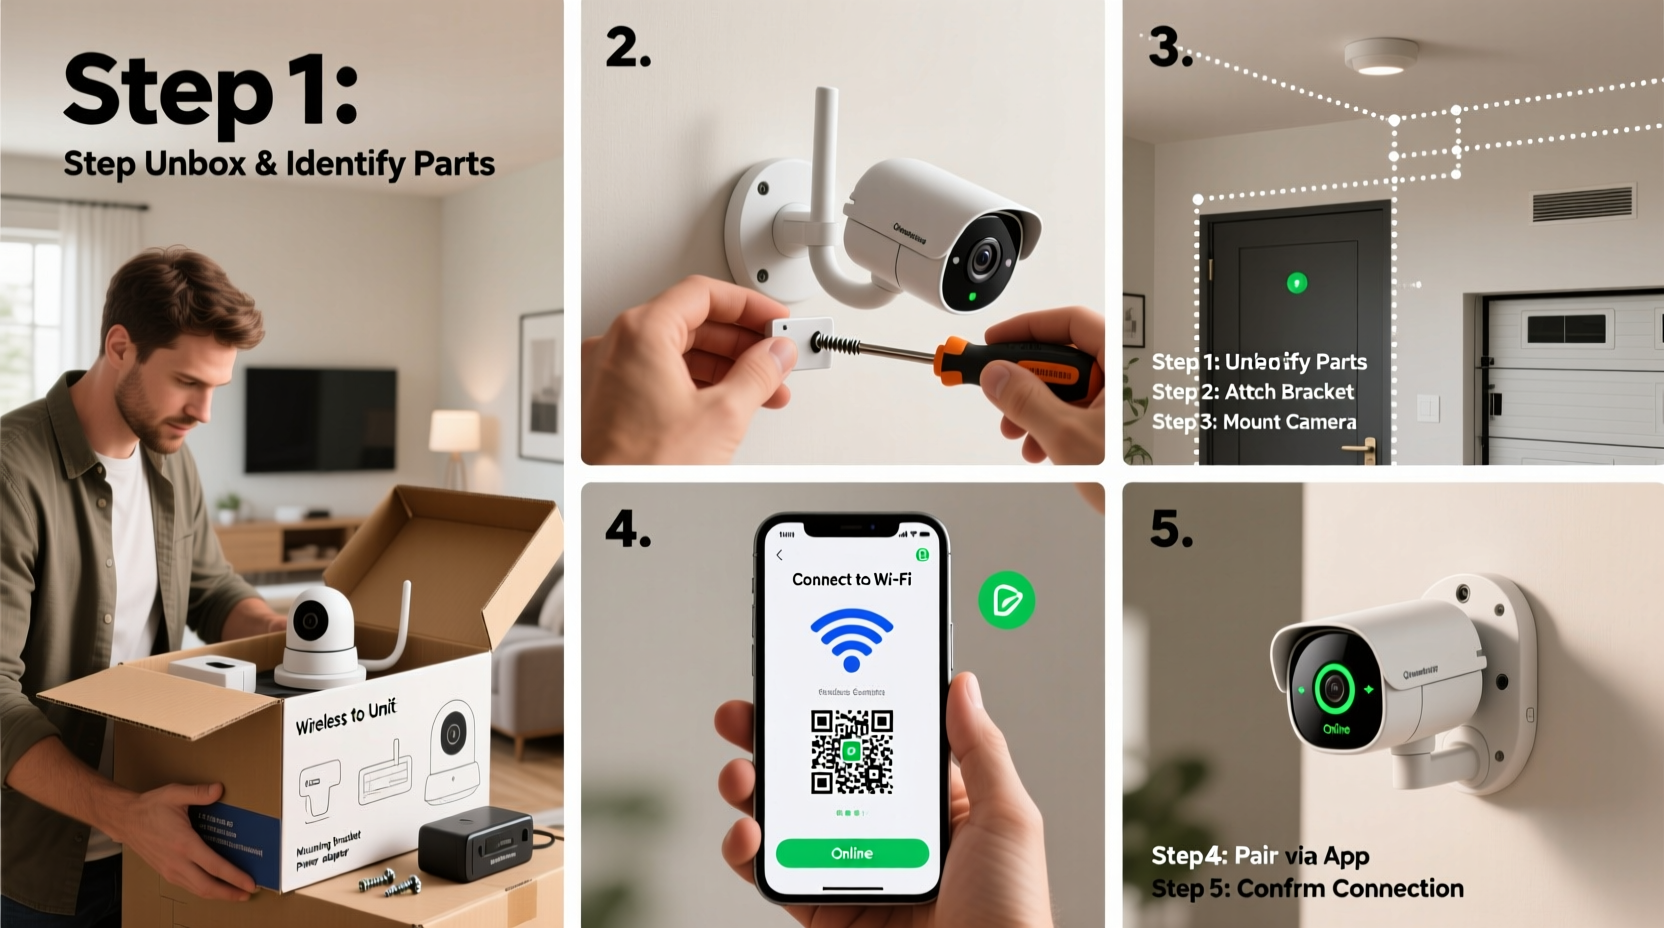
Step-by-Step Installation Process
Once you’ve selected your cameras and identified optimal locations, follow this proven sequence for a smooth setup.
- Unbox and Inspect: Check all components—camera, mounting hardware, power adapter or battery, and user manual.
- Download the App: Install the manufacturer’s mobile app (e.g., Ring, Arlo, Eufy) and create an account.
- Charge or Connect Power: Fully charge battery units; plug in wired models.
- Power On the Camera: Press the sync or reset button as instructed.
- Connect to Wi-Fi: In the app, select “Add Device,” then follow prompts to link the camera to your 2.4 GHz network (most wireless cameras don’t support 5 GHz).
- Mount the Camera: Use included screws and anchors to secure the bracket. Attach the camera and adjust the viewing angle.
- Test the Feed: Verify live video quality, motion detection, and two-way audio.
- Customize Settings: Set motion zones, enable person detection, schedule recording, and enable notifications.
Real-World Example: Securing a Two-Story Suburban Home
Sarah, a homeowner in Austin, Texas, wanted to monitor her home while traveling frequently for work. Her house had multiple access points and a large backyard frequented by stray animals, which often triggered false alarms.
She installed four cameras: a video doorbell at the front entrance, a pan-tilt camera overlooking the backyard, a fixed camera covering the side gate, and an indoor unit for the living room. After initial setup, she adjusted motion sensitivity and defined specific detection zones to exclude tree branches and her dog’s play area.
Within two weeks, the system captured footage of a package thief. Thanks to clear facial recognition and timestamped video, local police made an arrest. Sarah credits her success to careful planning and fine-tuning settings post-installation.
Common Pitfalls and How to Avoid Them
Even experienced users encounter challenges. Here are frequent issues and solutions:
- Weak Wi-Fi Signal: Cameras far from the router may disconnect. Use Wi-Fi extenders or mesh networks to boost coverage.
- Battery Drain: Frequent motion events shorten battery life. Adjust sensitivity or switch to solar-powered models.
- Night Vision Glare: Reflective surfaces can cause overexposure. Reposition the camera or disable spotlight auto-mode.
- Cloud Storage Costs: Many brands charge monthly fees. Consider hybrid models that support microSD cards for local storage.
“Most camera failures stem from poor network conditions, not faulty hardware. Always test signal strength before finalizing placement.” — Lena Park, IoT Network Consultant
Essential Setup Checklist
Before going live, verify the following actions are complete:
- ✅ Selected appropriate camera types for each zone
- ✅ Confirmed stable 2.4 GHz Wi-Fi access at all installation points
- ✅ Downloaded and logged into the manufacturer’s app
- ✅ Mounted cameras at optimal height and angle
- ✅ Connected each camera to Wi-Fi and verified live feed
- ✅ Configured motion zones and alert preferences
- ✅ Enabled encryption and updated firmware
- ✅ Tested two-way audio and night vision modes
Frequently Asked Questions
Can wireless cameras work without internet?
Some models support local recording to microSD cards without internet, but remote viewing, alerts, and cloud backup require a connection. For off-grid setups, choose cameras with edge storage and optional LTE backup.
How many cameras do I need for a typical home?
Most single-family homes benefit from 3–5 cameras: front door, back door, garage, driveway, and one interior room. Adjust based on layout and risk factors.
Are wireless cameras vulnerable to hacking?
All connected devices carry some risk. Minimize exposure by using strong passwords, enabling two-factor authentication, disabling remote access when unnecessary, and keeping firmware updated.
Final Steps and Ongoing Maintenance
Installation is just the beginning. To maintain peak performance, perform routine checks every few months: clean lenses with a microfiber cloth, inspect mounts for looseness, verify battery levels, and review recorded footage for gaps.
Update firmware regularly to patch security vulnerabilities and unlock new features. If you expand your system later, ensure new cameras are compatible with your existing hub or app ecosystem.
Conclusion: Secure Your Home with Confidence
Installing wireless cameras doesn’t require technical expertise—just careful planning and attention to detail. By choosing the right equipment, placing it strategically, and configuring settings wisely, you create a robust layer of protection that deters crime and gives you peace of mind.
Your home deserves reliable surveillance that works seamlessly in the background. Take the first step today: assess your property, pick your starting camera, and begin building a smarter, safer living environment.


 浙公网安备
33010002000092号
浙公网安备
33010002000092号 浙B2-20120091-4
Comments
No comments yet. Why don't you start the discussion?