
The iPhone 14 Pro Max is a precision-engineered device, designed for performance, durability, and elegance. However, even the most advanced smartphone benefits from protection. A high-quality case safeguards against drops, scratches, dust, and daily wear. But simply owning a case isn’t enough—installing it correctly ensures full functionality, seamless access to ports and buttons, and long-term reliability. Done improperly, you risk damaging the phone’s finish, misaligning components, or compromising drop protection. This comprehensive guide walks you through every stage of installing your iPhone 14 Pro Max case with care, precision, and confidence.
Why Proper Case Installation Matters
A well-installed case does more than just fit snugly—it preserves the integrity of your device while enhancing usability. The iPhone 14 Pro Max features precise camera alignment, flush speaker grilles, and tightly calibrated button mechanisms. When a case is forced or misaligned during installation, it can obstruct these elements, cause pressure marks on the screen, or create gaps that reduce shock absorption in a fall.
Additionally, improper installation may void manufacturer warranties or damage delicate finishes like Ceramic Shield or matte glass backs. Whether you're using a silicone sleeve, rugged hybrid shell, or minimalist transparent cover, taking the time to install it correctly extends both the life of your phone and the case itself.
Step-by-Step Guide to Installing Your iPhone 14 Pro Max Case
- Power Off Your Device (Optional but Recommended)
While not strictly necessary, turning off your iPhone eliminates the risk of accidental input during installation. It also allows you to inspect ports and sensors without interference. - Clean the iPhone Thoroughly
Use a lint-free cloth slightly dampened with water to wipe down the entire phone. Pay special attention to edges, corners, and the camera module. Dry completely before proceeding. Any debris trapped under the case can lead to scratches over time. - Inspect the Case for Defects
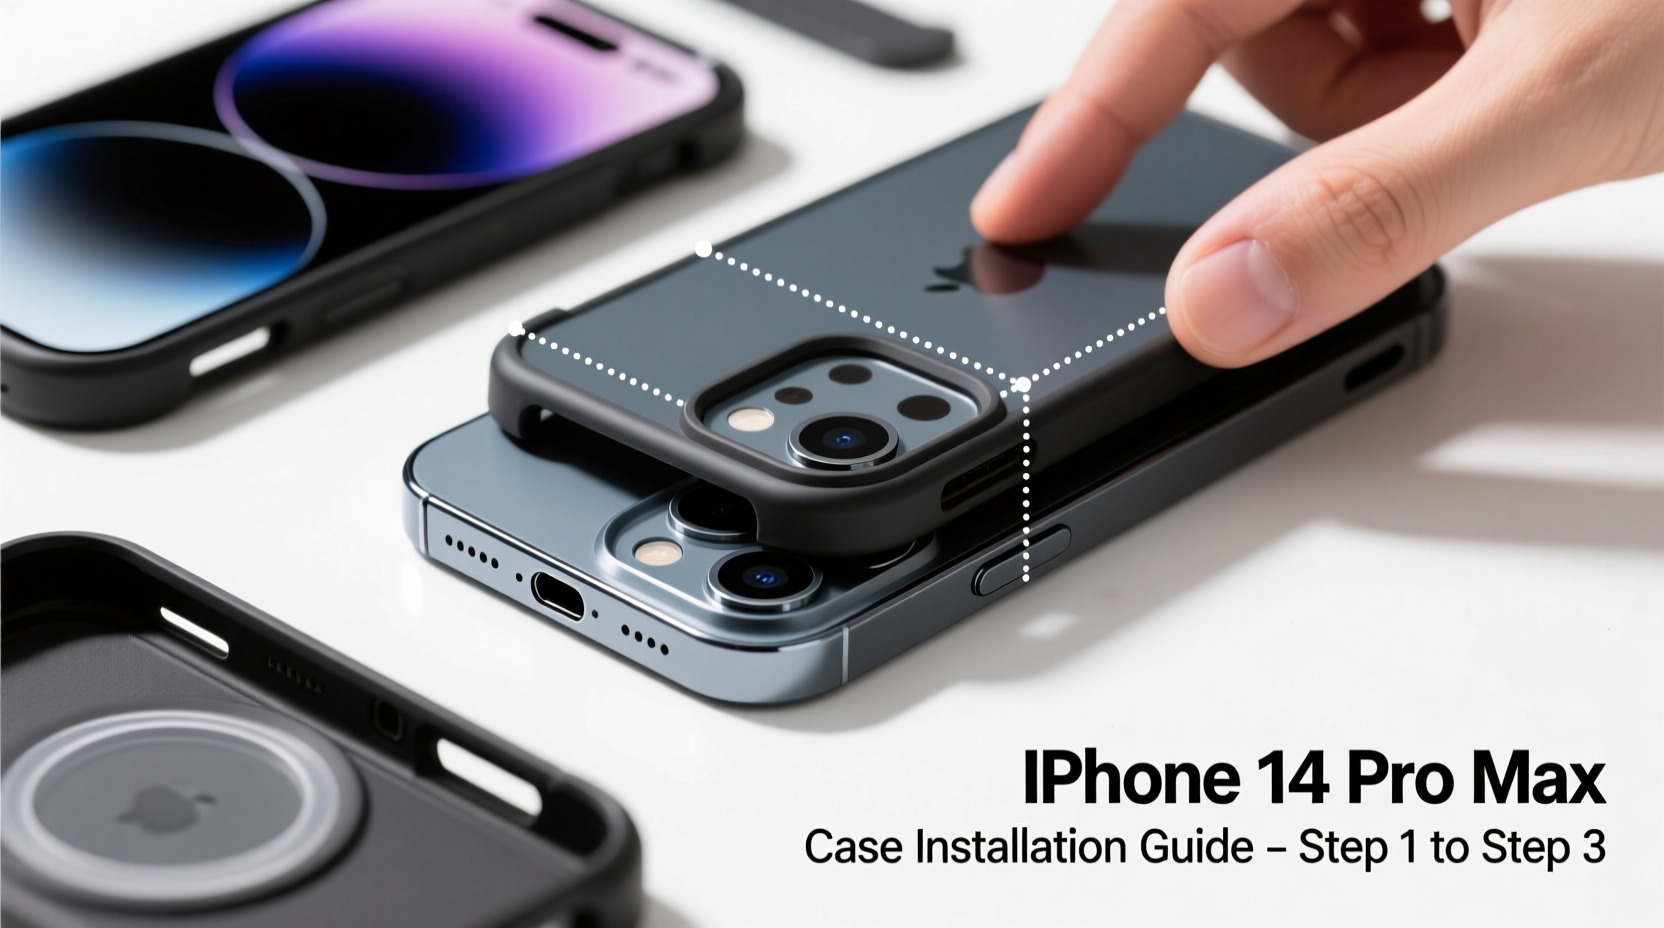
Hold the case up to light and check for warping, sharp edges, or manufacturing flaws. Ensure all cutouts—especially around the Dynamic Island, rear camera array, speaker, and charging port—are clean and unobstructed. - Align the Bottom First
Place the bottom edge of the case (where the Lightning port is located) over the corresponding area on the iPhone. Gently press until it clicks into place. Most cases are designed to snap on from the bottom up, reducing strain on the top housing near the camera. - Press Along the Sides Evenly
Starting from one side, use your thumbs to gently press the case onto the phone’s frame. Move slowly toward the other end, applying even pressure. Avoid using fingernails or tools, which could crack the case or scratch the phone. - Secure the Top Edge Carefully
Once the sides and bottom are seated, focus on the top. The area around the rear camera bump requires extra attention. Press down gently but firmly, ensuring the lens ring fits snugly within the case’s opening without pinching. - Test All Functions
Turn the phone back on and verify that:- Volume and power buttons respond normally
- Charging cable connects without obstruction
- Rear and front cameras operate without lens flare or blockage
- Speaker and microphone deliver clear audio
- Final Fit Check
Run your fingers along the seam between the phone and case. There should be no gaps, bulges, or uneven pressure points. If any exist, remove the case and repeat the process—forcing it further risks damage.
Do’s and Don’ts of iPhone Case Installation
| Do’s | Don’ts |
|---|---|
| Wash hands before handling to avoid transferring oils | Use excessive force when snapping the case on |
| Align the camera module precisely before securing the top | Install the case on a dirty or dusty surface |
| Choose a case specifically designed for iPhone 14 Pro Max | Use third-party cases not certified by Apple or reputable brands |
| Check compatibility with MagSafe accessories if applicable | Leave plastic film on the case or phone during installation |
Expert Insight: Precision Over Pressure
“Many users think ‘if it snaps, it fits.’ But forcing a case onto an iPhone can compromise structural integrity. The goal is alignment, not brute strength.” — Daniel Reeves, Senior Mobile Technician at iFix Solutions
This insight underscores a common misconception: that resistance means progress. In reality, if a case doesn’t slide smoothly into place with moderate pressure, something is misaligned. Re-evaluate positioning rather than pushing harder.
Tips for Long-Term Case Performance
Once installed, ongoing care ensures lasting protection and aesthetics. Consider the following maintenance habits:
- Remove and Clean Monthly: Take the case off every few weeks to clean both the phone and interior lining. Dust buildup reduces grip and increases abrasion.
- Avoid Extreme Temperatures: Heat can warp plastic, while cold makes materials brittle. Never leave your phone in direct sunlight or freezing conditions while cased.
- Rotate Cases Seasonally: Using multiple cases prevents permanent indentation and gives each one time to recover shape memory, especially silicone models.
- Check for Yellowing (Clear Cases): Transparent polycarbonate cases may discolor over time due to UV exposure or skin oils. Wipe with mild soap and store away from sunlight when not in use.
Real-World Example: Sarah’s Near-Miss Installation
Sarah purchased a premium leather case for her new iPhone 14 Pro Max. Excited to protect her investment, she opened the box and immediately tried to snap it on. She started at the top near the camera, pressing hard to get the first corner to catch. After several attempts, she noticed a faint scuff on the titanium band. Alarmed, she paused, cleaned both surfaces, and began again—this time starting at the bottom. The case slid on smoothly with minimal effort. By adjusting her approach, she avoided further cosmetic damage and ensured perfect alignment.
This scenario illustrates how impatience can lead to avoidable harm—even with high-end accessories.
Frequently Asked Questions
Can I install my iPhone 14 Pro Max case without removing the screen protector?
Yes. Most modern screen protectors do not interfere with case installation. However, ultra-thick or poorly aligned protectors might cause the case to sit unevenly. If you notice lifting at the front edge, consider reapplying or replacing the screen protector.
My case feels too tight. Is that normal?
Some snugness is expected, especially with new TPU or hybrid cases. After a few days of regular use, many cases loosen slightly due to material flexibility. If the phone becomes difficult to remove or shows signs of stress (e.g., creaking), contact the manufacturer—this may indicate poor tolerances.
Should I keep the original packaging after installation?
Yes. Retaining the box and receipt helps with returns, warranty claims, or future reference if you buy additional accessories. Plus, it confirms you have the correct model-specific case.
Final Checklist Before You Finish
📋 Installation Completion Checklist:- ✅ Phone powered off during installation (recommended)
- ✅ Device and case cleaned prior to fitting
- ✅ Bottom edge aligned and secured first
- ✅ Camera module fully visible and unobstructed
- ✅ Buttons responsive and accessible
- ✅ No gaps or warping along the edges
- ✅ Charging and audio functions tested
- ✅ Hands and workspace clean throughout process
Conclusion: Protect with Confidence
Installing your iPhone 14 Pro Max case properly isn’t just about snapping on a cover—it’s about preserving one of your most valuable digital tools. With the right technique, attention to detail, and respect for design precision, you ensure optimal protection, maintain resale value, and enjoy uninterrupted functionality. Whether you’re upgrading from an older model or replacing a worn-out case, take the time to do it right. Your iPhone deserves nothing less.


 浙公网安备
33010002000092号
浙公网安备
33010002000092号 浙B2-20120091-4
Comments
No comments yet. Why don't you start the discussion?