
Creating handmade paper at home is a rewarding, sustainable craft that transforms everyday waste into something beautiful and functional. Whether you're crafting personalized stationery, gift tags, or art projects, homemade paper offers a unique texture and character no store-bought sheet can match. With minimal tools and recycled materials, anyone can master this process. This guide walks you through every stage—from preparing pulp to pressing and drying—with expert-tested methods that ensure success even for first-time papermakers.
Gathering Your Materials
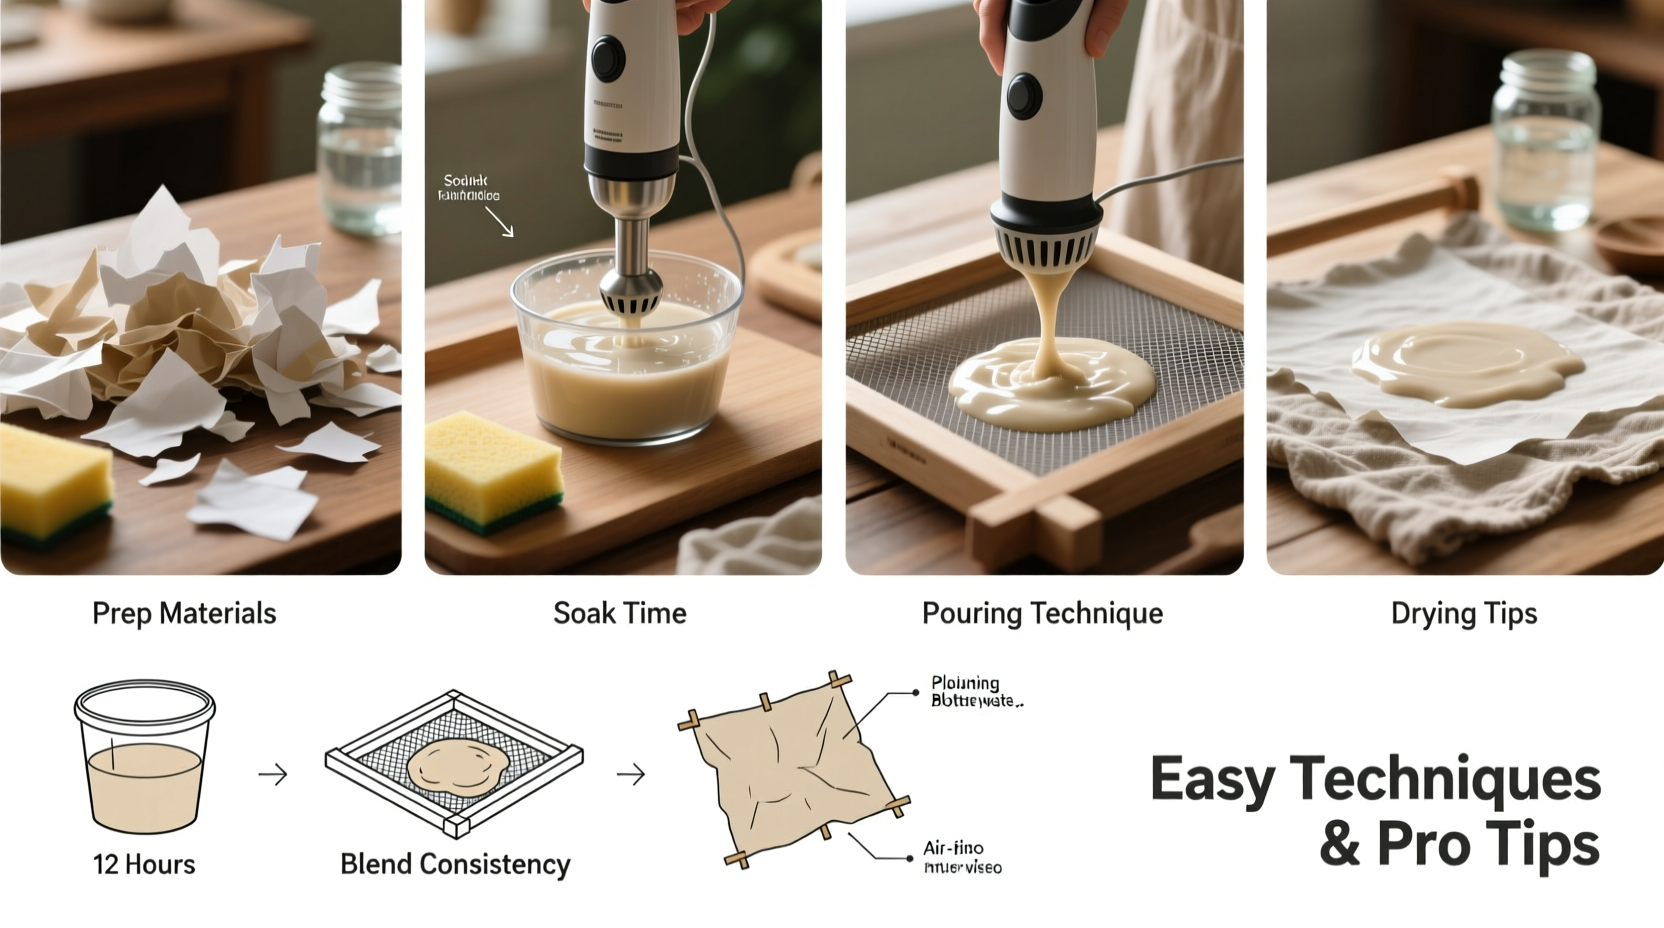
The foundation of quality handmade paper lies in the materials you choose. The best part? Most supplies are already in your home. Start with clean, fiber-rich paper scraps such as printer paper, tissue paper, newspaper (for darker sheets), or even old book pages. Avoid glossy or wax-coated papers like magazines or receipts, as they don’t break down well and may leave residue.
In addition to paper scraps, you’ll need basic kitchen and craft tools:
- Blender (dedicated to crafts if possible)
- Larger plastic tub or basin (at least 12” x 16”)
- Mould and deckle (can be DIY’d—see next section)
- Sponges and cloths (cotton or felt work best)
- Wooden boards or plexiglass (for pressing)
- Parchment paper or non-stick surface for drying
- Towels and rolling pin (optional for pressing)
Building a DIY Mould and Deckle
A mould and deckle is the frame used to scoop and shape the paper pulp into a uniform sheet. Commercial versions exist, but you can easily make one from simple materials.
To create a basic version:
- Cut two identical wooden picture frames slightly larger than standard paper size (e.g., 9” x 12”).
- Remove the glass and backing, keeping only the wooden borders.
- Stretch fiberglass window screen tightly across one frame and staple it securely on all sides. This is your mould.
- Leave the second frame bare—this is your deckle, which sits on top to control depth during forming.
- Sand sharp edges and ensure the screen is taut and free of wrinkles.
When assembled, the deckle fits over the mould, creating a shallow “tray” that holds the pulp slurry. This setup allows you to lift a consistent layer of fibers from the vat.
Step-by-Step Papermaking Process
Follow this detailed sequence to turn scraps into elegant handmade sheets.
- Soak the paper: Place torn paper pieces in warm water for 1–2 hours. Longer soaking softens fibers, especially for thicker stock.
- Create pulp: Drain excess water, then blend soaked paper in small batches with fresh water (1 cup water per 2 cups dry paper). Blend for 30–60 seconds until smooth, like oatmeal.
- Prepare the vat: Pour pulp into a large tub and add 4–6 cups of water to dilute. Stir gently to distribute fibers evenly.
- Form the sheet: Submerge the mould vertically, then slide it under the pulp mixture. Lift steadily, rocking slightly to settle fibers evenly. Remove the deckle.
- Drain excess water: Let water drip back into the tub. Tilt the mould at an angle to speed drainage without disturbing the sheet.
- Couching (transferring): Lay a damp cloth or felt on a flat surface. Flip the mould face-down onto it and press gently with a sponge or hand to release the sheet.
- Press the paper: Stack multiple sheets with cloths between them. Place between wooden boards and weigh down with books or clamps for 12–24 hours.
- Dry thoroughly: Peel off the dried sheets after 24–48 hours. Air-drying works best; for faster results, use a heated iron over parchment paper (low heat).
“Hand papermaking connects us to centuries of tradition and mindful creation. The patience it requires teaches respect for material and process.” — Dr. Lena Torres, Paper Conservator & Craft Historian
Enhancing Texture and Appearance
Once you’ve mastered the basics, experiment with customization. Handmade paper shines when personal touches elevate its aesthetic.
Add flower petals, herbs, thread snippets, or colored pulp swirls for visual interest. To embed materials:
- Place delicate items on the wet sheet just after couching.
- Or mix small amounts of colored tissue pulp into the vat for marbled effects.
- Use natural dyes like turmeric, beet juice, or spinach extract to tint pulp before forming sheets.
For a smoother finish, beat the pulp longer in the blender. For rustic, textured sheets, include coarser fibers like hemp, cotton linter, or shredded denim.
| Additive | Effect | Usage Tip |
|---|---|---|
| Lint or Cotton Rag | Stronger, softer paper | Pre-soak for 2+ hours |
| Dried Lavender | Fragrant decorative touch | Press into surface after forming |
| Food Coloring | Vibrant hue | Mix into pulp before adding to vat |
| Glitter (sparingly) | Sparkly accents | Not eco-friendly; avoid for compostable paper |
Common Challenges and Solutions
Even experienced crafters encounter issues. Knowing how to troubleshoot ensures better results over time.
- Paper won’t hold together? Likely under-blended pulp. Ensure fibers are fully broken down before forming.
- Uneven thickness? Rock the mould gently during lifting and avoid tilting too quickly.
- Sticking to the screen? Use a slightly damp transfer cloth and peel slowly. A light spray of water on the screen beforehand helps release.
- Mold growth? Dry sheets completely before storage. Work in a well-ventilated area and avoid leaving pulp overnight without refrigeration.
Mini Case Study: Classroom Paper Recycling Project
A middle school art teacher in Portland launched a monthly papermaking workshop using classroom scrap paper. Students collected notebook offcuts and old handouts, turning them into journals for writing prompts. By adding pressed leaves and plant-based dyes, each batch reflected seasonal themes. Not only did waste drop by 40%, but students showed increased engagement in sustainability topics. The project now runs annually, with handmade paper sold at school fairs to fund art supplies.
FAQ
Can I make waterproof handmade paper?
Not naturally—but you can seal finished sheets with rice starch spray or a thin layer of beeswax for water resistance. Note: this reduces recyclability.
How long does handmade paper last?
Properly dried and stored, it lasts decades. Acid-free source paper and cool, dry storage prevent yellowing and brittleness.
Is homemade paper recyclable?
Yes, if made from clean, recyclable paper and free of plastics or synthetic additives. However, reuse it first—journals, cards, or art—to extend its life cycle.
Final Checklist Before You Begin
- ✅ Collect 2–3 cups of clean, non-glossy paper scraps
- ✅ Prepare your mould and deckle
- ✅ Set up workspace near sink with towels and drying area
- ✅ Soak paper pieces in warm water for 1–2 hours
- ✅ Test pulp consistency: should resemble thin oatmeal
- ✅ Have cloths, felts, and pressing boards ready
- ✅ Plan for 2–3 days of drying time
Conclusion
Handmade paper bridges creativity and sustainability in the most tangible way. Every sheet tells a story—not just of the materials used, but of care, intention, and renewal. What begins as discarded scraps becomes a canvas for letters, art, or gifts imbued with personal meaning. The process itself slows you down, inviting mindfulness in an age of instant everything.


 浙公网安备
33010002000092号
浙公网安备
33010002000092号 浙B2-20120091-4
Comments
No comments yet. Why don't you start the discussion?