
Whether you're replacing a lost or damaged ID, updating personal information, or applying for the first time, having a valid government-issued identification card is essential. It grants access to banking services, travel, voting rights, healthcare, and employment verification. Yet many people face unnecessary delays due to incomplete documentation or lack of preparation. This comprehensive guide walks you through every stage of securing your new ID card efficiently—without common pitfalls.
1. Determine Your Eligibility and Required ID Type
Not all identification cards serve the same purpose. The type you need depends on your age, residency status, and intended use. In most countries, national ID cards are issued to citizens and permanent residents, while states or provinces may issue driver’s licenses or non-driver photo IDs that double as official identification.
Common types include:
- National Identity Card: Issued by federal authorities; often required for voting, tax filing, or social services.
- State-Issued Photo ID: Available even if you don’t drive; accepted for age verification and domestic travel (e.g., TSA in the U.S.).
- Enhanced ID: Allows border crossing into certain countries by land or sea (available in select U.S. states).
Check your country’s or state’s official government website to confirm which ID applies to your situation. For example, in the United States, visit dmv.org or your state’s DMV site. In the UK, refer to the GOV.UK portal.
2. Gather All Necessary Documents
The single biggest cause of processing delays is submitting incomplete paperwork. Most ID offices require proof across three categories: identity, residency, and legal presence (if applicable). Below is a standard checklist used in many regions, though specifics vary.
| Document Category | Acceptable Examples | Notes |
|---|---|---|
| Proof of Identity | Birth certificate, passport, naturalization certificate | Must be original or certified copy—no photocopies. |
| Proof of Residency | Utility bill, lease agreement, bank statement (within last 60 days) | Name and current address must match exactly. |
| Proof of Legal Presence | Green card, visa with I-94, employment authorization document | Required for non-citizens in many countries. |
| Previous ID (if replacing) | Expired or damaged ID card | Report lost/stolen IDs to authorities before applying. |
“We see dozens of applicants daily who bring outdated utility bills or unsigned forms. Bringing correct, current documents saves everyone time.” — Maria Lopez, Senior Clerk at California DMV
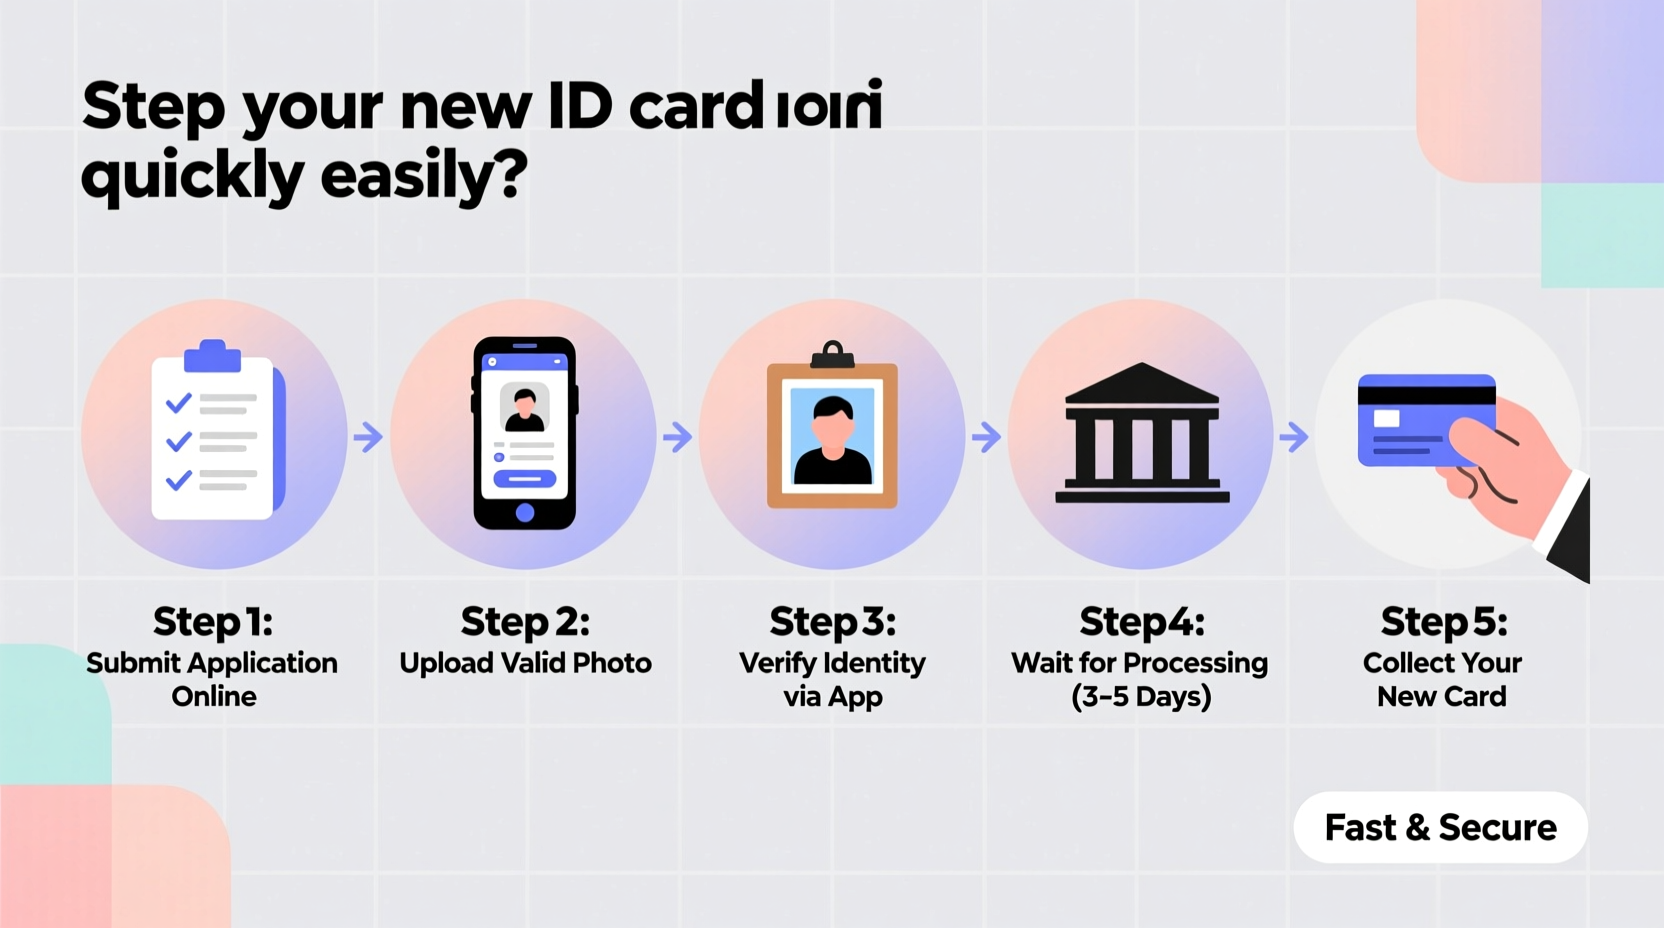
3. Complete the Application Process Step by Step
Once you’ve confirmed eligibility and collected your documents, follow this timeline-based approach to ensure a smooth experience.
- Step 1: Fill Out the Application Form (Online or In-Person)
Many jurisdictions now offer downloadable or fillable online forms. Completing this ahead of time reduces wait times at service centers. Double-check spelling and dates—errors here can delay processing. - Step 2: Schedule an Appointment (If Possible)
Walk-ins are accepted in many places, but appointments often guarantee faster service. Use your local ID office’s booking system to reserve a slot during off-peak hours (e.g., mid-week mornings). - Step 3: Visit the Office With All Materials
Arrive 10–15 minutes early. Bring originals and one set of photocopies if requested. Be prepared for fingerprinting or photograph capture on-site. - Step 4: Pay the Required Fee
Fees vary widely—from $15 for a basic state ID to over $50 for enhanced versions. Accepted payment methods differ by location; check whether credit cards, checks, or cash are allowed. - Step 5: Receive Temporary Proof and Track Delivery
You’ll typically get a temporary paper ID immediately. Your permanent card arrives by mail within 2–4 weeks. Some agencies provide tracking numbers.
4. Real Example: How Sarah Replaced Her Lost ID in Under Two Weeks
Sarah Thompson, a 28-year-old graduate student in Austin, Texas, misplaced her wallet while traveling. Without her ID, she couldn’t pick up prescription medication or verify her identity for a job interview. She followed these steps:
- Filed a police report for the lost wallet the same day.
- Visited the Texas DPS website and downloaded Form DL-14A for a replacement ID.
- Gathered her birth certificate, recent utility bill, and passport photo.
- Scheduled a same-week appointment at a nearby DPS office using the online portal.
- Paid the $16 fee via debit card and had her photo taken on-site.
Within nine days, her new ID arrived by mail. By acting quickly and preparing thoroughly, Sarah avoided disruptions to her academic and professional life.
5. Common Mistakes to Avoid
Even small oversights can result in rejection or extended processing times. Here’s what not to do:
| Mistake | Better Approach |
|---|---|
| Bringing expired utility bills | Use documents dated within the last 60 days |
| Wearing hats or glasses in the ID photo | Dress casually but remove accessories that obscure the face |
| Waiting until the last minute | Start the process at least 3 weeks before you need the ID |
| Assuming online renewal is always available | Verify eligibility—first-time applicants usually must appear in person |
Frequently Asked Questions
Can I apply for an ID card online?
In many cases, yes—but only for renewals. First-time applicants, minors, and those changing legal names typically must appear in person to verify identity and submit biometrics.
What if my name has changed due to marriage or court order?
You’ll need to present legal documentation of the change, such as a marriage certificate or court judgment. Update your Social Security record first (in the U.S.), as mismatched names can lead to denial.
How long does it take to receive the new ID?
Processing times range from 7 to 21 business days, depending on jurisdiction and mailing volume. Expedited services may be available for an additional fee.
Final Steps: Protect and Verify Your New ID
Once your ID arrives, inspect it immediately for accuracy. Confirm that your name, date of birth, photo, and signature are correct. If there’s an error, contact the issuing agency promptly to request a correction—most offer free reprints for administrative mistakes.
Store your ID in a protective sleeve to prevent wear and avoid carrying it unnecessarily. Keep a scanned copy in a secure digital vault (not unencrypted email or cloud storage) for emergency reference.
“An accurate, up-to-date ID is more than just a card—it's access to your rights and opportunities.” — National Association of Public Administrators
Take Action Today
Don’t wait until you’re turned away at a pharmacy, airport, or polling station. Whether you’re replacing a lost card or obtaining one for the first time, following this structured process ensures you get your new ID quickly and without stress. Prepare your documents, schedule smart, and stay informed. A valid ID opens doors—make sure yours is ready when you need it.


 浙公网安备
33010002000092号
浙公网安备
33010002000092号 浙B2-20120091-4
Comments
No comments yet. Why don't you start the discussion?