
Makeup drawers have a way of becoming chaotic over time. Products pile up, lids go missing, and finding that one eyeliner can feel like searching for treasure in a cluttered cave. The good news? You don’t need fancy organizers or a shopping spree to fix it. With a little strategy and some intentional sorting, you can transform your messy makeup drawer into a streamlined, functional space using only the tools and containers you already own.
This guide walks you through a complete reorganization process from start to finish—no purchases required. Whether you’re dealing with a tiny nightstand drawer or a spacious vanity compartment, these steps work universally. By the end, you’ll know exactly what you own, where everything belongs, and how to maintain order long-term.
Step 1: Empty and Assess
The first rule of organizing any space is simple: take everything out. This gives you full visibility and prevents items from being buried or forgotten. Remove every product—lipsticks, brushes, palettes, cotton pads, expired samples, and even random receipts or paper clips that somehow ended up in there.
Lay all items on a clean surface like your bathroom counter or bed. Resist the urge to start grouping things just yet. First, assess the state of your drawer. Wipe it down with a damp cloth and mild cleaner. Let it dry completely before returning anything. This small act resets the space physically and mentally.
Step 2: Sort and Categorize
Now that everything is visible, begin sorting into broad categories. Keep it simple:
- Lip products (lipstick, gloss, liner)
- Eyeshadow and eye liners
- Mascara and brow products
- Face makeup (foundation, concealer, powder, blush, bronzer)
- Brushes and applicators
- Tools (tweezers, lash curlers, sponges)
- Samples and travel sizes
- Expired or unusable items
This phase isn’t about neatness—it’s about clarity. Grouping helps you see duplicates, unused products, and what truly belongs in the drawer versus what might be better stored elsewhere (like seasonal items or backup stock).
“Clarity comes from separation. When you physically divide your makeup by type, decision fatigue drops significantly.” — Maya Tran, Professional Organizer & Founder of Minimal Beauty Living
Step 3: Declutter Ruthlessly
Not everything deserves a spot in your daily-use drawer. Now is the time to let go of what no longer serves you. Ask yourself:
- Have I used this in the past six months?
- Does the color still suit me?
- Is the formula dried out, separated, or smelly?
- Do I own something better or more frequently used?
If the answer is “no” to most of these, consider removing it. Be especially strict with expired products. Mascara should be replaced every 3–6 months; liquid foundations and concealers every 6–12 months; powders can last up to two years. Expired makeup not only performs poorly but can cause breakouts or infections.
Set aside a box or bag for discards. Donate unopened, gently-used samples to shelters or charities if allowed. Recycle packaging where possible. For broken or contaminated items, dispose of them responsibly.
Step 4: Create Zones Using What You Already Own
You don’t need acrylic dividers or branded trays to create structure. Look around your home for repurposable containers:
- Small jars: Clean jam, sauce, or baby food jars work perfectly for holding brushes or lipsticks.
- Cardboard boxes: Cut toilet paper rolls in half to corral eyeliners or pencils. Shoebox inserts can separate larger items.
- Tins: Altoids or mint tins are ideal for storing small palettes, bobby pins, or adhesive strips.
- Drawer dividers: If you have spare shoeboxes or cereal boxes, cut them to size to form partitions within the drawer.
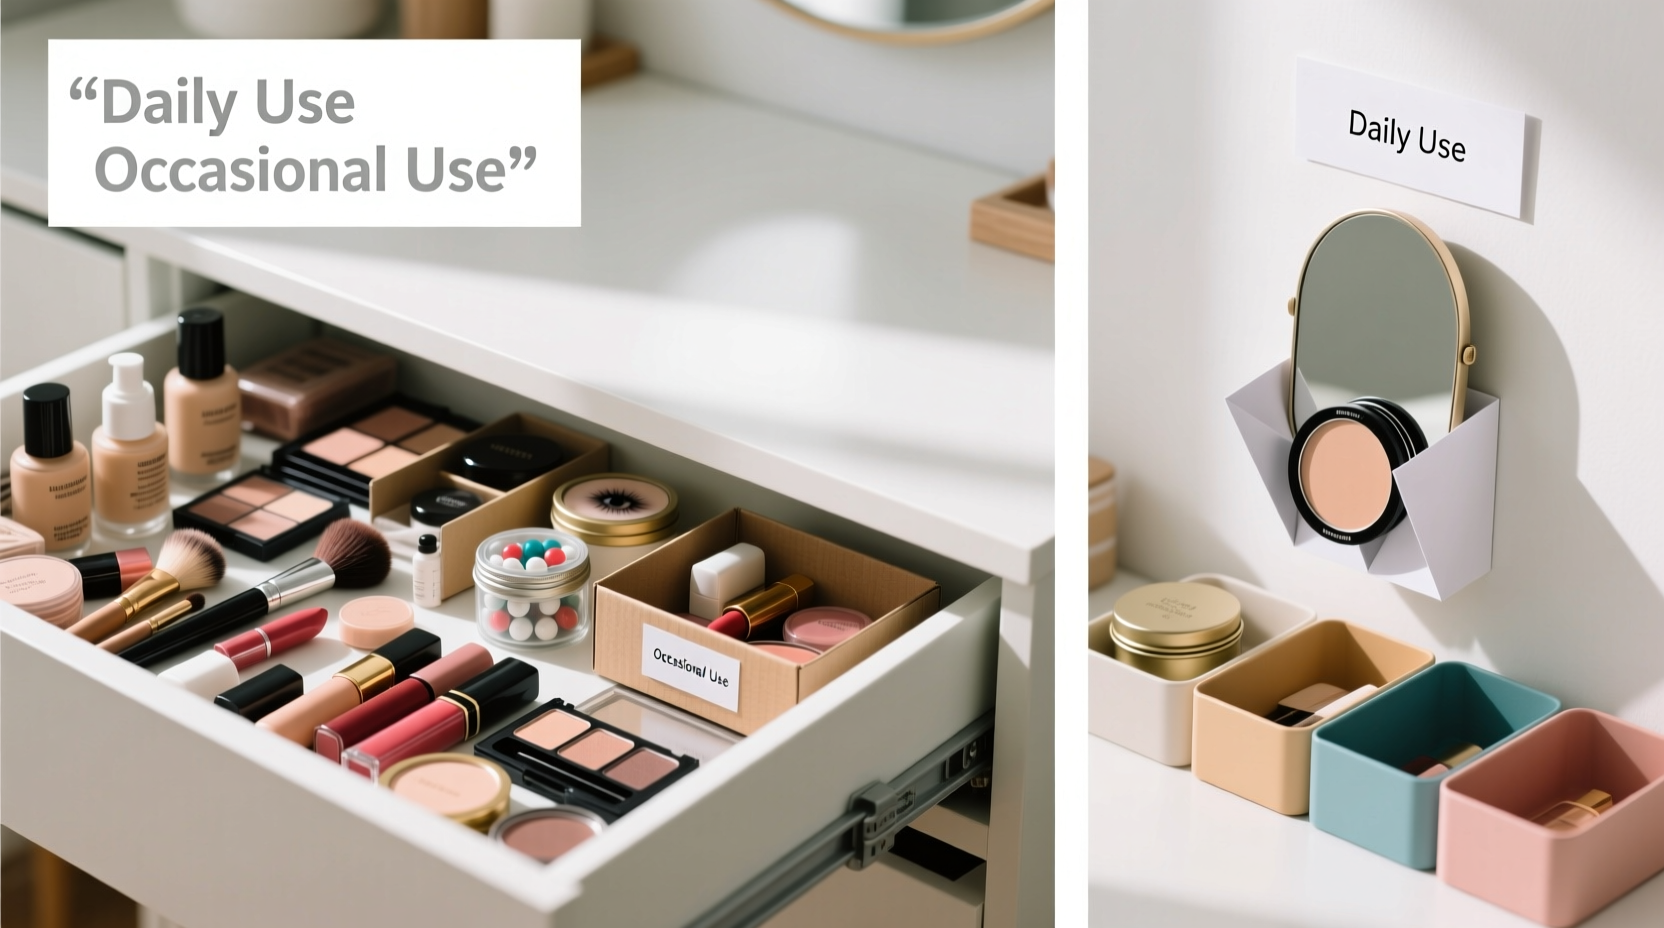
Arrange these improvised organizers based on how often you use each category. Place everyday essentials—foundation, mascara, lipstick—in easy-to-reach spots. Reserve back corners for backups, seasonal colors, or rarely used tools.
| Item Type | Ideal DIY Container | Placement Tip |
|---|---|---|
| Brushes & Applicators | Glass jar or cut cardboard tube | Front center for quick access |
| Lipsticks | Jam jar or mint tin | Right side if right-handed |
| Eyeliners/Pencils | Toilet paper roll halves | Near eye products for pairing |
| Palettes | Shoebox insert or book sleeve | Stack vertically to save space |
| Travel Sizes | Small gift box or tea tin | Back corner or separate section |
Step 5: Optimize Layout for Functionality
A well-organized drawer isn’t just neat—it’s efficient. Think about your morning routine. Where do you reach first? What slows you down?
Design your layout to support your habits. If you apply foundation before eyes, keep base products at the front. If you love experimenting with bold lips, group all lip shades together—even if they’re different formulas. Consistency reduces search time and frustration.
Consider stacking or vertical storage. Instead of laying palettes flat, stand them upright like books using a sturdy container as a bookend. This makes labels visible and maximizes depth. Use shallow containers in front and taller ones toward the back so nothing gets hidden.
Keep frequently lost items—like lash glue or brow gel—paired with their tools. Store tweezers next to brow pencils. Keep cotton swabs beside spot treatments. These micro-groupings reduce clutter caused by scattering.
Mini Case Study: Sarah’s Drawer Transformation
Sarah, a freelance designer in Portland, had a deep vanity drawer overflowing with makeup. She’d often be late because she couldn’t find her favorite concealer. After following this method, she cleared out 27 expired or unused items—including three dried-up mascaras and a highlighter she hadn’t touched in two years.
She repurposed four baby food jars: one for brushes, one for lip glosses, one for eyeliners, and one for travel-sized skincare. A cut-down tissue box became a standing holder for her blush and bronzer compacts. By labeling each jar with painter’s tape, she created a system that both she and her partner could navigate easily.
“I was skeptical about using jars,” she said, “but now I love seeing everything clearly. I even notice when something runs low and can replace it before I’m caught bare-faced.”
Checklist: Your No-Buy Makeup Drawer Reset
Follow this checklist to stay on track:
- Empty the entire drawer onto a clean surface
- Wipe down the drawer interior with a damp cloth
- Sort all items into clear categories
- Discard expired, broken, or unused products
- Identify household items to use as organizers (jars, tins, boxes)
- Assign zones based on frequency of use
- Group related tools and products together
- Label containers if needed
- Place everyday items in front, backups in back
- Test the layout by doing a mock morning routine
- Adjust spacing or containers as needed
- Create a monthly 10-minute maintenance habit
Common Mistakes to Avoid
Even with the best intentions, it’s easy to slip into habits that undo your progress. Watch out for these pitfalls:
- Keeping “just in case” items: If you haven’t used it in a year, you won’t miss it.
- Overfilling containers: Crowded jars make retrieval hard and damage delicate products.
- Ignoring expiration dates: Old makeup harbors bacteria—prioritize safety over sentimentality.
- Forgetting accessibility: Don’t tuck daily essentials under rarely used items.
- Skipping maintenance: Set a monthly reminder to tidy up and reassess.
Frequently Asked Questions
What if my drawer is too shallow for stacking?
Use flat layouts with labeled sections. A folded washcloth or fabric scrap can act as a non-slip mat to prevent sliding. Prioritize single-layer organization and store deeper items elsewhere, like on a shelf or in a nearby cup.
How do I stop my drawer from getting messy again?
Adopt a “one in, one out” rule—even if you’re not buying new items. When you open a new product, commit to finishing or discarding an old one. Also, spend 5 minutes weekly returning stray items to their zones. Small habits prevent big chaos.
Can I organize makeup without containers at all?
Absolutely. Lay products in neat rows by category. Use folded paper or cardboard strips as spacers. Align items by height or color for visual calm. Function matters more than form—what works for you is what’s right.
Sustainable Habits for Long-Term Success
Organizing without buying supports sustainability and mindfulness. You’re not adding plastic organizers to landfills or impulse-buying cute trays that don’t fit your needs. Instead, you’re working with what you have—a practice that fosters creativity and intentionality.
Once your drawer is organized, maintain it with a simple ritual. Every Sunday morning, take five minutes to return misplaced items, wipe down surfaces, and check for expired products. This prevents clutter from creeping back and keeps your system functional.
Also, reconsider how you acquire new makeup. Before purchasing, ask: Do I need this? Do I already own something similar? Will I use it regularly? These questions reduce future clutter and align your collection with your actual lifestyle.
Conclusion
Organizing your makeup drawer doesn’t require money, minimalism, or perfection. It requires a plan, honesty about what you use, and the willingness to repurpose what’s already in your home. By following these steps, you gain more than a tidy drawer—you gain time, confidence, and control over your daily routine.
Your makeup reflects your self-expression. Let the space it lives in reflect clarity and care. Start tonight: empty the drawer, sort with purpose, and build a system that works for you—not for Instagram aesthetics. You already have everything you need.


 浙公网安备
33010002000092号
浙公网安备
33010002000092号 浙B2-20120091-4
Comments
No comments yet. Why don't you start the discussion?