
Creating soft, bouncy curls at home no longer requires professional styling tools or hours of trial and error. The heating brush curling iron—also known as a hot air brush or rotating hot brush—has revolutionized at-home hairstyling by combining the smoothing action of a round brush with the heat-based shaping of a traditional curling iron. When used correctly, it delivers voluminous, polished curls with minimal damage. This guide walks you through every stage of the process, from preparation to finishing touches, so you can achieve consistent, camera-ready results.
Why Choose a Heating Brush Curling Iron?
Unlike flat irons or clamp-style curling wands, heating brushes offer more control and are generally safer for fine or fragile hair. They work by gently wrapping sections around heated bristles while applying airflow, which sets the curl without extreme heat exposure. Most models come with adjustable temperature settings, cool-shot buttons, and rotating barrels that make styling intuitive—even for beginners.
The result is natural-looking body and bounce, ideal for everyday wear or special occasions. Because the tool also smooths the cuticle as it styles, frizz is reduced, and shine is enhanced—two benefits often lost with older curling methods.
Essential Tools and Products You’ll Need
Success starts before you even plug in the device. Gather these items to ensure optimal performance and hair health:
- Heating brush curling iron – Preferably one with ceramic or tourmaline-coated bristles for even heat distribution.
- Heat protectant spray or serum – Forms a barrier between hair and high temperatures.
- Volumizing mousse or curl-enhancing cream – Adds grip and structure to help curls hold.
- Wide-tooth comb or detangling brush – For pre-styling detangling without breakage.
- Alligator clips – To section hair evenly during styling.
- Hairspray (light to medium hold) – Locks in shape without stiffness.
“Using a heating brush correctly can give you the same finish as a salon blowout, but in half the time.” — Jasmine Reed, Celebrity Stylist and Educator
Step-by-Step Guide to Perfect Curls
Follow this detailed timeline to master the technique. Allow 20–35 minutes depending on hair length and thickness.
- Start with clean, towel-dried hair. Wash and condition your hair earlier in the day or night before. Towel-dry until damp—not soaking wet. If styling on dry hair, mist lightly with water and apply a refresher product.
- Apply styling products. Distribute a nickel-sized amount of mousse from mid-length to ends. Then, apply a lightweight heat protectant evenly throughout.
- Pre-dry slightly with a blow dryer (optional). Use a concentrator nozzle to reduce moisture by about 70%. This speeds up curl setting and improves longevity.
- Divide hair into manageable sections. Clip the top half of your hair up. Begin with the bottom layers. Further divide each side into 1–2 inch subsections using clips.
- Set the temperature. Fine or damaged hair: 300°F (150°C). Medium to thick hair: 320–360°F (160–180°C). Avoid max settings unless necessary.
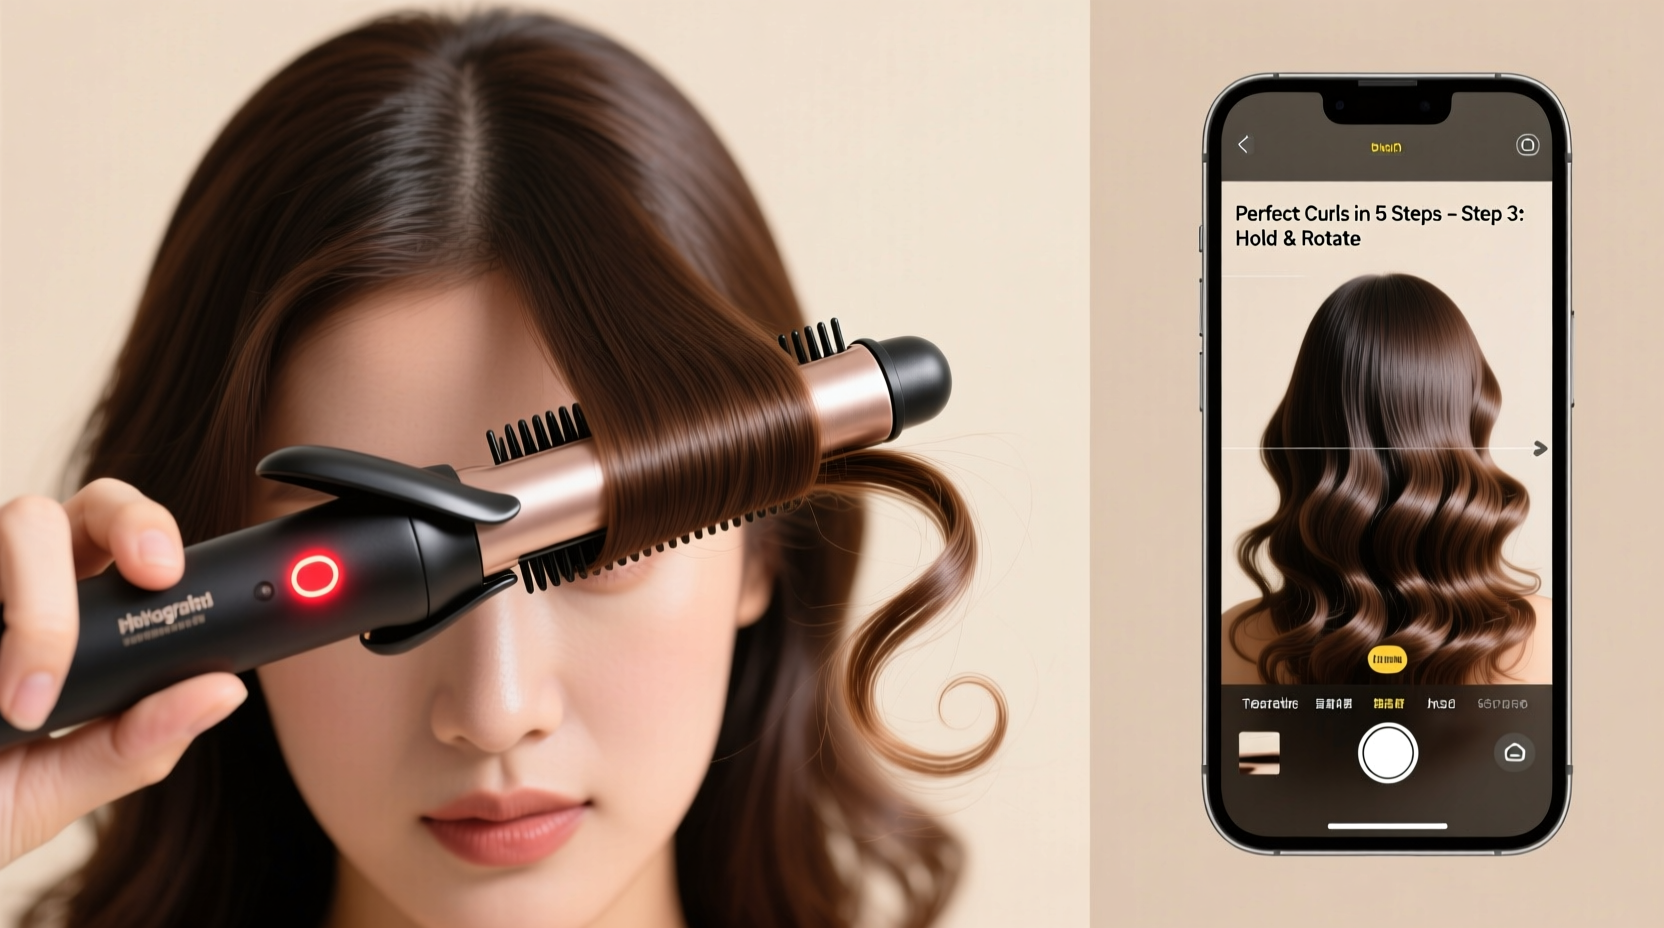
- Position the brush at the root. Place the barrel horizontally under a section near the scalp. Turn the brush on and begin slowly gliding it down the strand while rotating it inward toward your face (for front sections) or away (for back).
- Roll all the way to the ends. Maintain tension and keep the brush moving steadily. Don’t pause mid-strand. Let the brush reach the tips, then hold for 5–8 seconds before releasing.
- Cool the curl. After releasing, let the curl hang freely for 10–15 seconds before touching it. This sets the shape.
- Repeat across all sections. Work from the back upwards, then release the top layers and style those last.
- Finish with a cool shot. Once all curls are set, go over them briefly with the cool air setting if available, or use a separate cool-air diffuser.
- Lock in with hairspray. Hold 10–12 inches away and mist lightly. Scrunch gently to enhance texture.
- Optional: Finger-separate curls. Use your fingers to break up any stiffness and create a softer, more natural wave pattern.
Do’s and Don’ts When Using a Heating Brush
| Do’s | Don’ts |
|---|---|
| Use a lower heat setting and build up if needed | Use maximum heat on fine or color-treated hair |
| Section hair properly for even styling | Try to style too large sections at once |
| Let curls cool before touching | Pull apart curls immediately after forming |
| Clean the brush bristles weekly | Ignore built-up product or hair on the barrel |
| Store the brush upright or in a heat-safe case | Wrap the cord tightly around the device while hot |
A Real-Life Example: Transforming Flat Hair into Volume
Sarah, a 32-year-old teacher with shoulder-length, fine, straight hair, struggled with flatness and lack of hold. She tried traditional curling irons but found them time-consuming and damaging. After switching to a dual-voltage ceramic heating brush, she followed the steps above: applied mousse to damp hair, pre-dried slightly, and styled in small sections at 310°F.
The first time took her 30 minutes. By the third try, she was done in 18. Her curls lasted through school hours and survived humidity thanks to a light-hold hairspray. “I finally feel put together in the morning,” she said. “And my hair feels healthier than when I used metal tongs.”
Frequently Asked Questions
Can I use a heating brush on wet hair?
Yes—most heating brushes are designed for damp-to-dry use. However, never use them on soaking-wet hair, as excessive moisture can cause steam damage and weaken strands. Hair should be towel-dried to about 60–70% dry before styling.
How do I clean my heating brush?
Unplug and fully cool the device. Use a soft cloth or an old toothbrush to remove hair strands caught in the bristles. Wipe the barrel with a slightly damp microfiber cloth and mild soap if needed. Avoid submerging any part in water.
Are heating brushes safe for curly hair types?
They can be used on naturally curly hair to redefine waves or smooth frizz, but avoid over-straightening. Use lower heat settings and focus on reshaping rather than altering natural texture. Those with type 3C or 4 curls may prefer diffusing instead.
Final Checklist Before You Style
- ☑ Hair is clean and damp (or lightly misted if dry)
- ☑ Heat protectant has been applied
- ☑ Styling products evenly distributed
- ☑ Sections are clipped and ready
- ☑ Heating brush is preheated to appropriate temperature
- ☑ Workspace includes mirror, outlet access, and cooling space for curls
Master Your Morning Routine
Perfect curls aren’t reserved for stylists or special events. With a reliable heating brush curling iron and the right technique, anyone can achieve elegant, lasting waves in minutes. The key lies in preparation, patience with the cooling phase, and consistent practice. Over time, the process becomes second nature—transforming rushed mornings into moments of self-care and confidence.


 浙公网安备
33010002000092号
浙公网安备
33010002000092号 浙B2-20120091-4
Comments
No comments yet. Why don't you start the discussion?