
Press-on nails have evolved from a temporary fix to a legitimate alternative to salon manicures—especially when applied correctly. The secret to longevity and a seamless finish lies not just in the quality of the nails, but in the application method. Jelly glue, a flexible adhesive designed specifically for press-ons, offers superior hold, flexibility, and durability compared to traditional glues or adhesives. When used properly, it can keep your press-ons intact for up to two weeks without lifting or chipping.
This comprehensive guide walks you through every detail of achieving professional-grade press-on nails using jelly glue. From prep to aftercare, each step is designed to maximize wear time and minimize common pitfalls like air bubbles, premature lifting, or misalignment.
Why Jelly Glue Outperforms Other Adhesives
Jelly glue is a thick, gel-like adhesive that maintains elasticity after drying. Unlike liquid nail glue, which dries hard and brittle, jelly glue moves with your natural nail, reducing stress at the edges where lifting typically begins. It also fills minor gaps between the press-on and natural nail, creating a seal that resists moisture and daily wear.
“Jelly glue mimics the natural flex of the nail plate, making it ideal for long-term wear. It’s especially effective for people with active lifestyles.” — Dana Reyes, Nail Formulation Specialist
Its tacky consistency allows for slight repositioning during application, giving beginners more room for error while still achieving a secure bond. Most formulations are acetone-free and gentle on the natural nail, making removal easier and less damaging.
Essential Tools and Materials Checklist
Before starting, gather all necessary supplies. Having everything ready prevents interruptions mid-application, which can compromise adhesion.
- High-quality press-on nails (properly sized)
- Jelly glue (preferably brush-tip applicator)
- Nail file and buffer
- Cuticle pusher or orange stick
- 70% isopropyl alcohol or nail dehydrator
- Cotton pads or swabs
- Tweezers (optional, for precise placement)
- Lint-free wipe or microfiber cloth
Step-by-Step Application Process
The key to long-lasting press-ons is meticulous preparation and precise execution. Follow this timeline for best results.
- Remove old polish: Use acetone-based remover if needed, then cleanse nails with alcohol to eliminate oils and residue.
- Shape and buff: Lightly file natural nails into desired shape. Gently buff the surface to create micro-abrasions for better adhesion—do not over-buff, as this weakens the nail.
- Push back cuticles: Use a cuticle pusher to clear any skin overlapping the nail bed. This ensures full contact between the press-on and nail plate.
- Dry thoroughly: Wipe each nail with a lint-free cloth dampened with alcohol. Let them air-dry completely—moisture is the enemy of adhesion.
- Select correct sizes: Test each press-on against your natural nail. They should cover the nail bed without touching the cuticles or extending past the free edge.
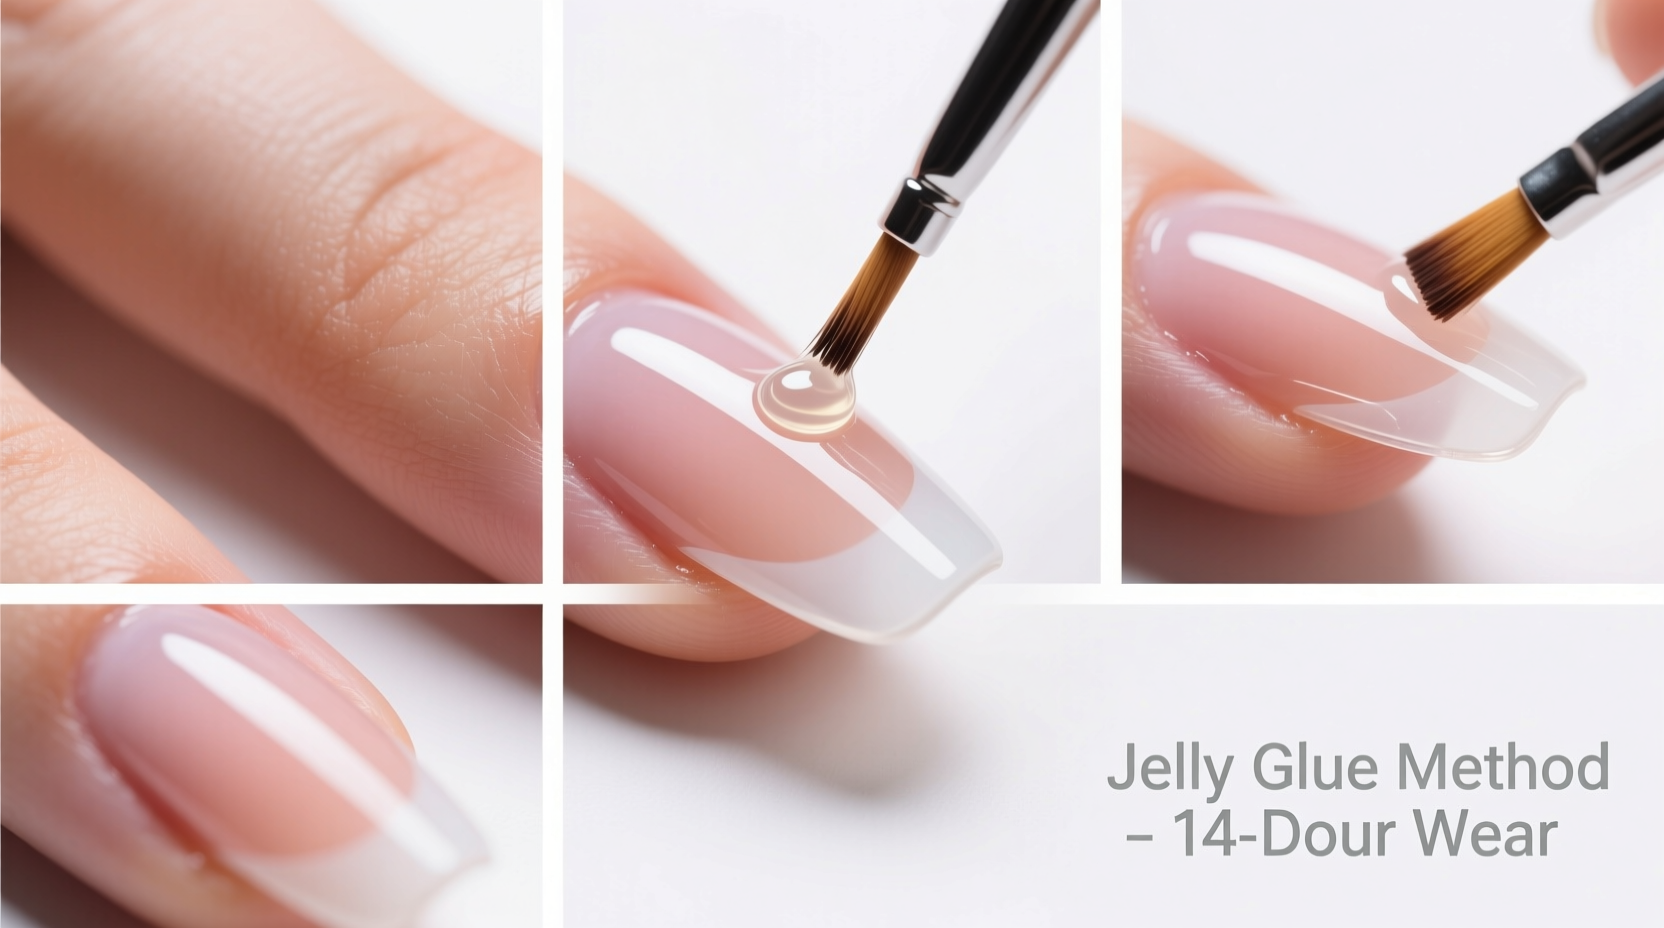
- Apply jelly glue: Squeeze a small drop (about the size of a pinhead) onto the center of the press-on. Spread evenly with the brush tip, covering the entire nail bed area but avoiding the edges.
- Position carefully: Align the press-on with your cuticle line first, then press down firmly over the entire surface. Hold for 15–20 seconds per nail to activate the bond.
- Seal the edges: After all nails are applied, run a wooden stick around the perimeter to ensure no gaps remain. Apply light pressure along the sides to reinforce the seal.
- Final cleanup: If excess glue squeezes out, wait 2–3 minutes for it to become tacky, then gently scrape it away with an orangewood stick.
Do’s and Don’ts of Press-On Nail Care
| Do’s | Don’ts |
|---|---|
| Wear gloves when cleaning or doing dishes | Use nails as tools (e.g., opening cans) |
| Reinforce with top coat every 3–4 days | Soak hands in water for prolonged periods |
| Maintain cuticle oil routine (on skin only) | Peel off press-ons; always remove properly |
| Store extra nails flat in original case | Apply excessive force when typing or texting |
Real-World Example: A Week in the Life of a Press-On Set
Sophia, a graphic designer who works remotely, wanted polished-looking nails without weekly salon visits. She applied almond-shaped press-ons using jelly glue on a Sunday evening following this guide. She wore gloves while gardening on Tuesday, avoided prolonged water exposure during showers, and applied a glossy top coat on Thursday. By Friday, one corner on her ring finger began to lift slightly due to frequent mouse use. She cleaned the area, reapplied a tiny amount of jelly glue, and pressed it back down—extending the life of her set by five additional days.
She removed the nails after 14 days using the soak-off method with acetone-soaked cotton pads wrapped in foil. Her natural nails remained healthy and undamaged.
Expert Tips for Maximum Longevity
- Avoid water for the first hour: Allow the jelly glue to fully set before handwashing or showering.
- Limit exposure to heat and chemicals: Hot water, hand sanitizers, and harsh detergents degrade adhesive over time.
- Use a rubberized top coat: Adds an extra protective layer and reduces chipping at the tips.
- Check alignment nightly: Early detection of lifting allows for quick repair before full detachment.
“The first 48 hours are critical. If the bond survives hot showers and hand sanitizer, it’s likely to last the full two weeks.” — Lila Tran, Nail Tech & Educator
Frequently Asked Questions
Can I reuse press-on nails after removing them?
Yes, if removed carefully. Soak fingertips in acetone for 10–15 minutes until the adhesive softens, then gently slide the nails off. Clean residual glue with a cotton swab and store in a dry case. Reapply with fresh jelly glue next time.
Is jelly glue safe for natural nails?
Yes. Most jelly glues are formulated to be non-damaging. They don’t require filing or drilling and come off cleanly with proper soaking. Avoid prying them off, which can cause peeling.
How do I prevent air bubbles during application?
Air bubbles usually form from uneven glue distribution or improper pressure. Apply a thin, even layer of jelly glue and press from cuticle to tip in one motion. Hold firmly for 20 seconds to eliminate trapped air.
Conclusion: Elevate Your DIY Manicure Game
Perfect press-on nails aren’t reserved for professionals. With jelly glue and the right technique, anyone can achieve a durable, salon-quality manicure at home. The process demands attention to detail—from nail prep to post-application care—but the payoff is weeks of flawless wear without damage to your natural nails.


 浙公网安备
33010002000092号
浙公网安备
33010002000092号 浙B2-20120091-4
Comments
No comments yet. Why don't you start the discussion?