
Personalized gifts carry a depth of meaning that off-the-shelf items rarely match. A thoughtfully crafted keychain adorned with meaningful charms becomes more than just a tool for holding keys—it transforms into a wearable memory, a daily reminder of connection, love, or achievement. Whether it’s for a birthday, anniversary, graduation, or just because, a customized charm keychain is both practical and sentimental. With minimal supplies and a bit of creativity, you can design one-of-a-kind pieces that reflect the recipient’s personality, interests, or shared experiences.
Why Charm Keychains Make Exceptional Gifts
Unlike generic presents, personalized keychains offer lasting value. They’re used every day, often carried close at hand, making them intimate tokens of affection. The addition of charms allows for storytelling—each symbol can represent a milestone, hobby, pet, or inside joke. This layering of meaning elevates the gift from simple accessory to emotional keepsake.
Moreover, creating your own keychains is accessible and affordable. Most materials are widely available online or in craft stores, and no advanced skills are required. With thoughtful selection and arrangement, even beginners can produce polished, professional-looking results.
Gathering Your Materials and Tools
Before diving into assembly, ensure you have all necessary components. The quality of your materials directly impacts the final look and durability of the keychain. Here’s what you’ll need:
- Keyring base: Choose from stainless steel, brass, or coated rings in various sizes (25–38mm recommended).
- Charms: Available in metal, enamel, resin, wood, or glass. Look for durable finishes that resist chipping.
- Jump rings: Small metal loops used to attach charms securely. Use 4–6mm sizes depending on charm weight.
- Pliers: Round-nose and flat-nose pliers help open and close jump rings without damaging them.
- Optional extras: Beads, leather cords, tassels, or letter charms for added customization.
When sourcing materials, consider longevity. Nickel-free metals prevent skin irritation, while epoxy-coated charms resist tarnishing. For eco-conscious gifting, opt for recycled metals or sustainably sourced wood elements.
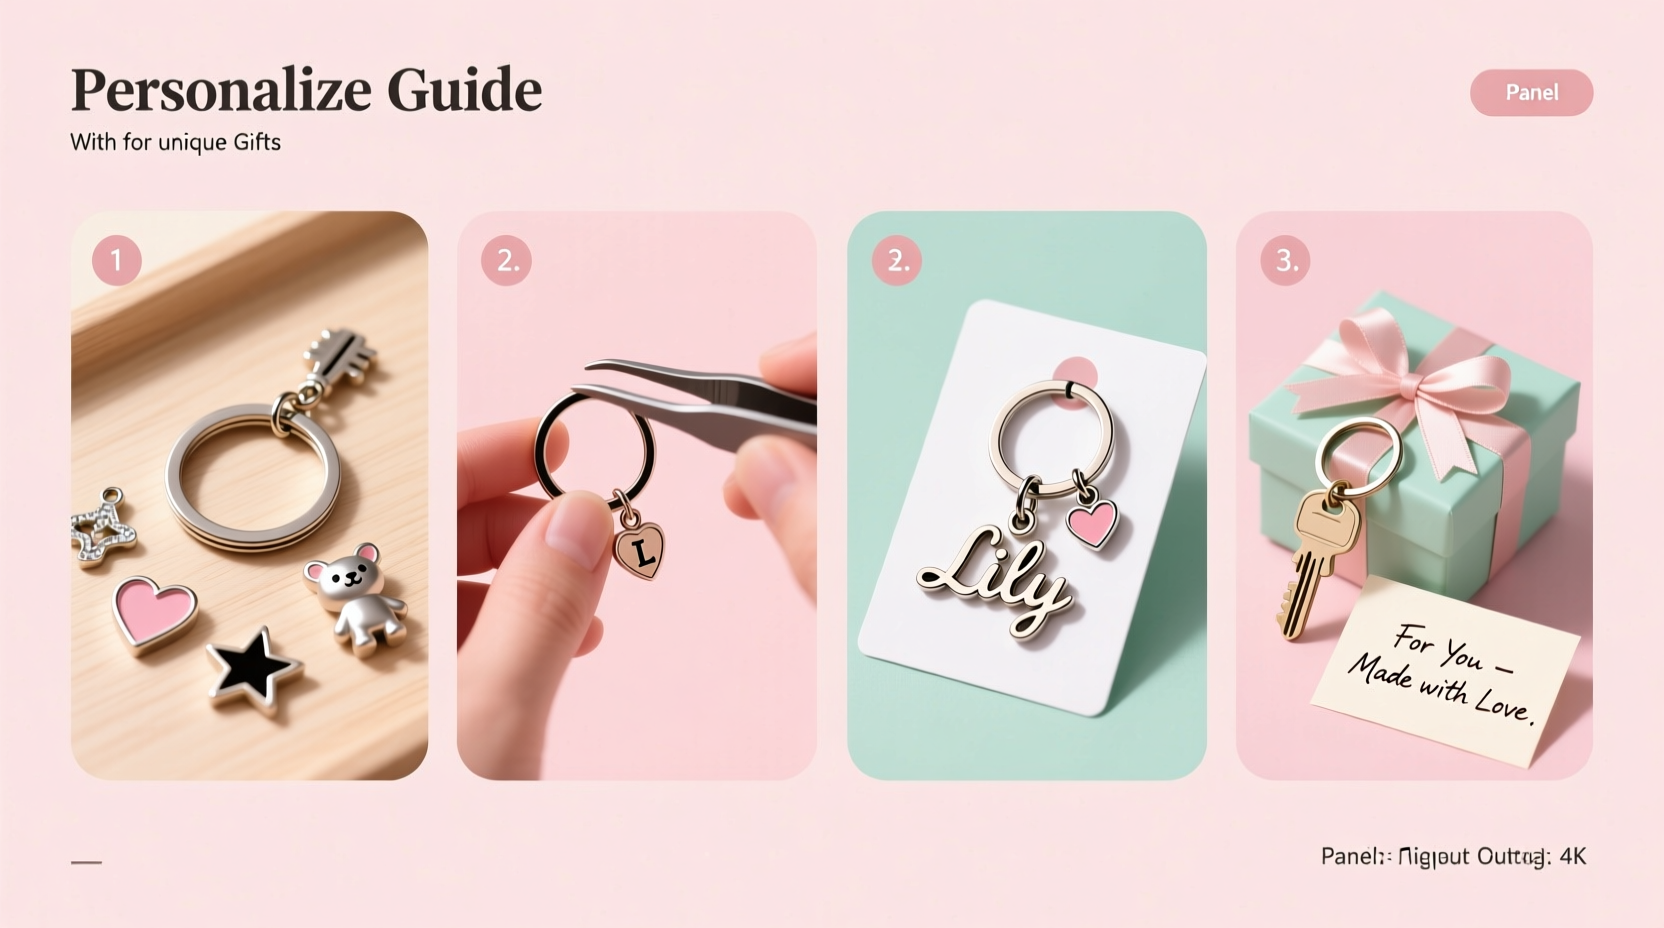
Step-by-Step Guide to Assembling Your Custom Keychain
- Plan your design. Lay out all charms on a table to experiment with arrangement. Group by theme, size, or color. Consider balance—larger or heavier charms should be centered or placed near the ring for stability.
- Select your keyring. Open the clasp gently using pliers if needed. Some rings open fully; others require slipping items on laterally.
- Attach jump rings to charms. Use pliers to twist open a jump ring sideways (not pulling apart), slide it through the charm’s loop, then attach it to the keyring. Close the ring securely by twisting back into place.
- Layer charms strategically. Place frequently seen or most meaningful charms where they’ll be visible when keys are in use—usually near the top.
- Incorporate text or initials. Add alphabet charms spelling names, dates, or short phrases like “BFF” or “Home.” Arrange them in a cluster or as a focal point.
- Add movement and texture. Introduce beads between charms or attach a small tassel for visual interest and tactile appeal.
- Secure and test. Once assembled, gently shake the keychain to check for loose parts. Ensure nothing catches on fabric or risks falling off.
| Design Element | Best Practices | Common Mistakes |
|---|---|---|
| Charms | Limited to 3–5 per keychain for clarity | Overcrowding reduces visibility and function |
| Jump Rings | Twist open/closed sideways to maintain shape | Pulling apart weakens the metal |
| Balance | Distribute weight evenly around the ring | Top-heavy designs may flip or spin awkwardly |
| Theme | Stick to one cohesive idea (travel, music, pets) | Mixing unrelated symbols dilutes impact |
Real-Life Example: A Graduation Gift That Stood Out
Sophie wanted to honor her sister’s college graduation with something more meaningful than a card. She created a keychain featuring a tiny mortarboard charm, the school’s colors woven into a micro-braided cord, and a silver “2024” initial tag. She added a small owl charm—inside humor referencing late-night study sessions—and finished it with a leather loop engraved with “Proud of You.”
At the ceremony, her sister clipped it to her bag immediately. Months later, she still uses it daily. “It’s not just cute,” she said. “It feels like carrying a piece of that moment with me.” This example shows how combining symbolism, personal history, and craftsmanship creates enduring emotional value.
“Personalization isn’t about adding names—it’s about embedding narrative. A well-designed charm keychain tells a story in miniature.” — Lena Torres, Artisan Jewelry Designer
Tips for Themed Keychains
Themed designs simplify decision-making and enhance coherence. Focus on a central concept and build outward. Below are popular themes and corresponding charm ideas:
- Travel: Airplane, globe, suitcase, passport stamp, city skyline
- Pets: Paw prints, breed-specific silhouettes, pet name tags
- Hobbies: Camera, paint palette, tennis racket, musical notes
- Family: Heart lockets, birthstone beads, sibling constellation charms
- Self-Care: Moon phases, lotus flower, affirmation tags (“Breathe,” “You’ve Got This”)
Frequently Asked Questions
How do I prevent charms from scratching each other?
Select charms with protective coatings or space them with spacer beads. Avoid stacking delicate enamel pieces directly against metal. Store finished keychains in soft pouches when not in use.
Can I personalize keychains without tools?
Yes. Use snap-on keyrings or pre-attached charm clusters. Alternatively, thread lightweight charms onto elastic cord or ribbon tied to a basic ring—ideal for children or temporary designs.
What’s the best way to clean a personalized keychain?
Wipe gently with a dry microfiber cloth. For metal tarnish, use a jewelry polishing pad. Avoid soaking, especially if charms contain paper, fabric, or glued elements.
Final Checklist Before Gifting
- All jump rings are fully closed and secure
- No sharp edges or loose parts
- Charms face forward when worn
- Design aligns with recipient’s tastes and lifestyle
- Packaged neatly—consider a small box or muslin bag with a handwritten note
Conclusion: Turn Thought Into Tangible Keepsakes
A personalized charm keychain is more than a gift—it’s a gesture made visible. Each charm serves as a quiet affirmation of attention, care, and memory. By following a structured approach, choosing meaningful symbols, and assembling with precision, you create something that transcends utility and enters the realm of sentiment.
The beauty of this craft lies in its simplicity and scalability. Start small, learn through doing, and let each creation deepen your understanding of what resonates with others. Whether you're making your first keychain or your fiftieth, the act of personalization remains a powerful form of expression.


 浙公网安备
33010002000092号
浙公网安备
33010002000092号 浙B2-20120091-4
Comments
No comments yet. Why don't you start the discussion?