
Personalized metal keychains with initials are more than just functional accessories—they’re small expressions of identity, sentiment, or style. Whether you're crafting a gift, branding merchandise, or simply adding a signature detail to your everyday carry, engraving or stamping initials onto a metal keychain elevates its value. The process is accessible, affordable, and deeply satisfying when done right. With the correct tools and attention to detail, anyone can create clean, professional-looking personalized keychains at home.
Why Personalize Metal Keychains?
Customization transforms an ordinary object into something meaningful. Initials on a keychain can mark ownership, commemorate an occasion, or serve as a minimalist keepsake. In corporate settings, branded keychains act as subtle yet effective promotional items. For individuals, they offer a way to carry a piece of identity in a compact form. Unlike mass-produced items, hand-personalized keychains reflect effort and thought, making them ideal for gifts among friends, family, or employees.
“Personalization creates emotional connection. A simple set of initials can turn a utilitarian object into a treasured item.” — Daniel Ruiz, Industrial Designer & Craft Educator
Choosing the Right Type of Metal Keychain
Not all metal keychains respond equally well to personalization. The material affects how cleanly the initials imprint and how durable the result will be. Common metals used include:
- Stainless steel – Durable, rust-resistant, and excellent for engraving.
- Brass – Softer than steel, easier to stamp, but may tarnish over time.
- Aluminum – Lightweight and corrosion-resistant; good for light stamping.
- Silver-plated or copper – Aesthetic appeal but require careful handling during customization.
For beginners, brass or aluminum keychains are recommended due to their softer composition, which makes stamping easier without requiring excessive force. Stainless steel offers longevity but demands more precision and stronger tools.
Essential Tools and Materials
The method you choose—hand stamping, engraving, or etching—determines the tools required. Here’s a breakdown of what you’ll need for each approach:
| Method | Tools Required | Best For |
|---|---|---|
| Hand Stamping | Metal stamps (alphabet/number), bench block, hammer, masking tape, ruler | Beginners, tactile finish, gift-making |
| Engraving (Manual) | Graver, pivot tool, magnifier, lubricant | Detailed script, experienced users |
| Laser Engraving | Laser engraver machine, design software, safety goggles | Bulk production, precise fonts |
| Chemical Etching | Resist pen, ferric chloride solution, gloves, brush | Fine-line designs, artistic touches |
For most home crafters, hand stamping provides the best balance of accessibility and visual impact. It requires minimal investment and yields crisp, legible results when executed carefully.
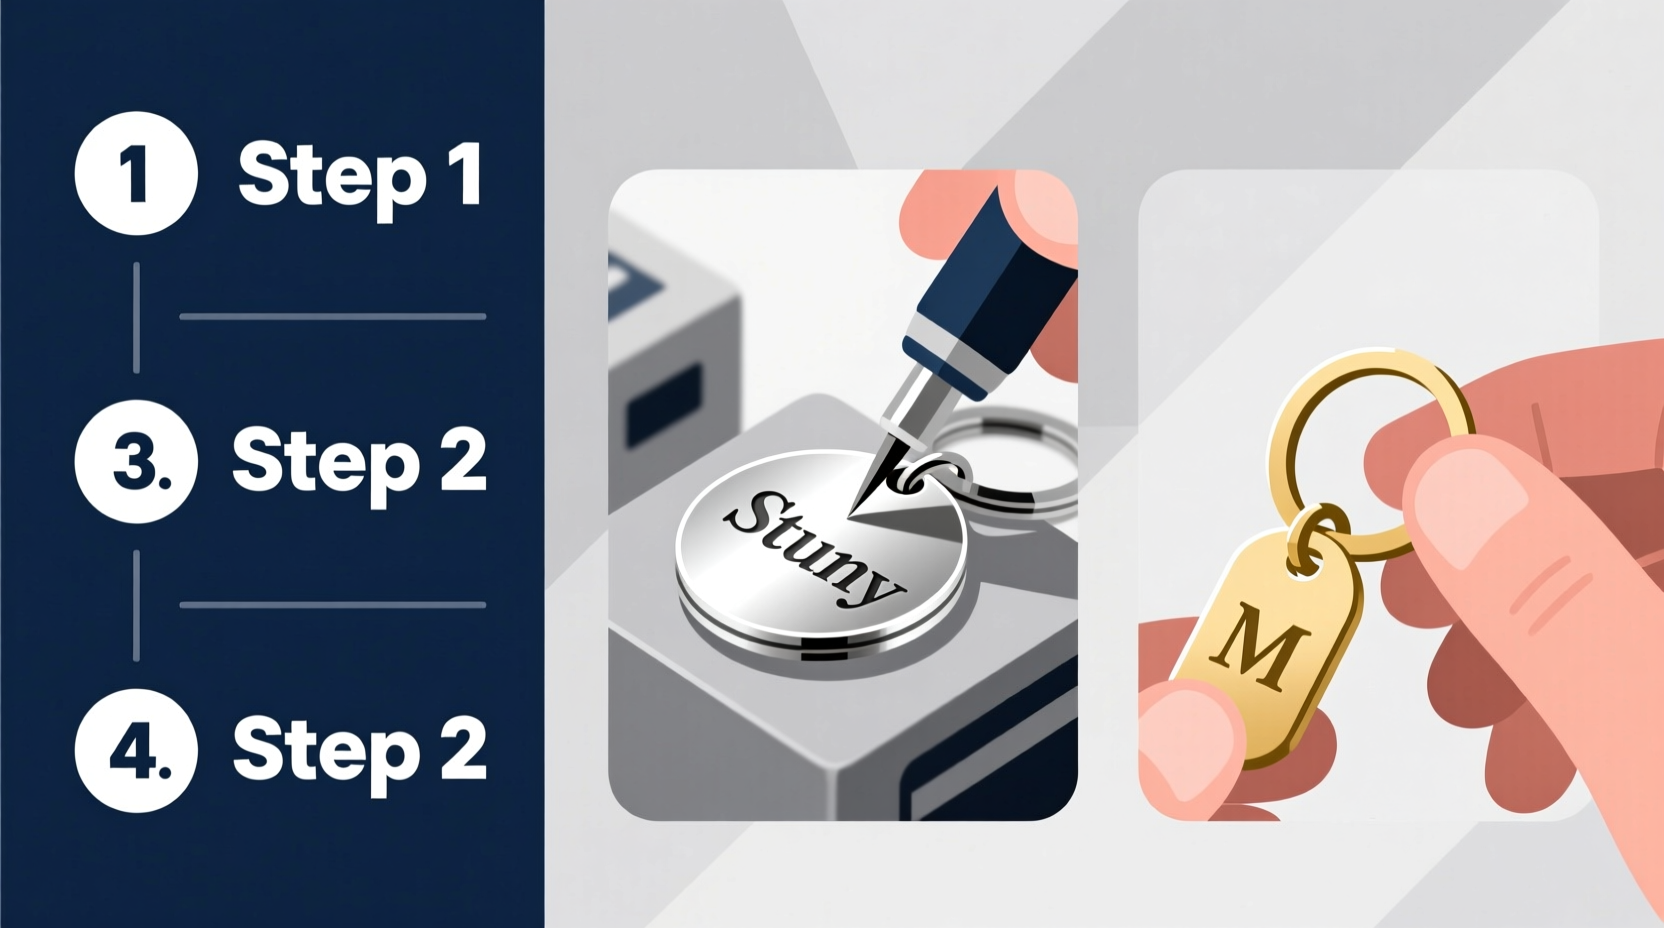
Step-by-Step Guide to Hand Stamping Initials
Hand stamping involves impressing individual letters into metal using hardened steel dies. Follow this sequence for consistent, aligned results:
- Select and clean the keychain: Wipe the surface with rubbing alcohol to remove oils or residue that could interfere with marking.
- Mark alignment points: Use a fine-tip marker and ruler to lightly draw a center line where the initials will go. For multiple letters, space them evenly—typically 3–5 mm apart.
- Tape the keychain in place: Secure it to a bench block or heavy-duty anvil using low-adhesive tape to prevent movement during stamping.
- Position the first stamp: Choose the correct letter die and place it firmly on the marked spot. Ensure it’s perpendicular to the surface.
- Strike with a single firm blow: Use a ball-peen hammer to deliver one sharp hit. Avoid multiple taps, as they cause double impressions.
- Repeat for remaining letters: Work from left to right, checking alignment after each stamp.
- Clean and polish: Remove tape, wipe off marks, and buff with a soft cloth. Optional: use metal polish for shine.
Avoiding Common Mistakes
Even experienced crafters make errors when rushing or skipping preparation. The following checklist helps ensure success:
📋 Keychain Personalization Checklist- ✅ Clean the metal surface before starting
- ✅ Secure the keychain to avoid slippage
- ✅ Double-check letter order (especially easy to reverse “M” and “W”)
- ✅ Use consistent hammer force for uniform depth
- ✅ Verify font style matches the intended look (block vs. script)
- ✅ Store tools properly to prevent chipping of stamp edges
Misaligned letters, crooked strikes, or inconsistent depth are common issues. These often stem from poor positioning or wobbling between hits. Using a vise or clamp to hold the keychain rigidly improves control significantly.
Real Example: Custom Keychains for a Wedding Gift Set
Sophia wanted to create matching keychains for her bridal party. She chose brushed stainless steel oval tags and decided on hand stamping each member’s initials in uppercase block font. After measuring the tag width, she calculated even spacing for three-letter monograms. She practiced on spare brass blanks until her strikes were clean and straight.
During production, she laid out all materials on a padded table, labeled each keychain with the recipient’s name, and worked one at a time. By using a jeweler’s loupe to inspect each impression, she caught minor misalignments early. The finished set included polished chains and small organza bags. Guests appreciated the thoughtful, handmade quality—many reported still using them years later.
Alternative Methods: When Stamping Isn’t Enough
For intricate designs or cursive scripts, hand stamping may not suffice. In such cases, consider these alternatives:
- Laser engraving: Offers pixel-perfect precision and supports logos or fonts. Ideal for business giveaways or high-volume orders.
- Electrochemical etching: Uses controlled current to dissolve metal in specific patterns. Best for detailed artwork or grayscale effects.
- Printed overlays: Not permanent, but useful for temporary branding using UV-resistant ink on metal surfaces.
While advanced tools deliver higher fidelity, they come with steeper learning curves and costs. For most personal projects, traditional stamping remains the preferred choice.
Frequently Asked Questions
Can I personalize already-used keychains?
Yes, as long as the surface is flat and undamaged. Clean thoroughly and assess whether prior scratches or dents will interfere with new markings.
How do I prevent the stamp from sliding on metal?
Use a center punch to make a tiny indentation before stamping. This guides the die into place and prevents lateral movement upon impact.
Are personalized keychains suitable for outdoor use?
Absolutely. Stainless steel and brass keychains withstand weather well. If using aluminum, consider applying a clear protective coating to resist oxidation.
Final Thoughts and Next Steps
Personalizing metal keychains with initials blends craftsmanship with sentiment. Whether you're making one for yourself or dozens for an event, the process rewards patience and precision. Each strike of the hammer adds character—not just to the metal, but to the story behind it.
Start small: gather basic tools, practice on inexpensive blanks, and refine your technique. As your confidence grows, experiment with spacing, layering, or combining stamping with polishing for contrast. The skills you develop here can extend to other metalcraft projects like dog tags, bookmarks, or custom jewelry.


 浙公网安备
33010002000092号
浙公网安备
33010002000092号 浙B2-20120091-4
Comments
No comments yet. Why don't you start the discussion?