
Creating a custom-printed silk shawl at home allows you to express your personal style while engaging in a rewarding craft. Silk’s natural luster and smooth texture make it an ideal canvas for artistic expression, but working with this delicate fabric requires precision and care. With the right materials, preparation, and technique, you can transfer intricate designs—hand-drawn, digital, or photographic—onto silk using methods that don’t require industrial equipment. This guide walks you through every stage, from concept to finished piece, ensuring professional-quality results in your own workspace.
Understanding Silk and Print Compatibility
Silk is a protein-based natural fiber derived from silkworms, known for its strength, sheen, and ability to hold dye deeply. Unlike cotton or polyester, silk reacts best to specialized dyes and printing processes that bond with its molecular structure. For home printing, two primary methods are viable: direct fabric paint application and iron-on transfer printing. While screen printing and steam-setting dyes yield museum-grade results, they demand advanced skills and ventilation. The approach outlined here prioritizes safety, accessibility, and durability without sacrificing visual impact.
Not all silk shawls are created equal. Opt for 100% pure mulberry silk with a tight weave (measured in mommes). Avoid blends or synthetic linings, as these interfere with ink absorption and heat transfer. A lightweight (12–16 momme) shawl offers the best balance between opacity and drape for printing.
“Silk demands respect—not fear. When treated properly, it rewards the artist with unmatched depth of color and luminosity.” — Lila Moreau, Textile Artist & Conservator
Materials and Preparation Checklist
Before beginning, gather all necessary supplies. Having everything ready prevents interruptions during time-sensitive steps like curing or heat-setting.
- 100% pure silk shawl (pre-washed and de-gummed)
- Silicone-coated transfer paper (for inkjet or laser printers)
- Design printed on transfer paper (mirror image if needed)
- Heat press or domestic iron with temperature control
- Parchment paper or Teflon sheet
- Soft brayer or squeegee (for smoothing)
- Flat, heat-resistant surface
- Gloves (to prevent oil transfer from hands)
Pre-Treatment Steps
- Wash the shawl: Use lukewarm water and mild pH-neutral detergent. Gently swirl; never wring. Air dry flat.
- Iron smooth: Set iron to low heat (silk setting), no steam. Remove all wrinkles.
- Handle with care: Wear gloves to avoid transferring skin oils, which can repel ink.
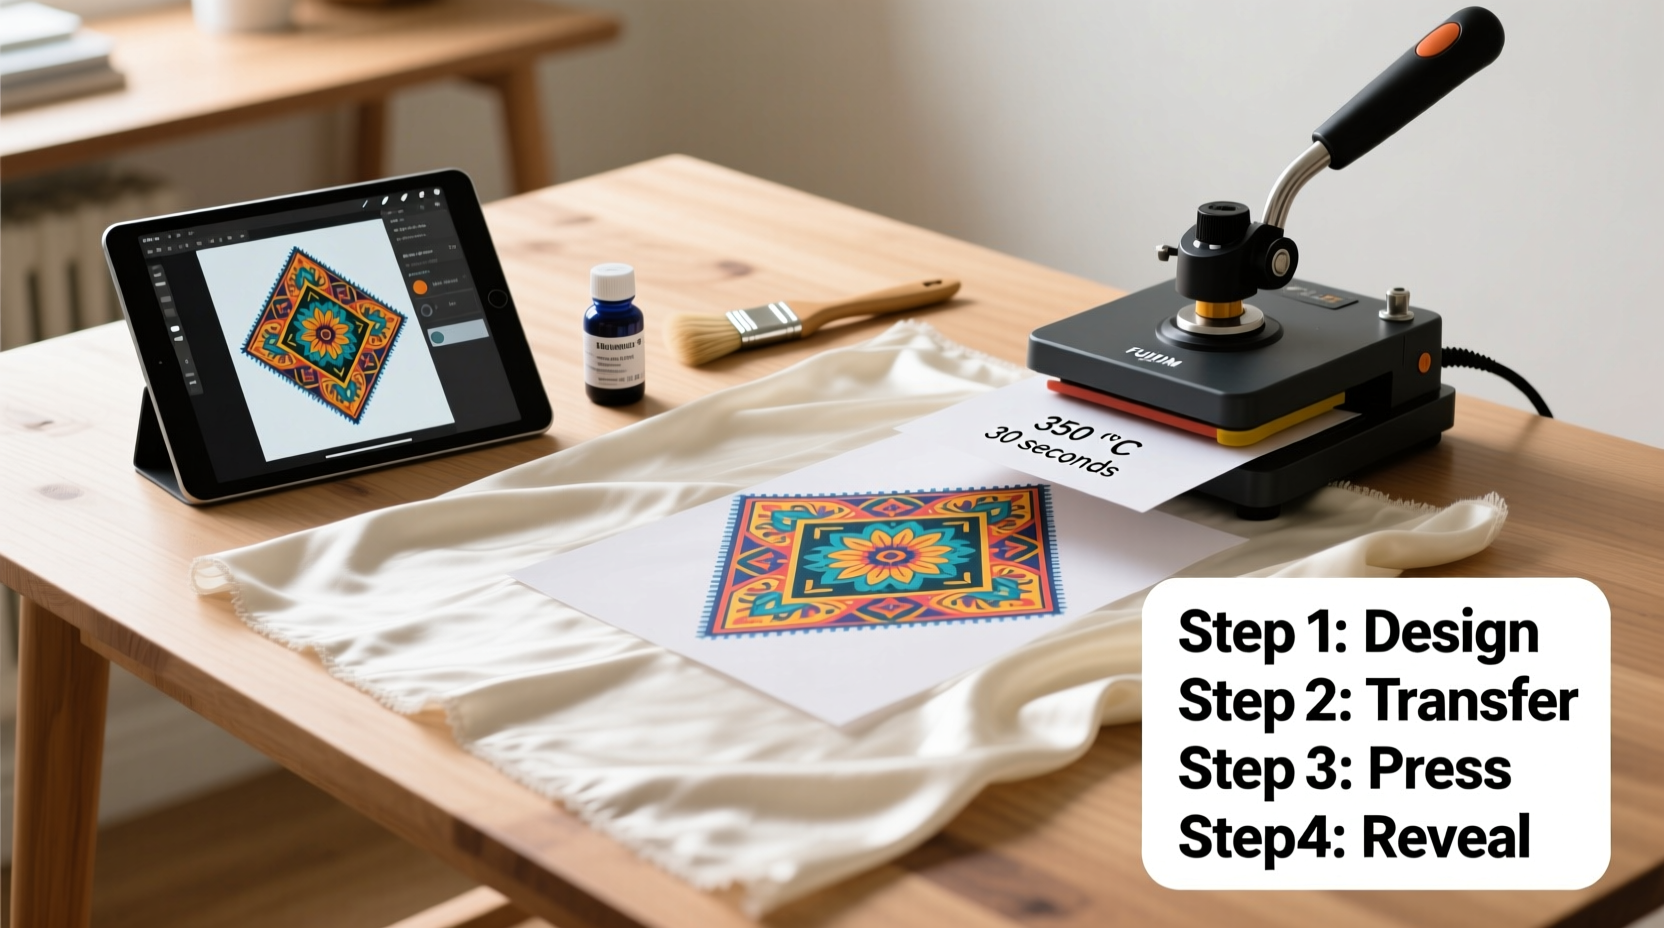
Design Creation and Transfer Process
Your design defines the final product. Whether it’s a floral motif, geometric pattern, or abstract artwork, ensure it’s optimized for silk’s fluid drape. Digital designs should be high-resolution (at least 300 DPI) and sized to fit the shawl’s dimensions, leaving a 1-inch border for handling.
If using a photo or complex illustration, print it in reverse (mirror image) when using transfer paper that requires face-down application. Most consumer iron-on papers specify orientation—follow manufacturer instructions precisely.
Step-by-Step Printing Procedure
- Position the transfer: Place the printed side of the transfer paper face down on the silk. Align carefully using pins or temporary tape at edges.
- Cover with parchment: Lay a sheet of parchment or Teflon over the transfer to protect the fabric and distribute heat evenly.
- Apply heat: Using a heat press set to 375°F (190°C), apply firm pressure for 45–60 seconds per section. If using an iron, press in overlapping 10-second intervals, applying steady downward pressure without sliding.
- Cool completely: Allow the shawl to cool undisturbed for at least 5 minutes before peeling off the transfer paper slowly at a 180-degree angle.
- Inspect and repress (if needed): Check for incomplete transfers. Reapply heat only to affected areas using reduced time to avoid scorching.
Post-Printing Care and Longevity Tips
Once printed, the design must be set permanently. While some transfer papers claim “no cure” properties, washing before heat-setting risks smudging. For maximum durability:
- Wait 24 hours before first wash to allow ink stabilization.
- Hand wash in cool water with silk-specific detergent.
- Air dry away from direct sunlight to prevent fading.
- Store flat or rolled, never folded sharply, to avoid cracking the print.
| Do | Don’t |
|---|---|
| Use acid-free tissue when storing | Hang silk long-term (causes stretching) |
| Press with low heat and cloth barrier | Use bleach or enzymatic cleaners |
| Rotate display to prevent light exposure | Machine wash or tumble dry |
Real Example: Maria’s Heirloom Shawl Project
Maria, a graphic designer in Portland, wanted to create a meaningful gift for her mother’s birthday. She combined a scanned sketch of her grandmother’s handwriting with a botanical border inspired by vintage embroidery. After converting the image to grayscale and mirroring it, she printed onto laser-compatible transfer paper using a borrowed office printer. Using a household iron on a marble countertop, she applied heat in 10-second bursts across the shawl’s surface. Though the first attempt showed slight ghosting near the edge, a second pass corrected the issue. The finished shawl, framed and displayed, became a cherished family heirloom—proof that thoughtful craftsmanship transcends technical perfection.
Frequently Asked Questions
Can I use a regular printer for silk transfers?
No—standard inkjet inks are not designed for fabric adhesion or wash resistance. You must use transfer paper specifically made for either inkjet or laser printers, depending on your machine type. Pigment-based inks perform better than dye-based ones for longevity.
How long will the print last?
With proper application and care, a well-set transfer can remain vibrant for years. Avoid frequent washing and UV exposure. Some artists report prints lasting over five years with minimal fading when stored correctly.
Is it possible to fix a misaligned transfer?
Once heat is applied, corrections are limited. If caught early—before full curing—you may gently reposition the paper with tweezers. However, once bonded, removal typically damages the silk. Precision in placement is critical.
Final Thoughts and Creative Encouragement
Printing your own design on a silk shawl transforms a simple accessory into a wearable story. Each step—from selecting the fabric to pressing the final corner—invites mindfulness and creativity. While silk may seem unforgiving, its responsiveness to quality technique makes the effort worthwhile. Mistakes are part of the process; even imperfect prints carry authenticity that mass-produced items lack.


 浙公网安备
33010002000092号
浙公网安备
33010002000092号 浙B2-20120091-4
Comments
No comments yet. Why don't you start the discussion?