
Monstera deliciosa, often called the Swiss cheese plant, has become a staple in modern indoor gardens thanks to its bold, fenestrated leaves and relatively easy care. But one of the most rewarding aspects of owning a Monstera isn’t just watching it grow—it’s multiplying it. Propagation allows you to expand your collection or share lush greenery with friends, all at minimal cost. Water propagation is among the most beginner-friendly methods, offering clear visibility into root development and requiring only basic supplies. This comprehensive guide walks you through every stage of propagating a Monstera in water, from selecting the right cutting to transplanting a healthy new plant.
Why Propagate Monstera in Water?
Water propagation is ideal for beginners because it provides real-time feedback. Unlike soil, where root growth remains hidden, water lets you monitor progress closely. You can see when roots emerge, detect rot early, and ensure optimal conditions throughout the process. Additionally, this method eliminates guesswork about moisture levels—overwatering is impossible when you’re growing in water.
Monstera plants respond well to water propagation due to their natural tendency to develop aerial roots. These roots, which normally cling to trees or moss poles in tropical environments, adapt quickly to submerged conditions. With proper technique, success rates are high, even for first-time propagators.
What You’ll Need: The Essential Supplies
Before making any cuts, gather the tools and materials needed for clean, successful propagation. Having everything ready ensures a smooth process and reduces stress on both you and the plant.
- Sharp pruning shears or scissors: Clean, sharp tools prevent damage to the parent plant and reduce the risk of infection.
- A healthy Monstera plant: Choose a mature specimen with visible nodes and aerial roots for best results.
- Clear glass jar or vase: Transparency helps you monitor root growth and water quality.
- Room-temperature water: Cold water can shock the cutting; warm water may encourage algae.
- Optional: Rooting hormone: While not required, it can accelerate root formation.
- Hydroponic nutrients (optional): After several weeks, adding a drop of liquid nutrient can support stronger root development.
“Water propagation demystifies plant reproduction. Seeing roots form builds confidence and deepens understanding of plant biology.” — Dr. Lena Torres, Botanist & Urban Horticulture Educator
Step-by-Step Guide to Taking and Preparing Your Cutting
The key to successful propagation lies in taking the right cutting. Not all parts of a Monstera will root effectively. Follow these steps carefully to maximize your chances of success.
- Identify a suitable stem section: Look for a vine segment that includes at least one node—the small, bump-like protrusion on the stem where leaves and aerial roots emerge. Nodes are essential; without them, no roots will form.
- Include a leaf and aerial root if possible: A cutting with one healthy leaf and an existing aerial root significantly increases success rates. The leaf supports photosynthesis, while the aerial root can transition into a water root.
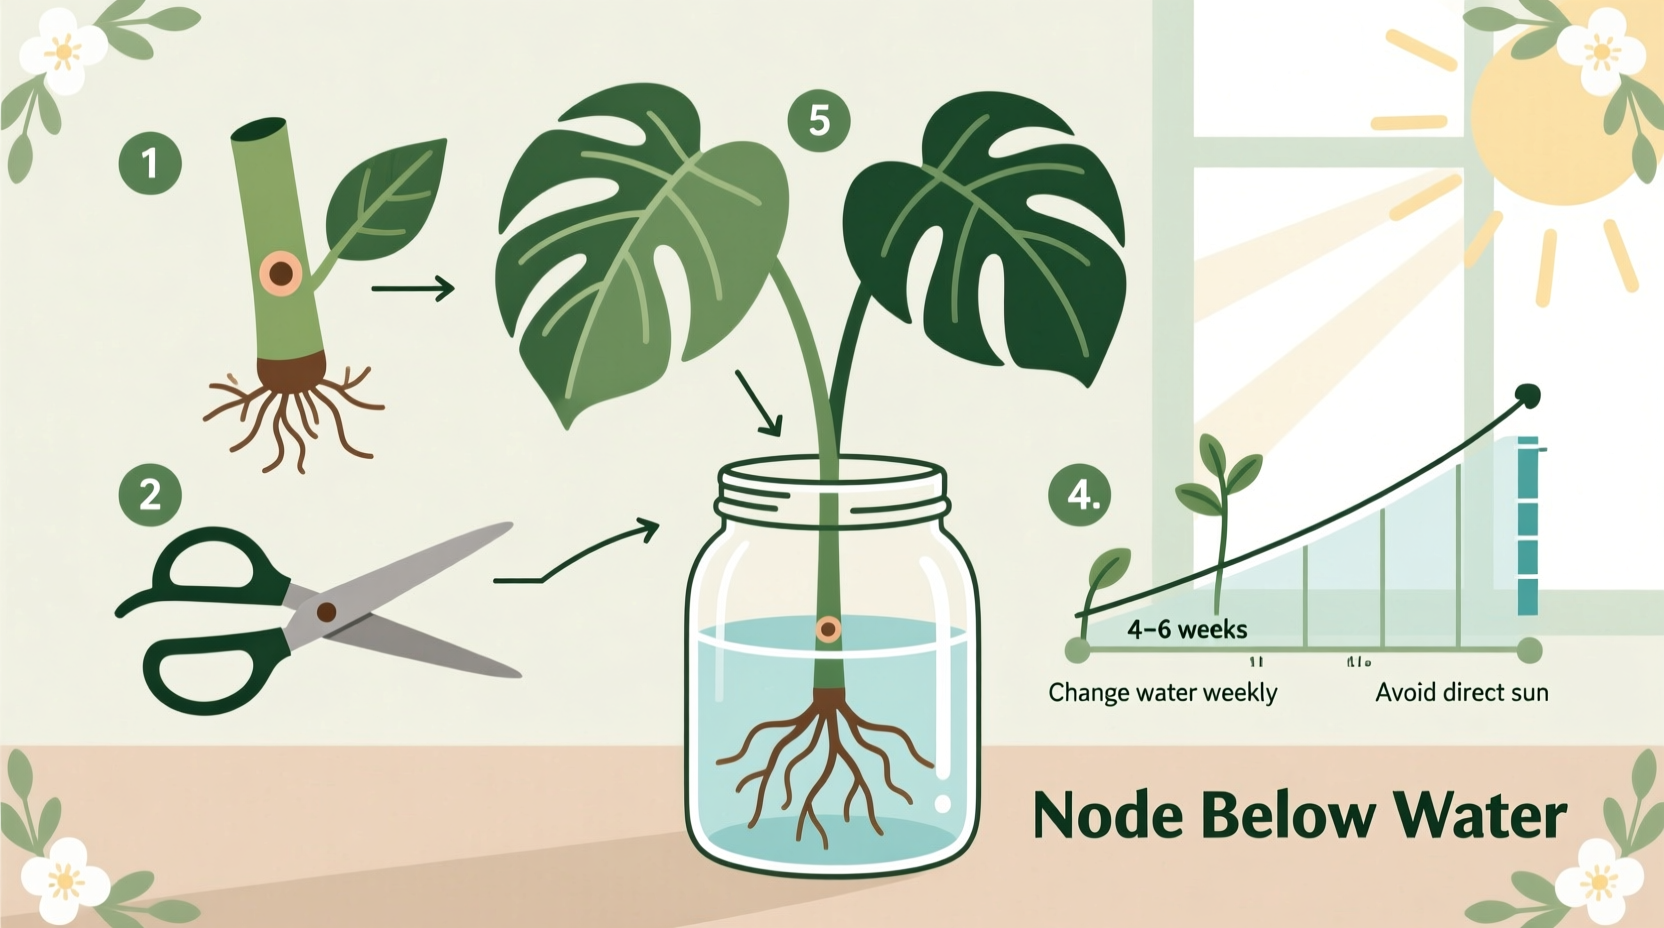
- Cut just below the node: Using sterilized shears, make a clean 45-degree cut about half an inch below the node. This angled cut increases surface area for water absorption.
- Remove lower leaves: If your cutting has multiple leaves, strip off any that would sit below the waterline. Submerged foliage can rot and contaminate the water.
- Rinse the cutting gently: Rinse the stem under lukewarm water to remove dust or sap, which can cloud the water and promote bacterial growth.
- Apply rooting hormone (optional): Dip the cut end into rooting hormone powder or gel, then shake off excess before placing it in water.
Setting Up the Propagation Environment
Once your cutting is prepared, placement and environment play crucial roles in root development. Monstera cuttings thrive under stable, bright, indirect light.
Place the jar in a location that receives consistent, filtered sunlight—near an east- or north-facing window is ideal. Avoid direct sun, which can overheat the water and scorch the leaf. Maintain room temperatures between 68°F and 80°F (20°C–27°C), away from drafts or heating vents.
Submerge only the node and any aerial root. The leaf should remain above water. If the node isn’t fully submerged, roots won’t form. Ensure the water level covers the node at all times, topping it off as needed due to evaporation.
| Do’s | Don’ts |
|---|---|
| Use a clean, transparent container | Use opaque or dirty vessels |
| Change water weekly | Let water become cloudy or stagnant |
| Keep in bright, indirect light | Place in direct sunlight or dark corners |
| Ensure the node is submerged | Submerge leaves or leave node dry |
| Use room-temperature water | Use cold or chlorinated tap water directly |
Real Example: Sarah’s First Monstera Propagation
Sarah, a novice houseplant enthusiast in Portland, decided to propagate her Monstera after noticing long vines crowding her living room shelf. She followed online advice but initially failed because she cut above the node, leaving no growth point. On her second attempt, she studied the stem closely, identified a node with a small aerial root, and made a clean cut below it. She placed the cutting in a recycled glass bottle filled with filtered water and positioned it near her kitchen window.
Within ten days, tiny white root nubs appeared. She changed the water every Friday and wiped the glass weekly to prevent algae. By week six, the roots were over two inches long. Today, that propagated Monstera thrives in a pot of its own and sits proudly on her desk—a symbol of her growing confidence as a plant caretaker.
Monitoring Growth and Maintenance Routine
Patience is essential. Root development typically begins within 7–14 days, but strong, transplant-ready roots take 4–8 weeks. During this time, consistent maintenance ensures healthy growth.
Change the water once a week to prevent bacterial buildup and oxygenate the cutting. When refilling, use fresh, room-temperature water. If you notice brown, mushy stems or foul odors, the cutting may be rotting—remove it immediately and start over with a new cutting.
Algae growth on the glass is common but harmless unless excessive. To minimize it, avoid direct sunlight and clean the container during water changes. If using nutrients, add only a single drop of hydroponic solution per cup of water every other week—over-fertilizing at this stage can burn developing roots.
When and How to Transplant to Soil
While some people keep Monsteras in water indefinitely, transferring to soil promotes stronger, more robust growth over time. The best time to transplant is when the roots are at least 2–3 inches long and have developed secondary branching.
- Choose a small pot (4–6 inches) with drainage holes.
- Fill it with a well-draining mix—combine two parts potting soil, one part perlite, and one part orchid bark.
- Carefully transfer the cutting, ensuring roots aren’t bent sharply.
- Water lightly after planting and keep the soil consistently moist (not soggy) for the first few weeks.
- Place the pot in the same bright, indirect light used during propagation.
Expect some leaf drooping or yellowing in the first week—this is normal as the plant adjusts to soil. Avoid fertilizing for at least four weeks post-transplant to prevent root burn.
Frequently Asked Questions
Can I propagate a Monstera leaf without a node?
No. A leaf alone cannot produce roots or a new plant. The node contains meristematic tissue responsible for new growth. Without it, the leaf may survive temporarily but will eventually yellow and die.
How long does it take for roots to appear?
Visible root nubs usually emerge within 7 to 14 days under optimal conditions. Full root systems suitable for transplanting typically take 4 to 8 weeks.
Can I propagate in the winter?
You can, but growth will be slower due to lower light levels and reduced metabolic activity in cooler temperatures. For best results, propagate in spring or early summer when the plant is actively growing.
Final Checklist for Success
- ✅ Select a healthy stem with at least one node
- Ensure the node is visible and undamaged.
- ✅ Make a clean, angled cut below the node
- Use sterilized tools to prevent infection.
- ✅ Submerge the node in clean water
- Keep leaves above the waterline.
- ✅ Place in bright, indirect light
- Avoid direct sun and cold drafts.
- ✅ Change water weekly
- Maintain clarity and oxygenation.
- ✅ Wait for 2–3 inch roots before transplanting
- Premature transfer reduces survival chances.
- ✅ Transition gently to well-draining soil
- Allow time for acclimation without overwatering.
Start Growing Today
Propagating a Monstera in water is more than a gardening task—it’s a lesson in patience, observation, and connection with nature. Each cutting holds the potential for a new life, a living heirloom passed from one generation of plant lovers to the next. Whether you're expanding your jungle or sharing green joy with a friend, the process is deeply satisfying. With the right approach, even a first-time gardener can succeed. Gather your tools, choose your cutting, and begin. In a matter of weeks, you’ll watch roots unfold like secrets revealed—and know you played a part in their growth.


 浙公网安备
33010002000092号
浙公网安备
33010002000092号 浙B2-20120091-4
Comments
No comments yet. Why don't you start the discussion?