
Reformatting a USB drive on Mac is a routine task that can restore performance, resolve compatibility issues, or prepare the drive for specific use cases like bootable installations or cross-platform file sharing. Over time, fragmentation, incorrect formatting, or corrupted data structures can degrade a USB drive’s efficiency. A proper reformat not only clears clutter but also allows you to choose the most suitable file system for speed, compatibility, and reliability. This guide walks you through the entire process with precision, offering expert insights and practical tips to ensure your USB drive operates at peak performance.
Why Reformatting Improves USB Drive Performance
USB drives, despite their simplicity, rely heavily on correct formatting to function optimally. When a drive is used across multiple operating systems or subjected to frequent write/delete cycles, its file system can become fragmented or misaligned. This leads to slower read/write speeds, mounting errors, or even data corruption. Reformatting resets the file system structure, eliminating inefficiencies and preparing the drive for consistent performance.
Additionally, choosing the right format—such as exFAT for cross-platform compatibility or Mac OS Extended (Journaled) for exclusive macOS use—can significantly impact speed and stability. A clean format also helps prevent hidden malware or residual boot files from interfering with normal operations.
“Proper formatting isn’t just about erasing data—it’s about optimizing the underlying structure for faster access and better longevity.” — Dr. Alan Zhou, Storage Systems Engineer at Pacific Data Labs
Before You Begin: Essential Precautions
Reformatting permanently erases all data on the USB drive. Before proceeding, ensure you have backed up any important files to your Mac or cloud storage. Connect the drive directly to a built-in USB port rather than using a hub, as this ensures stable communication during the process.
Also, verify the health of your USB drive. If it frequently disconnects, shows unusual behavior, or fails to mount, formatting may not resolve deeper hardware issues. In such cases, consider replacing the drive after backup.
Step-by-Step Guide to Reformatting a USB Drive on Mac
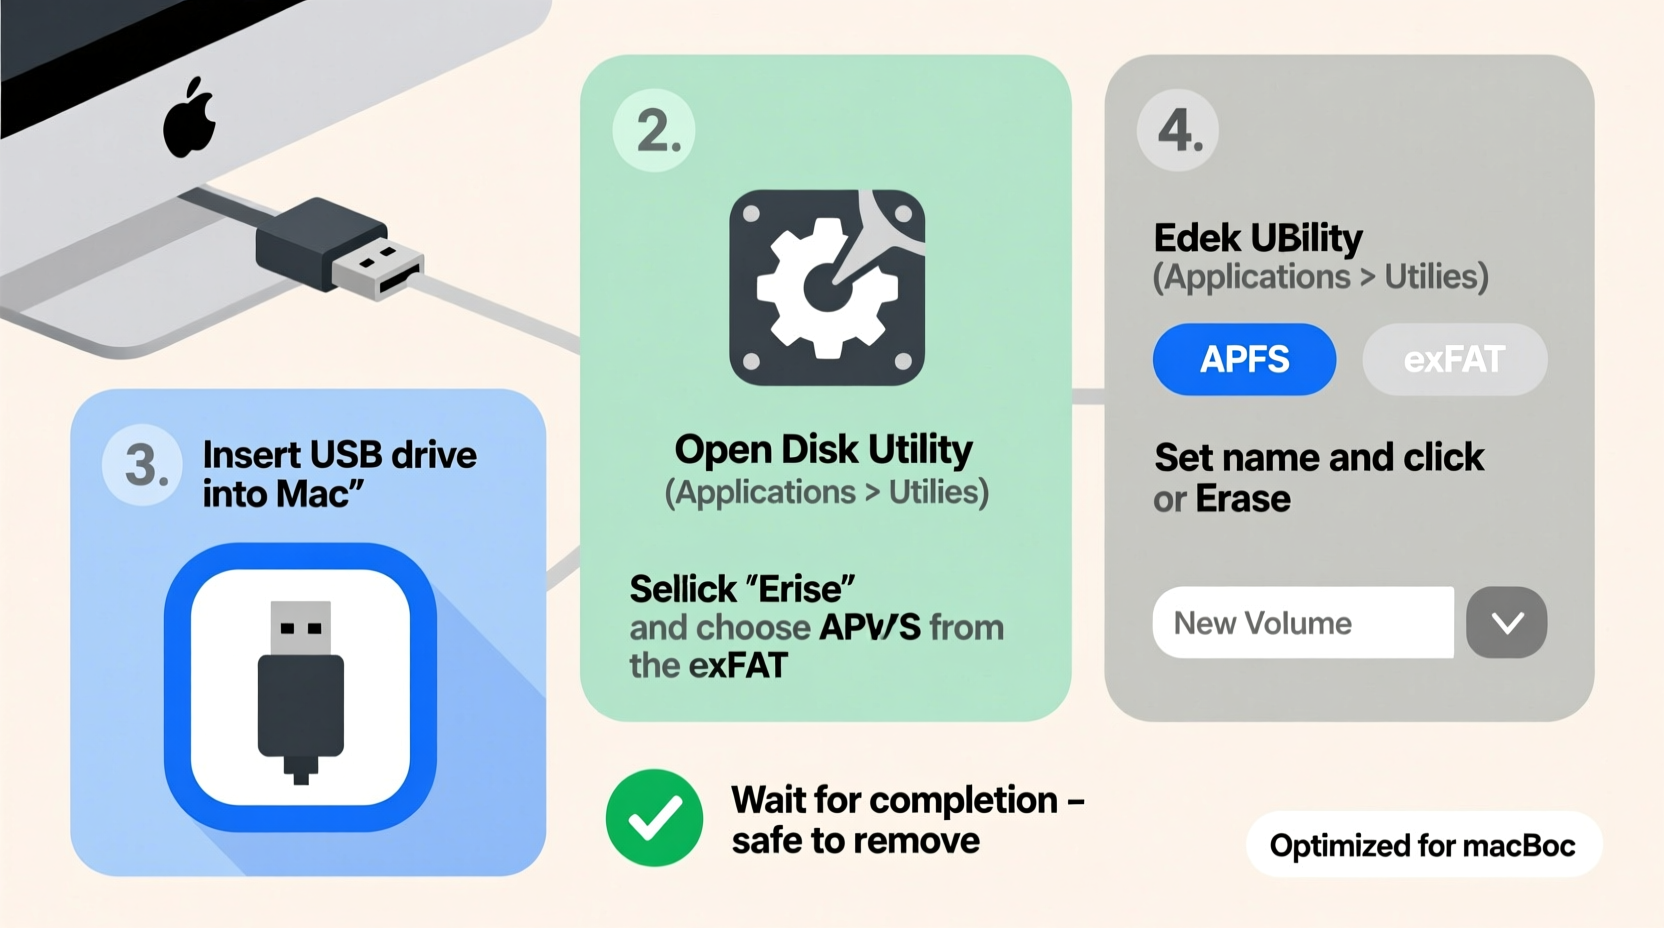
- Connect the USB drive to your Mac using a reliable port. Wait a few seconds for the system to recognize it.
- Open Disk Utility: Press Command + Space to launch Spotlight, type \"Disk Utility,\" and press Enter. Alternatively, navigate to Applications > Utilities > Disk Utility.
- Select the correct drive: In the left sidebar, locate your USB drive under “External.” Be careful to select the top-level device (e.g., “SanDisk Cruzer 32GB”) rather than just the volume beneath it. Selecting the wrong entry could affect internal drives.
- Click “Erase” in the toolbar. This opens the formatting options.
- Configure the settings:
- Name: Assign a descriptive label (e.g., “BackupDrive” or “BootInstaller”)
- Format: Choose based on intended use:
- Mac OS Extended (Journaled) – Best for Mac-only use; supports Time Machine and full metadata.
- APFS – Ideal for SSD-based USB drives used exclusively with macOS 10.13+; offers fast performance and encryption.
- exFAT – Recommended for cross-platform use (Mac and Windows); handles large files over 4GB.
- MS-DOS (FAT) – Legacy option for older systems; limited to 4GB file size.
- Scheme (Partition Map): For most users, select “GUID Partition Map” if the drive will be used with modern Macs or for bootable installers. Use “Master Boot Record” only for older Windows-compatible devices.
- Click “Erase” to begin the process. Wait for completion—this typically takes under a minute for standard drives.
- Eject the drive once the process finishes. Click the Eject button next to the drive in Disk Utility or Finder, then physically remove it.
Choosing the Right File System: A Comparison
| File System | Best For | Max File Size | Compatibility | Performance Notes |
|---|---|---|---|---|
| Mac OS Extended (Journaled) | Time Machine, Mac backups | 8 EB | macOS only | Reliable, journaling prevents corruption |
| APFS | SSD USB drives, macOS 10.13+ | Unlimited | Modern Macs only | Fast cloning, snapshots, encryption support |
| exFAT | Cross-platform file transfer | 16 EB | Mac, Windows, Linux (with support) | Balanced speed and compatibility |
| MS-DOS (FAT) | Older devices, small drives | 4 GB | Universal | Limited; avoid for HD video or large apps |
Real-World Example: Recovering a Sluggish Drive
Sophie, a freelance photographer, relied on a 64GB USB drive to transfer RAW image files between her MacBook Pro and client computers running Windows. Over time, she noticed the drive took longer to copy files and occasionally failed to mount. After backing up her portfolio, she reformatted the drive using exFAT via Disk Utility. The result? Transfer speeds improved by nearly 40%, and the drive worked seamlessly across both platforms. By aligning the file system with her workflow, Sophie extended the usable life of her hardware without purchasing a new drive.
Troubleshooting Common Formatting Issues
- “Disk Not Ejected Properly” Warning: This often occurs if the drive was removed mid-operation. Always use the Eject command before unplugging.
- “Could Not Unmount Disk” Error: Close any app accessing files on the drive. Restart your Mac if necessary.
- Drive Doesn’t Appear in Disk Utility: Try a different USB port or cable. Test on another computer to rule out hardware failure.
- Formatting Fails Repeatedly: The drive may be failing. Use Disk Utility’s First Aid tool to check for errors. If unresolved, retire the drive.
diskutil list to identify the disk identifier, then run
diskutil eraseDisk FAT32 MYDRIVE MBRFormat /dev/diskX (replace X accordingly).
Frequently Asked Questions
Can I reformat a USB drive without losing data?
No—reformatting erases all data. Always back up files before starting. There are no safe shortcuts to reformat without data loss.
Which format is best for a bootable macOS installer?
Use Mac OS Extended (Journaled) with a GUID Partition Map. This ensures compatibility with macOS recovery tools and installation processes.
Does reformatting fix a slow USB drive?
It can—if slowness is due to file system bloat or incorrect formatting. However, if the drive has physical wear or controller issues, performance gains may be limited.
Final Checklist: Reformatting Done Right
- ✅ Backed up all data?
- Ensure nothing important remains on the drive.
- ✅ Chose correct file system?
- Match format to your primary use case: APFS/exFAT/Mac OS Extended.
- ✅ Selected top-level device in Disk Utility?
- Avoid selecting only the volume—choose the full drive entry.
- ✅ Used GUID Partition Map for Mac use?
- Necessary for bootable media and modern compatibility.
- ✅ Verified post-format performance?
- Test with real-world file transfers to confirm improvements.
Conclusion: Optimize Your Workflow with a Clean Start
Reformatting a USB drive is more than a cleanup—it’s a strategic optimization. Whether you're preparing for a critical project, troubleshooting performance hiccups, or ensuring seamless cross-platform collaboration, taking control of your drive’s format empowers you to work faster and more reliably. With the right settings and a methodical approach, you extend not just the life of your hardware, but the efficiency of your digital workflow.


 浙公网安备
33010002000092号
浙公网安备
33010002000092号 浙B2-20120091-4
Comments
No comments yet. Why don't you start the discussion?