
A broken bag strap doesn’t mean the end of your favorite handbag. Whether it snapped from overuse, frayed at the attachment point, or simply loosened over time, you can restore functionality—and even elevate style—by replacing it with a sturdy metal chain. Chain straps are not only resilient but also add a timeless, polished look to clutches, crossbodies, and shoulder bags. With basic tools and attention to detail, this repair is achievable at home, saving money and preserving sentimental or high-value accessories.
Why Choose a Chain Strap Replacement?
Leather, fabric, or synthetic straps degrade faster than hardware components. Chains, particularly those made from brass, stainless steel, or nickel-plated alloys, resist stretching, snapping, and wear far better. They maintain structural integrity under daily load and offer a sleek aesthetic that complements both casual and formal designs.
Fashion designers increasingly use chain accents not just for durability but for visual impact. Replacing a damaged strap with a chain turns a repair into a subtle redesign—breathing new life into an aging accessory.
“Upgrading to a chain isn’t just functional—it’s a small customization that can redefine a bag’s character.” — Lena Torres, Accessory Designer & Craft Instructor
Tools and Materials You’ll Need
Before beginning, gather all necessary supplies. Having everything ready ensures a smooth process and prevents mid-project delays.
| Item | Purpose | Recommended Specs |
|---|---|---|
| Chain strap (pre-made or custom-cut) | Main replacement component | Width: 4–6mm; Length: 20–26” depending on carry style |
| Spring snap hooks or lobster clasps (x2) | Connects chain to bag frame | Stainless steel, 8–10mm opening |
| Jump rings (x2) | Secure connection points | 6–8mm diameter, solid metal |
| Chain nose pliers or flat-nose pliers | Open/close jump rings safely | Smooth jaws to avoid scratching |
| Wire cutters (if modifying chain) | Cut excess links if needed | Hardened steel blades |
| Ruler or measuring tape | Ensure symmetrical length | Metric and imperial markings |
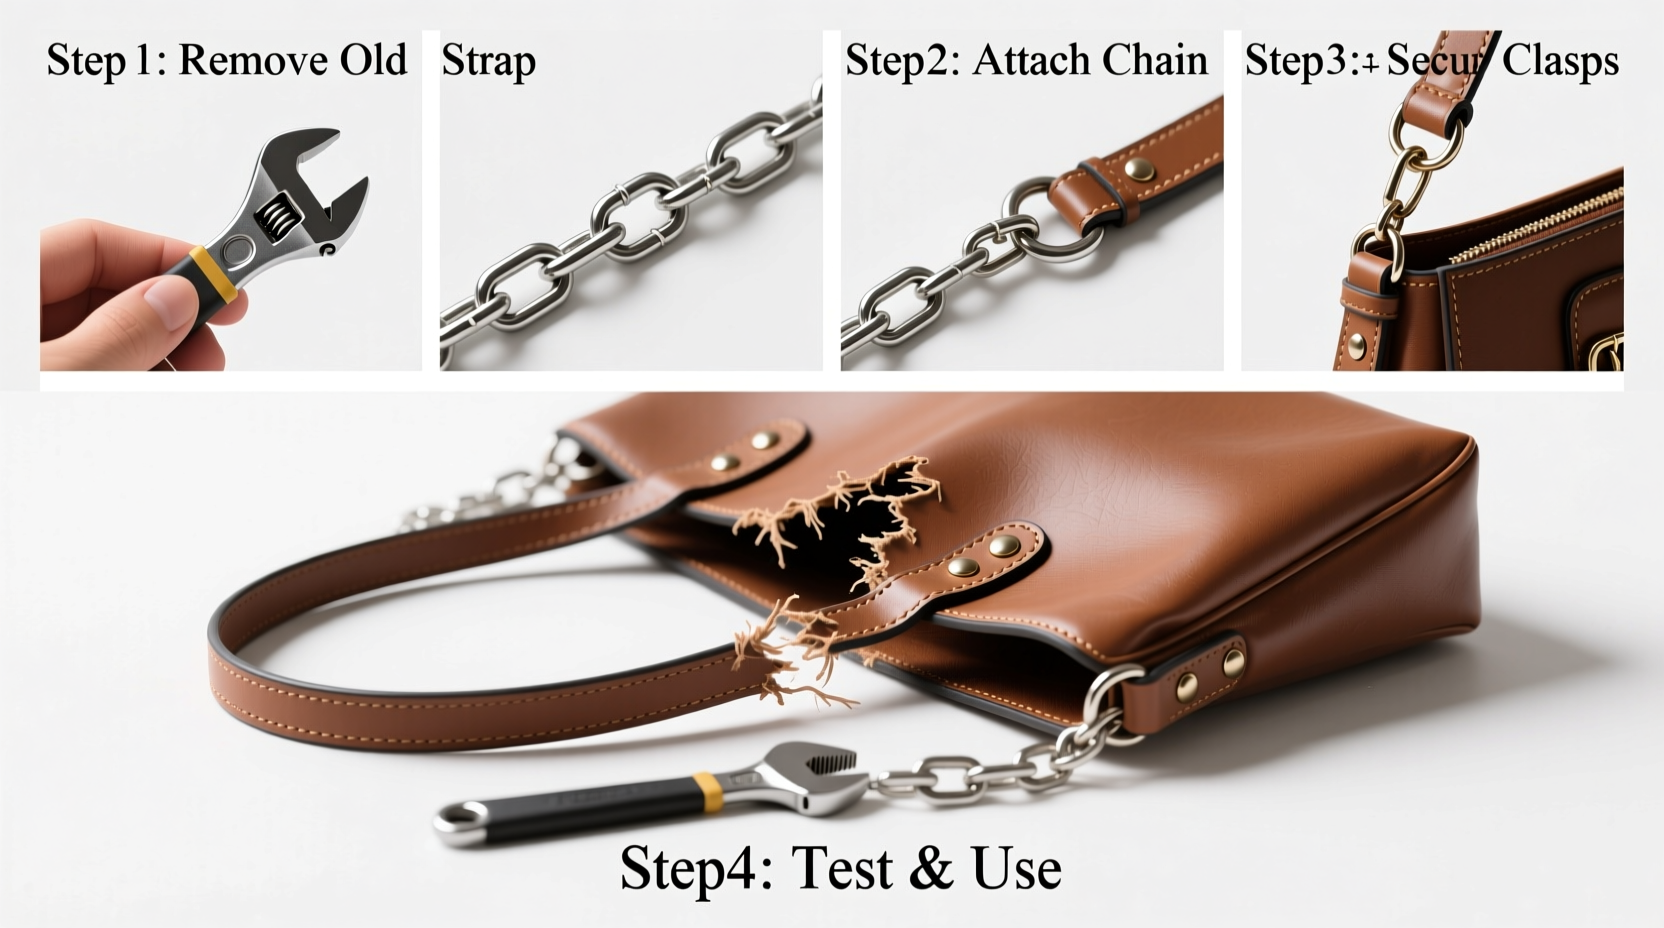
Step-by-Step Installation Process
Follow these steps carefully to ensure a secure, long-lasting installation. This method works for most handbags with looped or D-ring attachments.
- Remove the Broken Strap
Use pliers to gently open any connecting jump rings or unscrew hardware. If rivets or stitching hold the old strap, carefully cut them away using small scissors or a seam ripper, taking care not to damage the bag’s exterior or lining. - Inspect Attachment Points
Check the existing loops, D-rings, or metal frames where the strap connects. Ensure they’re intact and free of cracks or corrosion. Reinforce weak points with epoxy resin or replace them with new rivet-mounted connectors if necessary. - Cut Chain to Desired Length
Lay out the chain straight and measure twice. Most shoulder chains range from 22” to 26”, while crossbody styles run 48”–54”. Use wire cutters to snip through the link pin cleanly. Avoid crushing adjacent links during cutting. - Attach Jump Rings to Chain Ends
Open a jump ring by twisting it sideways (do not pull apart). Slide one end of the chain onto the ring, then connect it to a spring snap hook. Close the jump ring securely using two pairs of pliers—one to hold, one to twist shut. - Connect to Bag
Hook the snap ends onto the bag’s original anchor points. If no loops exist, install leather washers and rivets with reinforced backing plates to create new mounting hardware. - Test Stability and Adjust
Gently tug each side to verify connections. Swing the bag lightly to simulate movement. Make sure the weight distributes evenly and the chain doesn’t bind or catch on seams.
Finishing Touches
To prevent sharp edges on cut chain links, buff the ends lightly with fine-grit sandpaper. For added security, apply a drop of clear nail polish or threadlocker to the closed jump rings—this minimizes accidental openings due to vibration or friction.
Do’s and Don’ts of Chain Strap Maintenance
Once installed, proper care extends the lifespan of your new chain strap significantly.
| Do’s | Don’ts |
|---|---|
| Wipe down the chain weekly with a microfiber cloth | Submerge in water or expose to harsh cleaners |
| Store bag with strap loosely draped (not coiled tightly) | Hang bag by the chain for long periods—this stresses joints |
| Apply a tiny amount of machine oil to hinges annually | Use abrasive pads or bleach-based wipes |
| Inspect connections monthly for looseness | Overload the bag beyond its intended capacity |
Real Example: Reviving a Vintage Clutch
Sophia, a vintage fashion enthusiast, inherited a 1970s beaded evening clutch from her grandmother. The delicate silk strap had rotted at the base, leaving the bag unusable. Instead of reweaving fragile fabric, she opted for a slim, curb-style gold-toned chain.
She measured a 24-inch length, attached it via brass jump rings to the original ornate side loops, and added a small extender link for adjustable drop. The result was elegant, secure, and true to the era’s glam aesthetic. “It feels more authentic now,” Sophia said. “Chains were popular then, so it’s like restoring it the way it was meant to be.”
Expert Tips for Long-Term Success
- Match metal tones: Gold, silver, or gunmetal chains should coordinate with existing hardware (zippers, feet, logos) for a cohesive look.
- Balance weight: Heavy chains on lightweight bags can cause sagging or stress seams. Opt for hollow-link or lighter alloys when appropriate.
- Customize length: Shorter chains work for clutch conversion; longer ones allow crossbody versatility.
“A well-executed chain replacement can increase a bag’s usability by years. It’s one of the most cost-effective upgrades you can make.” — Marcus Reed, Handbag Restoration Specialist
Frequently Asked Questions
Can I replace a double strap with a single chain?
Yes, but consider balance. If the bag has two top handles, replacing both sides with a continuous chain maintains symmetry. Alternatively, convert it into a single-point suspension using a central connector bar for a modern drape.
What if my bag has no metal loops?
You’ll need to install anchor points. Use leather washers and rivets to attach small D-rings to strong areas near the top edge. Ensure stitches or glue don’t interfere with placement. Pre-punch holes with an awl to avoid tearing.
Are chain straps comfortable on the shoulder?
Some find bare chains digging into shoulders. To improve comfort, add a padded sleeve made from faux fur, silicone tubing, or slip-on fabric guards. These slide over the chain and distribute pressure without compromising style.
Final Checklist Before You Begin
- ☐ Assess the bag’s structure and identify secure attachment zones
- Look for reinforced panels or existing hardware.
- ☐ Choose the right chain type and finish
- Match aesthetics and strength to your bag’s purpose.
- ☐ Measure accurately for ideal drop height
- Shoulder carry: 20–26”; Crossbody: 48–54”.
- ☐ Prepare tools and workspace
- Use a non-slip mat and good lighting.
- ☐ Test fit and adjust before finalizing connections
- Make sure movement is smooth and balanced.
Conclusion: Transform Damage Into Design
A broken strap is an inconvenience, not a sentence of retirement for your favorite bag. By upgrading to a durable chain, you enhance both resilience and elegance—turning a repair into a personalized upgrade. With careful measurement, quality materials, and precise execution, you can achieve results rivaling boutique-level craftsmanship.


 浙公网安备
33010002000092号
浙公网安备
33010002000092号 浙B2-20120091-4
Comments
No comments yet. Why don't you start the discussion?