
Wall clocks, especially antique or decorative models, often fall out of sync due to worn-out internal mechanisms. Rather than discarding a cherished timepiece, replacing the clock movement is an affordable and satisfying solution. With the right tools and attention to detail, you can restore accurate timekeeping in under an hour. This guide walks through the entire process—from identifying your current movement to selecting a replacement and installing it correctly.
Understanding Wall Clock Movements
A clock’s “movement” is the internal mechanism that drives the hands and keeps time. Most modern wall clocks use quartz movements powered by batteries, which are reliable, affordable, and easy to replace. Mechanical movements, found in older or heirloom clocks, rely on springs and gears but require more expertise to repair or replace.
For most homeowners, replacing a quartz movement is straightforward. These units typically include the motor, gear train, and hand shafts in one compact module. When the clock stops, runs too fast, or makes irregular ticking sounds, the movement is likely failing and should be replaced.
“Over 80% of wall clock issues stem from degraded movements, not damaged dials or cases. Replacing the movement can breathe new life into even decades-old clocks.” — James Holloway, Horology Technician
Essential Tools and Materials
Before starting, gather the necessary tools. Most replacements require only basic supplies:
- Replacement quartz clock movement kit (includes hands and shaft nut)
- Small screwdriver set
- Needle-nose pliers
- Ruler or caliper (to measure shaft length and dial thickness)
- Battery (usually AA or C-cell, depending on movement size)
- Gloves (to prevent fingerprints on components)
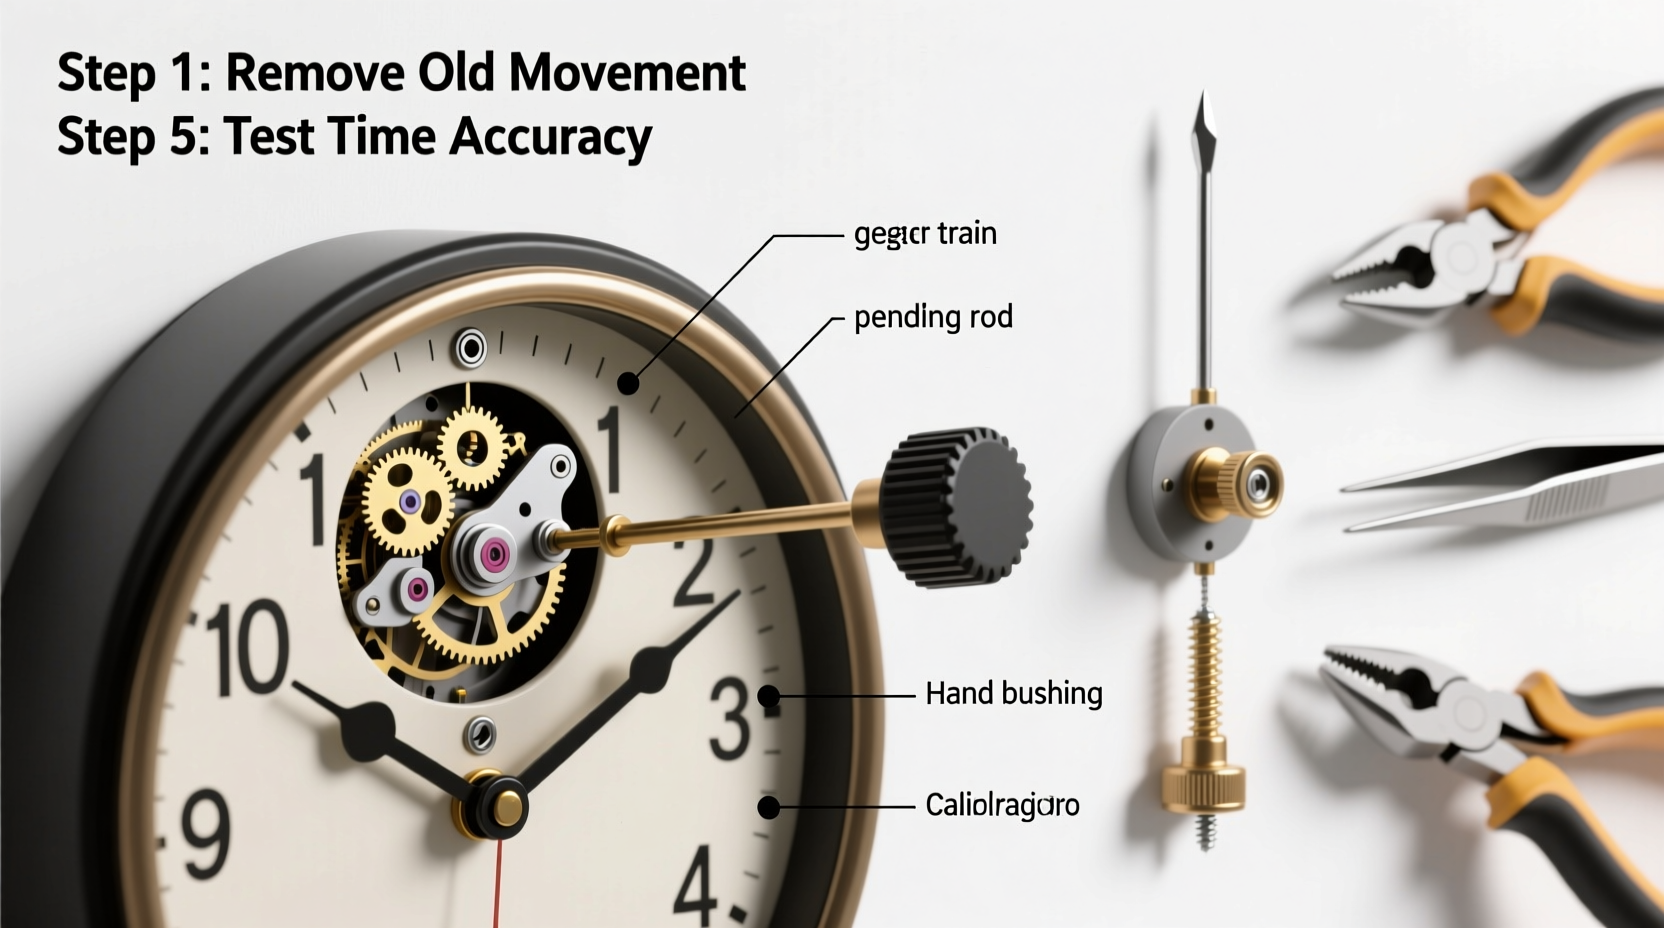
Step-by-Step Guide to Replacing the Movement
- Remove the clock from the wall and lay it face-up on a soft surface to protect the glass or face.
- Take off the battery and remove the second hand by gently pulling it straight off the shaft. Use needle-nose pliers if needed, but avoid squeezing the hand.
- Remove the hour and minute hands. The minute hand usually has a small washer or friction fit. The hour hand slips over a smaller post and can be pulled off carefully.
- Unscrew or unclip the movement housing. Most movements are secured by a single hex nut or mounting bracket at the back of the clock face. Remove this to free the movement.
- Extract the old movement. Pull it gently from the front. Note the length of the shaft extending through the dial—this determines compatibility with the new unit.
- Select the correct replacement movement. Match the shaft length, dial thickness, and thread size. Standard movements fit dials up to 3/8 inch thick; thicker dials require extended shafts.
- Insert the new movement from the front. Slide the shaft through the dial hole and secure it from behind with the provided nut. Do not overtighten.
- Reattach the hands in order: hour hand first, then minute hand with its washer, and finally the second hand.
- Insert the battery and test the movement. Adjust the time using the time-setting knob, usually located on the back of the movement.
- Hang the clock and observe for 24 hours to confirm consistent, accurate operation.
Choosing the Right Replacement Movement
Not all clock movements are interchangeable. Using the wrong type can lead to poor performance or damage to the clock face. Below is a comparison of common movement types and their ideal applications.
| Movement Type | Best For | Power Source | Accuracy | Installation Difficulty |
|---|---|---|---|---|
| Standard Quartz | Round wall clocks (10–14” diameter) | AA Battery | ±1 min/month | Easy |
| Extended Shaft Quartz | Clocks with thick wood or metal faces | AA or C Battery | ±1 min/month | Easy-Moderate |
| Silent Sweep Quartz | Bedrooms, offices (noise-sensitive areas) | AA Battery | ±1 min/month | Easy |
| Mechanical Wind-Up | Antique or decorative clocks | Mainspring (hand-wound) | ±5 min/week | Difficult |
Real Example: Restoring a 1970s Kitchen Clock
Sarah, a homeowner in Portland, inherited a mid-century wall clock from her grandmother. Though beautiful, it hadn’t kept time in years. She removed the hands and measured the shaft protruding through the 3/4-inch wooden face. Realizing she needed an extended-shaft movement, she ordered a C-battery-powered quartz unit with longer threading.
After installation, the clock ran perfectly. Sarah also upgraded to a silent sweep model so it wouldn’t disturb early morning routines. The entire project cost $18 and took less than 30 minutes. “It feels like my grandmother is still keeping time in the kitchen,” she said.
Common Mistakes to Avoid
- Using incorrect hand sizes: Overly long hands can rub against each other or the glass, causing the movement to stall.
- Overtightening the mounting nut: This can warp thin dials or strip plastic threads.
- Installing hands in the wrong order: The hour hand must go on first, followed by the minute hand washer, then the second hand.
- Ignoring battery corrosion: Always clean the battery compartment before inserting a new battery to prevent connection issues.
Frequently Asked Questions
Can I replace a mechanical movement with a quartz one?
Yes, in most cases. Quartz movements are easier to install and maintain. You may need to modify the mounting hole slightly, but adapters are available. This conversion is common in vintage clock restoration.
How long do quartz clock movements last?
Typically 1–3 years per battery, with the movement itself lasting 5–10 years under normal conditions. Exposure to humidity or temperature extremes can shorten lifespan.
Why is my new movement not working after installation?
First, check the battery orientation and voltage. Then ensure all hands are properly seated and not touching each other or the dial. If the second hand doesn’t move, verify it’s fully snapped onto the shaft.
Final Checklist Before Completion
- ✔️ Measure the shaft and dial thickness
- Ensure compatibility with the new movement.
- ✔️ Confirm hand sizes match the clock face
- Minute hand should extend close to the edge without touching numbers or glass.
- ✔️ Test the movement outside the clock (optional)
- Attach hands and battery before final installation to confirm operation.
- ✔️ Clean the clock interior
- Remove dust and old lubricant residue to prevent interference.
- ✔️ Set the correct time and monitor accuracy
- Adjust as needed over the first few days.
Conclusion
Replacing a wall clock’s movement is a simple yet impactful home maintenance task. Whether restoring a family heirloom or refreshing a forgotten decor piece, the process revitalizes both function and sentiment. With minimal investment and careful attention to specifications, accurate timekeeping is easily restored. Don’t let a broken clock gather dust—revive it with confidence and keep time moving forward.


 浙公网安备
33010002000092号
浙公网安备
33010002000092号 浙B2-20120091-4
Comments
No comments yet. Why don't you start the discussion?