
Connecting wires in parallel is a fundamental skill in electrical work, essential for distributing power evenly across multiple devices or loads. When done correctly, parallel wiring ensures stable voltage delivery, reduces circuit strain, and enhances system reliability. However, improper connections can lead to overheating, short circuits, or fire hazards. This guide walks through the process with precision, safety, and best practices in mind—ensuring your electrical installations perform efficiently and last longer.
Understanding Parallel Wiring: The Basics
In a parallel circuit, each component receives the full voltage of the source because all positive leads are connected together, as are all negative (or neutral) leads. Unlike series circuits, where current flows through one device after another, parallel wiring allows independent operation: if one device fails, others continue to function normally.
This configuration is commonly used in household lighting, outlets, automotive systems, and solar panel arrays. The key advantage lies in consistent voltage supply and load independence. However, it demands careful planning—especially regarding wire gauge, load capacity, and connection integrity.
“Parallel circuits offer flexibility and redundancy, but only when installed with proper wire sizing and secure terminations.” — James Rutherford, Master Electrician & NEC Consultant
Essential Tools and Materials
Before beginning any electrical work, gather the right tools and materials. Using substandard equipment increases the risk of poor connections, arcing, or insulation damage.
- Wire strippers (adjustable for different gauges)
- Needle-nose pliers
- Lineman’s pliers
- Voltage tester (non-contact preferred)
- Multimeter
- Insulated screwdrivers
- Heat-shrink tubing or wire nuts (UL-listed)
- Electrical tape (rated for 600V minimum)
- Copper wires of appropriate gauge (e.g., 14 AWG for 15A circuits)
- Junction box (if required by code)
Step-by-Step Guide to Connecting Wires in Parallel
Safety and accuracy are paramount. Follow this sequence to make secure, code-compliant parallel connections.
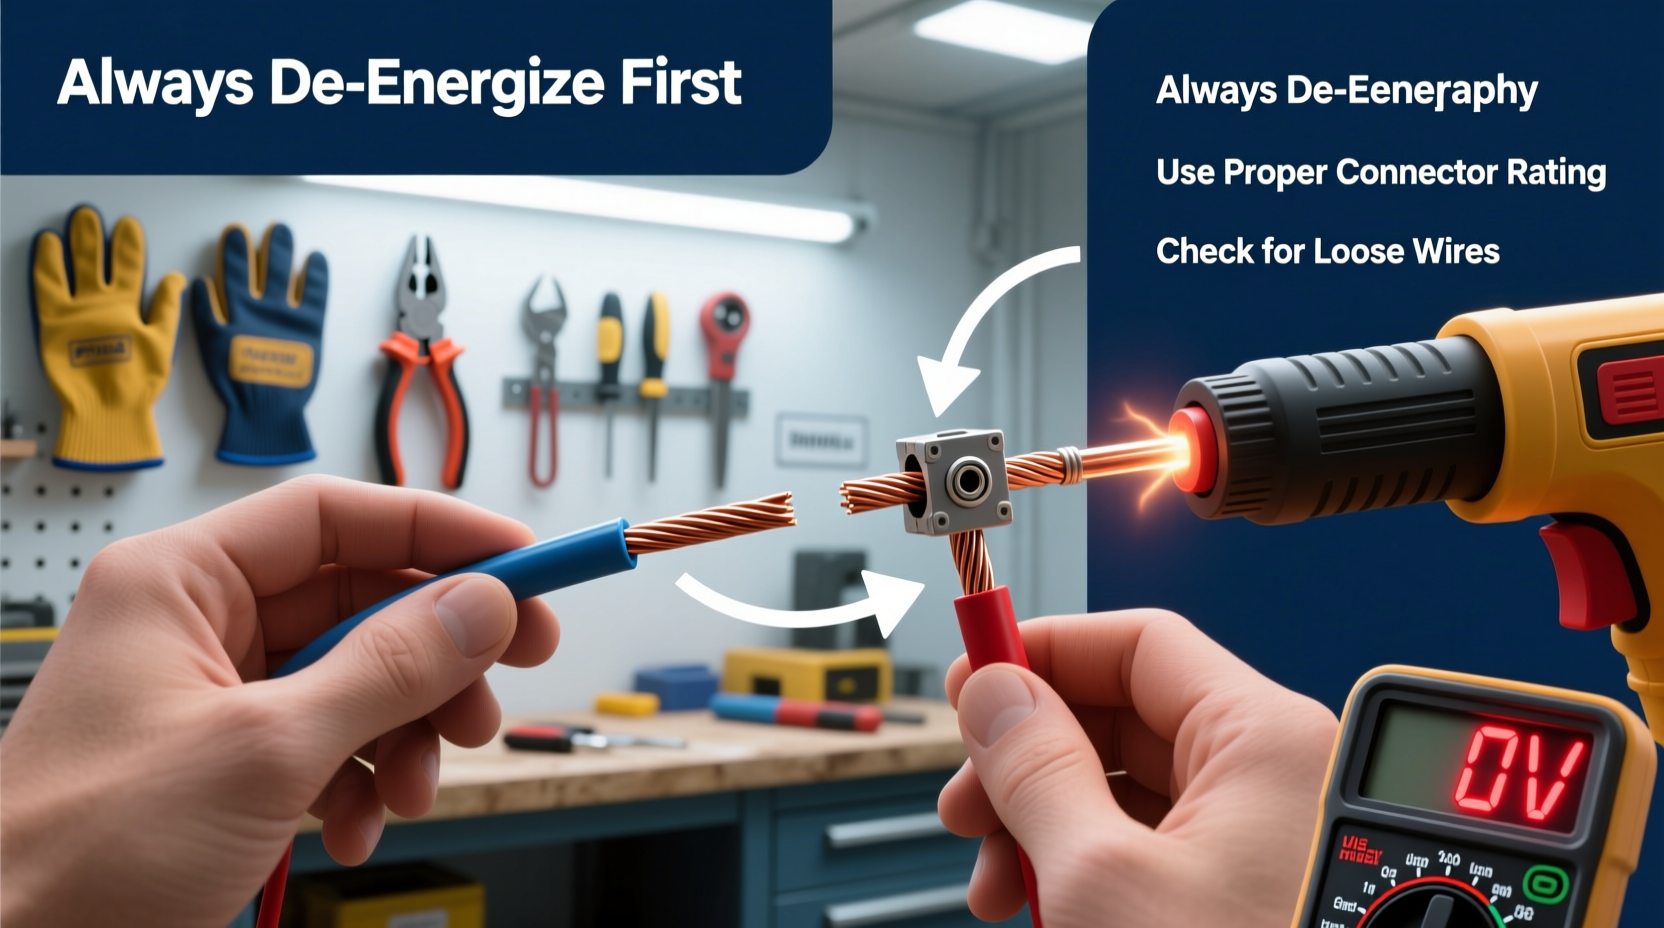
- Turn Off Power: Shut off the circuit at the main breaker panel. Lock out the breaker if possible to prevent accidental re-energizing.
- Verify No Voltage: Use a non-contact voltage detector followed by a multimeter to confirm zero voltage at the work point.
- Prepare Wires: Strip approximately ¾ inch of insulation from each wire end using wire strippers. Avoid nicking the copper strands.
- Group Conductors: Bring together all hot (typically black or red) wires that will be connected in parallel. Repeat separately for neutral (white) and ground (bare/green) wires.
- Twist Wires Securely: Hold the stripped ends side by side and twist them clockwise using lineman’s pliers. Ensure all strands are tightly interwoven.
- Cap Connections: Place a UL-listed wire nut over the twisted joint, twisting until no bare wire is exposed. Gently tug on each wire to test grip strength.
- Insulate Further (Optional): Wrap the base of the wire nut with electrical tape to prevent loosening due to vibration or thermal cycling.
- Secure in Junction Box: If applicable, mount the connected wires inside a properly sized junction box with clamps to relieve strain on terminals.
- Label Connections: Mark each wire or group if future maintenance is anticipated, especially in complex setups like solar arrays or control panels.
- Restore Power and Test: Turn the breaker back on. Use a multimeter to verify voltage across each branch and ensure continuity.
Common Mistakes and How to Avoid Them
Even experienced electricians occasionally overlook critical details. Below is a comparison of correct practices versus frequent errors.
| Do’s | Don’ts |
|---|---|
| Use wire nuts rated for the number and gauge of wires being joined | Overcrowd a wire nut beyond its capacity |
| Ensure all grounds are bonded together and connected to the grounding system | Leave ground wires unconnected or floating |
| Support wires so no tension is placed on terminal screws | Pull wires tight into fixtures, risking loose connections |
| Match wire gauge to amperage load (e.g., 12 AWG for 20A circuits) | Mix different gauges without calculating derating factors |
| Install junction boxes where required and keep them accessible | Bury splices in walls or ceilings without a box |
Real-World Example: Upgrading Garage Lighting
A homeowner wanted to add two additional LED shop lights to an existing garage ceiling fixture powered by a 15-amp circuit. Instead of daisy-chaining in series, they opted for a parallel setup to maintain brightness and reliability.
They turned off the breaker, opened the junction box, and identified the incoming hot, neutral, and ground. Using 14 AWG stranded wire, they created pigtails—short lengths of wire connecting the source to each light independently. Each pigtail was securely twisted and capped with a red wire nut capable of handling three 14 AWG wires. After mounting the new fixtures and double-checking all connections, they restored power. All four lights operated simultaneously at full brightness, with no flickering or voltage drop.
The success stemmed from proper load calculation (total draw under 12 amps), correct wire gauge, and secure parallel terminations—all within NEC guidelines.
Checklist: Safe Parallel Wiring Installation
Use this checklist before, during, and after installation to ensure compliance and safety.
- ☐ Circuit power is OFF and locked out
- ☐ Voltage confirmed absent with tester and multimeter
- ☐ Wire gauge matches circuit amperage and load requirements
- ☐ All connections are tight and fully insulated
- ☐ Ground wires are bonded and secured
- ☐ Splices are housed in approved junction boxes
- ☐ Load does not exceed 80% of circuit capacity
- ☐ Final inspection includes visual check and operational test
Frequently Asked Questions
Can I connect different gauge wires in parallel?
No. Mixing wire gauges in a parallel circuit can cause uneven current distribution. The smaller wire may overheat since it carries more current than intended. Always use uniform gauge unless specifically designed and calculated for balanced sharing, which is rare in residential applications.
Is it safe to use wire nuts for outdoor connections?
Only if they are rated for wet locations. Standard wire nuts should be replaced with gel-filled or waterproof versions when used outdoors or in damp areas. These seal out moisture and prevent corrosion over time.
How many wires can I connect under one terminal?
Most terminals are designed for one wire only. To connect multiple wires, create a pigtail: join the wires with a wire nut and run a single wire from the bundle to the terminal. This prevents loosening and ensures reliable contact.
Final Thoughts and Action Steps
Properly connecting wires in parallel isn't just about making things work—it's about ensuring they work safely, efficiently, and durably. Whether you're upgrading a lighting circuit, installing appliances, or building a custom electrical system, attention to detail separates functional results from hazardous ones.
Take the time to plan your circuit load, select the right components, and follow every step with care. Recheck your work, respect electrical codes, and never rush a connection. Your diligence today prevents failures—and risks—tomorrow.


 浙公网安备
33010002000092号
浙公网安备
33010002000092号 浙B2-20120091-4
Comments
No comments yet. Why don't you start the discussion?