
Travel toothbrushes are designed for portability and convenience, but their compact structure often makes them difficult to clean thoroughly. Over time, trapped moisture and residual toothpaste can create an environment conducive to bacterial growth. Many models feature detachable heads or collapsible handles to fit into small cases, yet users often avoid disassembling them due to uncertainty about proper handling. When done correctly, regular detachment and reassembly not only improve hygiene but also extend the life of the toothbrush. This guide provides a clear, safe process for taking apart and putting back together your travel toothbrush, ensuring it remains both functional and sanitary.
Why Detach Your Travel Toothbrush?
Unlike standard toothbrushes, travel versions are engineered with space-saving mechanisms—snap-on caps, telescoping handles, or interchangeable heads. While these features enhance portability, they can trap debris and water if not properly maintained. A study published in the *Journal of Dental Hygiene* found that enclosed toothbrush storage containers increased microbial retention by up to 300% compared to open-air drying. Disassembling your travel toothbrush allows each component to dry completely, reducing mold and bacteria accumulation.
Additionally, inspecting individual parts during cleaning helps identify early signs of wear, such as cracked seals or loose hinges, preventing sudden breakage during trips. Regular maintenance ensures reliable performance when you're away from home.
Tools and Materials You’ll Need
No special tools are required for most travel toothbrush models, but having a few basic items on hand makes the process easier and more effective:
- A soft-bristled cleaning brush (e.g., an old toothbrush)
- Mild liquid soap or antibacterial mouthwash
- Lukewarm water
- Clean microfiber towel or paper towels
- Small bowl or container for soaking
- Optional: cotton swabs for tight crevices
Ensure all materials are clean and dedicated solely to hygiene purposes. Avoid using abrasive cleaners or harsh solvents, which can degrade plastic components over time.
Step-by-Step Guide to Safe Detachment and Reassembly
Follow this structured sequence to disassemble, clean, and reassemble your travel toothbrush without damaging its components.
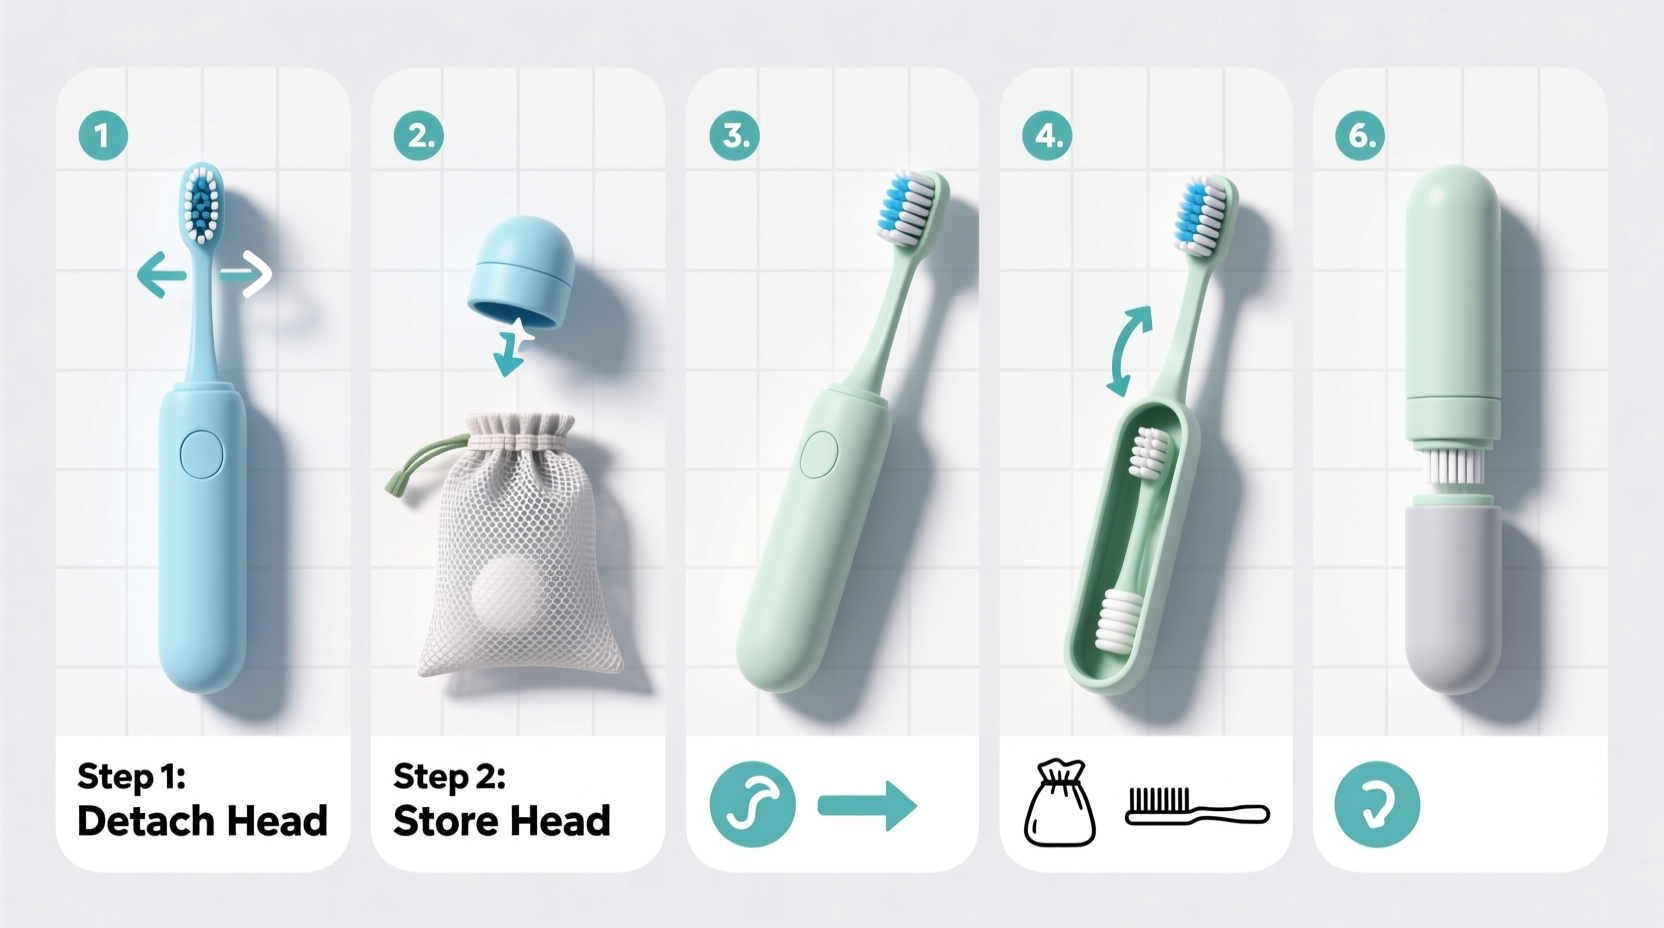
- Remove the Brush Head
Gently pull the brush head from the handle. On models with snap-fit mechanisms, apply even pressure while wiggling slightly side-to-side. Do not twist aggressively, as this may crack internal tabs. - Open the Protective Cap (if applicable)
If your model includes a sliding or screw-on cap, unscrew or slide it off carefully. Some caps have rubber seals; set them aside gently to avoid tearing. - Separate Handle Sections (for telescopic designs)
For brushes with retractable handles, extend fully and then pull sections apart slowly. Note the order and orientation of each piece—this is critical for correct reassembly. - Inspect All Components
Check for cracks, warping, or buildup in joints. Pay attention to O-rings or silicone gaskets, which help maintain seal integrity. - Clean Each Part Individually
Soak brush head, handle segments, and cap in a solution of lukewarm water and a few drops of mild soap or diluted mouthwash (1:3 ratio) for 5–10 minutes. Use the cleaning brush to scrub bristles and grooves. For narrow gaps, use a cotton swab dampened with the solution. - Rinse Thoroughly
Rinse each part under running water until no suds remain. Residual soap can irritate gums upon reuse. - Dry Completely Before Reassembly
Place components on a clean towel in a well-ventilated area. Allow at least 30 minutes for air drying. Never reassemble wet parts—moisture trapped inside promotes bacterial growth. - Reattach the Brush Head
Align the connector on the handle with the socket on the brush head. Press firmly until you hear or feel a soft click, indicating secure attachment. - Reconnect Handle Segments (if applicable)
Slide telescopic sections back together in the original order. Test smoothness of motion; resistance may indicate misalignment. - Replace the Cap
Reinstall the protective cap once everything is dry and assembled. Ensure it fits snugly but does not require excessive force.
Do’s and Don’ts of Travel Toothbrush Maintenance
| Do’s | Don’ts |
|---|---|
| Disassemble after 2–3 uses | Leave the brush assembled for weeks |
| Use gentle, non-abrasive cleaners | Soak in boiling water or bleach |
| Dry all parts completely before storing | Store in sealed bags while damp |
| Inspect for wear monthly | Force components if they don’t align easily |
| Carry a spare brush head for long trips | Share your toothbrush with others |
“Regular disassembly and drying are essential for minimizing microbial load on compact toothbrushes. It’s one of the simplest yet most overlooked hygiene practices.” — Dr. Lena Patel, Microbiologist & Oral Health Researcher
Real-World Example: A Frequent Traveler’s Routine
Sophie, a digital nomad who spends over 200 days a year abroad, used to suffer from recurring gum sensitivity. After consulting her dentist, she learned that her travel toothbrush—kept constantly sealed in a plastic case—was harboring bacteria due to inadequate ventilation. She began disassembling it after each hotel stay, rinsing parts in bottled water when tap water wasn’t safe, and letting them dry on a windowsill. Within two months, her oral irritation subsided. Now, she packs a small reusable pouch with labeled compartments for each brush component, making reassembly intuitive even in unfamiliar settings.
Frequently Asked Questions
Can I wash my travel toothbrush in the dishwasher?
No. High heat and strong detergents can warp plastic components and degrade internal seals. Hand washing with mild soap is the safest method.
How often should I replace the brush head?
Every three months, or sooner if bristles fray. Even with careful cleaning, worn bristles reduce brushing effectiveness and may harbor more bacteria.
My brush won’t snap back together—what should I do?
First, confirm all parts are completely dry and free of debris. Then, verify alignment: some connectors have directional tabs. If resistance persists, consult the manufacturer’s instructions or consider replacement, as forcing it may cause breakage.
Final Checklist for Safe Cleaning and Storage
- ☑ Remove brush head and cap
- ☑ Separate handle sections (if applicable)
- ☑ Soak parts in soapy water for 5–10 mins
- ☑ Scrub joints and bristles gently
- ☑ Rinse thoroughly under running water
- ☑ Air-dry all components for at least 30 minutes
- ☑ Reassemble in correct order
- ☑ Store in ventilated case, not sealed plastic
Conclusion: Make Hygiene a Seamless Habit
Detaching and reassembling your travel toothbrush isn’t just about cleanliness—it’s a proactive step toward better oral health. With minimal effort, you can prevent bacterial buildup, prolong the lifespan of your brush, and maintain confidence in your hygiene routine no matter where you are. The key is consistency: integrate this short process into your post-brushing ritual, just as you would flossing or rinsing. Over time, it becomes second nature. Start today—your next trip deserves a fresher, safer brushing experience.


 浙公网安备
33010002000092号
浙公网安备
33010002000092号 浙B2-20120091-4
Comments
No comments yet. Why don't you start the discussion?