
Modern smartphones are precision-engineered devices, and their components—especially the battery, screen, and internal circuitry—are sensitive to mishandling. Yet, many users need to access internal parts for repairs, battery replacements, or SIM card changes. The challenge arises when the phone is encased in a protective cover. Removing the case every time isn’t always practical, and attempting to open the phone while it’s cased can lead to scratches, stripped screws, or even internal damage if done incorrectly.
This guide provides a safe, systematic method for accessing your smartphone’s internals without removing the case—when absolutely necessary. While experts generally recommend removing the case before disassembly, there are real-world situations where that isn't feasible. Whether you're in the field, lack tools, or simply want to minimize handling, this approach prioritizes safety, precision, and long-term device health.
When It Makes Sense to Open a Phone With Its Case On
Opening a phone with its case attached should be considered only under specific circumstances. Most manufacturers and repair technicians advise against it due to the increased risk of misalignment, pressure on delicate components, and reduced access. However, limited scenarios justify the practice:
- Emergency repairs – When immediate access is needed (e.g., water exposure requiring quick drying).
- Diagnostic checks – For temporary inspection without full disassembly.
- Minimal access tasks – Such as replacing a SIM card or checking internal connections.
- Case integrity concerns – Some cases are glued or difficult to reattach without damage.
In such cases, proper technique becomes critical. Rushing or using excessive force can compromise both the phone and the case.
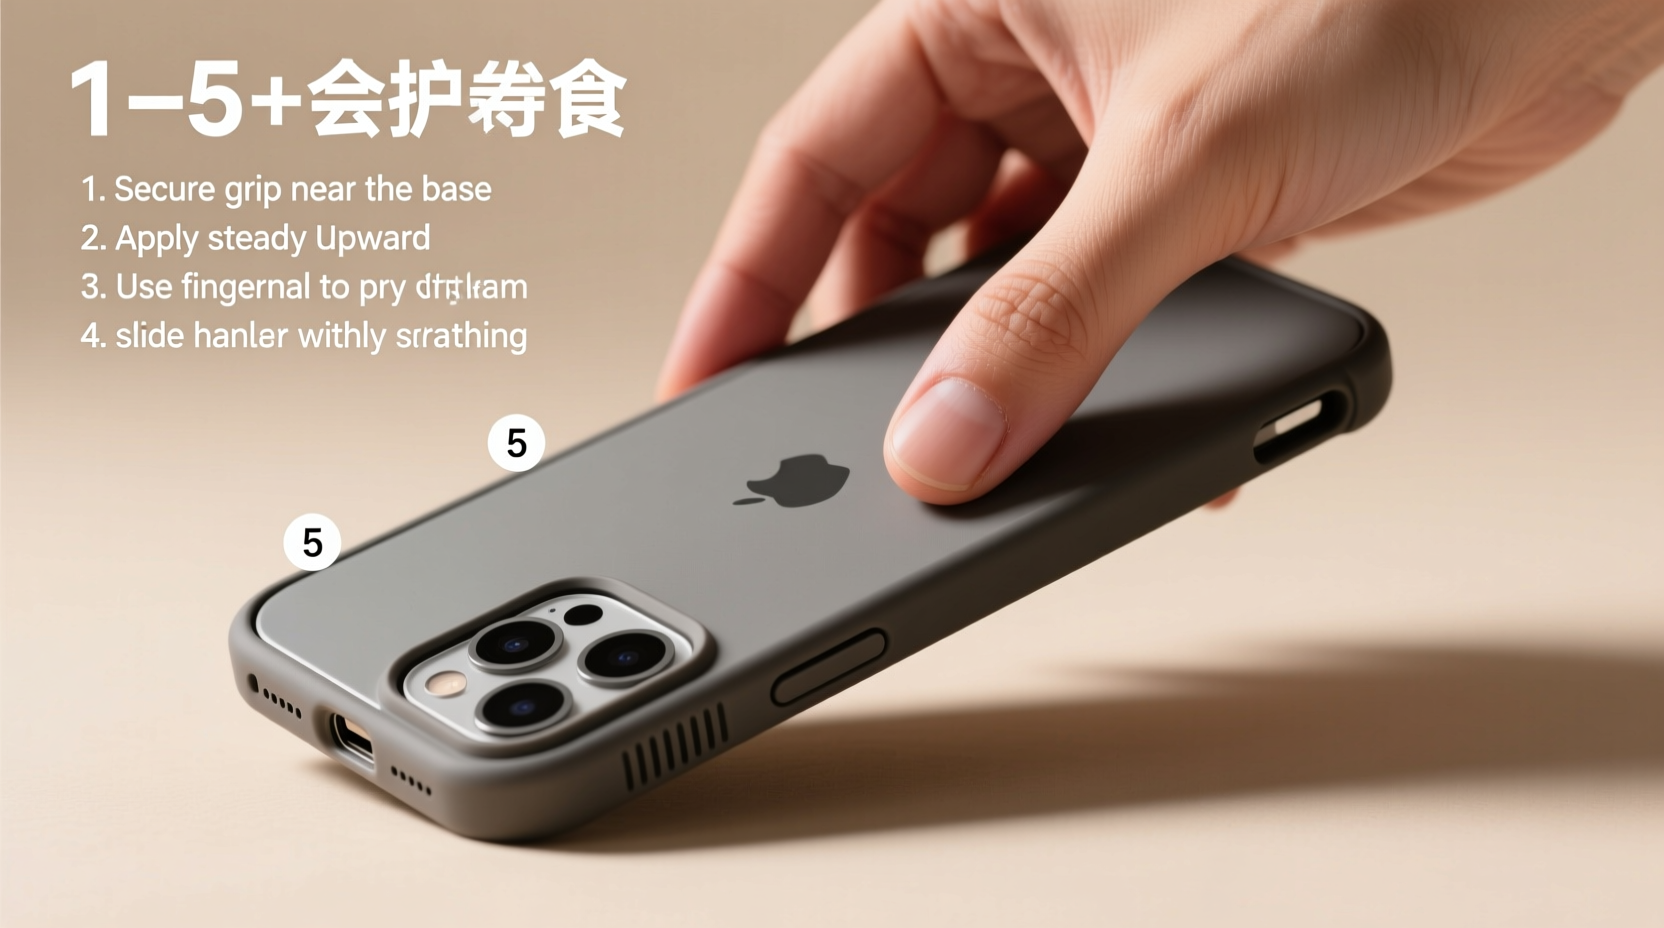
Step-by-Step Guide to Safely Opening Your Phone With the Case On
- Evaluate the case design. Confirm that all necessary screws (especially near the charging port) are accessible. If the case covers any screw heads, do not proceed.
- Power off the device completely. This prevents short circuits and protects internal components during handling.
- Clean the exterior. Use a microfiber cloth to remove dust and debris from the case and phone edges. Particles can interfere with tool grip and scratch surfaces.
- Select the correct screwdriver. Match the bit precisely to the screw type (usually P2 or P3 pentalobe for iPhones, Phillips #000 for many Androids). Using the wrong size risks stripping.
- Remove bottom screws carefully. Apply steady, downward pressure while turning slowly. If resistance occurs, stop and recheck alignment.
- Use a suction cup near the screen. Attach it just above the front camera or near the top edge (if accessible). Gently pull upward to create a small gap between the display and body.
- Insert a plastic opening tool. Slide it into the gap to separate clips holding the frame together. Work around the edges slowly—do not force it.
- Monitor case interference. If the case resists separation, slightly twist the tool or adjust angle. Never use metal tools directly on the casing.
- Prop the phone open. Once separated, use a rubber band or clip to hold the halves apart, preventing accidental snapping shut.
- Proceed with caution during internal work. Be aware that the case may limit movement. Avoid pulling cables or applying pressure through the back cover.
This process requires patience. Rushing increases the likelihood of damaging adhesive seals, ribbon cables, or the OLED panel.
Do’s and Don’ts: Safe Practices Summary
| Do’s | Don’ts |
|---|---|
| Use precision tools designed for electronics | Use kitchen knives or improvised metal tools |
| Work on a clean, static-free surface | Disassemble on carpeted or dusty areas |
| Label screws as you remove them | Mix screws from different locations |
| Take photos at each step for reassembly | Assume you’ll remember component placement |
| Apply gentle, consistent pressure | Force components that resist movement |
Real-World Example: Field Repair Under Pressure
Jamal, a field technician working in rural Kenya, was called to revive a water-damaged smartphone used by a community health worker. The device had a rugged waterproof case that had swollen slightly after submersion. Removing it would have taken specialized tools he didn’t have on hand. Instead, he assessed the case’s screw access—luckily, the manufacturer included service-friendly cutouts.
Using a portable toolkit, Jamal powered down the phone, cleaned the seams, and carefully unscrewed the base while the case remained on. He opened the device just enough to disconnect the battery and place it in a sealed silica gel container. Two days later, after thorough drying, he reassembled the unit—all without removing the outer shell. The phone resumed full functionality, and the worker resumed patient tracking.
This example shows that with preparation and care, in-field interventions are possible—even with constraints.
“The key isn’t whether the case stays on or comes off—it’s control. If you can maintain precision and visibility, minimal access with the case on is viable.” — Lena Torres, Senior Mobile Repair Specialist, iFix Electronics
Essential Tools Checklist
Before beginning any disassembly, ensure you have the following:
- Precision screwdriver set (Pentalobe, Phillips #000)
- Plastic opening tools or spudgers
- Suction cup (small, mobile-compatible)
- Microfiber cloth and isopropyl alcohol (for cleaning)
- Tray or magnetic mat for organizing screws
- Flashlight or headlamp for visibility
- Digital camera or secondary phone for documentation
Frequently Asked Questions
Can opening my phone with the case on void the warranty?
Yes, in most cases. Any unauthorized disassembly—regardless of whether the case is on—typically voids the manufacturer’s warranty. This applies even if no damage occurs. Check your device’s warranty terms before proceeding.
Will leaving the case on increase the risk of damaging the screen?
Potentially. The case can restrict movement and create uneven leverage during separation. If the case presses against the screen assembly while prying, it may crack the glass or damage internal brackets. Always ensure clearance and use controlled force.
Are some phone cases more serviceable than others?
Absolutely. Brands like Spigen, OtterBox Defender, and some Mophie models include precise screw cutouts and modular designs that allow limited servicing without full removal. Avoid glued or sealed cases for devices you may need to repair yourself.
Final Thoughts and Recommendations
While opening a smartphone with its case on is technically possible, it should remain an exception—not a standard practice. The safest route is always to remove the case first, ensuring unobstructed access and reducing stress on components. However, in urgent or resource-limited environments, knowing how to proceed safely can mean the difference between a functional device and a costly replacement.
The principles outlined here—precision, cleanliness, documentation, and controlled force—are universal. Whether you’re swapping a battery, replacing a speaker, or diagnosing a fault, respecting the engineering of your device ensures longer lifespan and better performance.


 浙公网安备
33010002000092号
浙公网安备
33010002000092号 浙B2-20120091-4
Comments
No comments yet. Why don't you start the discussion?