
Adjusting the size of a metal watch band is often necessary for comfort, especially when gifting or sharing watches among family members. While many assume this task requires a trip to a jeweler or a specialized toolset, it’s entirely possible to remove watch links safely at home—using only common household items. With patience and precision, you can achieve a professional-looking fit without spending extra money or risking damage to your timepiece.
Understanding Your Watch Band Type
Before attempting any adjustment, identify the type of bracelet on your watch. Most metal bands fall into two categories: pin-and-link bracelets and screw-link bracelets.
- Pin-and-link bracelets use small metal pins that connect each link. These are the most common on mid-range watches and require pushing out pins to separate links.
- Screw-link bracelets use tiny screws instead of pins. These are less common and typically found on higher-end models like certain Omega or Rolex designs. Removing these usually requires a micro-screwdriver, which may not qualify as “no special tools,” so this guide focuses on pin-style bands.
Most standard stainless steel bands from brands like Casio, Timex, Seiko, or Fossil use push-pin construction and are ideal candidates for at-home adjustments.
What You’ll Need: Household Alternatives to Specialized Tools
You don’t need a professional watch repair kit to remove links. Instead, gather these readily available items:
- A small nail (like a finishing nail or thumbtack)
- A pushpin or sewing needle
- A wooden block or thick book (to support the watch)
- A hammer (preferably lightweight or tack hammer)
- A pair of needle-nose pliers (optional, for handling small springs)
- Tweezers (helpful for retrieving tiny parts)
- A clean cloth or towel (to protect the watch face)
The nail or pushpin will act as a makeshift pin punch, while the wooden surface provides stable backing during tapping. Avoid metal surfaces—they can bend pins or damage links.
“Many customers come in just to resize their bands, unaware they could do it themselves with basic tools. It's one of the most underutilized DIY watch skills.” — Daniel Reyes, Master Watchmaker with 18 years of experience
Step-by-Step Guide to Removing Watch Links
- Count and mark the links to remove. Try on the watch and determine how many links need to be removed for a snug fit. Most adults remove 1–3 links. Remember: always remove an equal number from each side for symmetry unless the clasp is offset.
- Lay the watch on a soft surface. Place it face down on a cloth to prevent scratches. Use a rubber band to gently secure the watch body if needed, reducing movement during work.
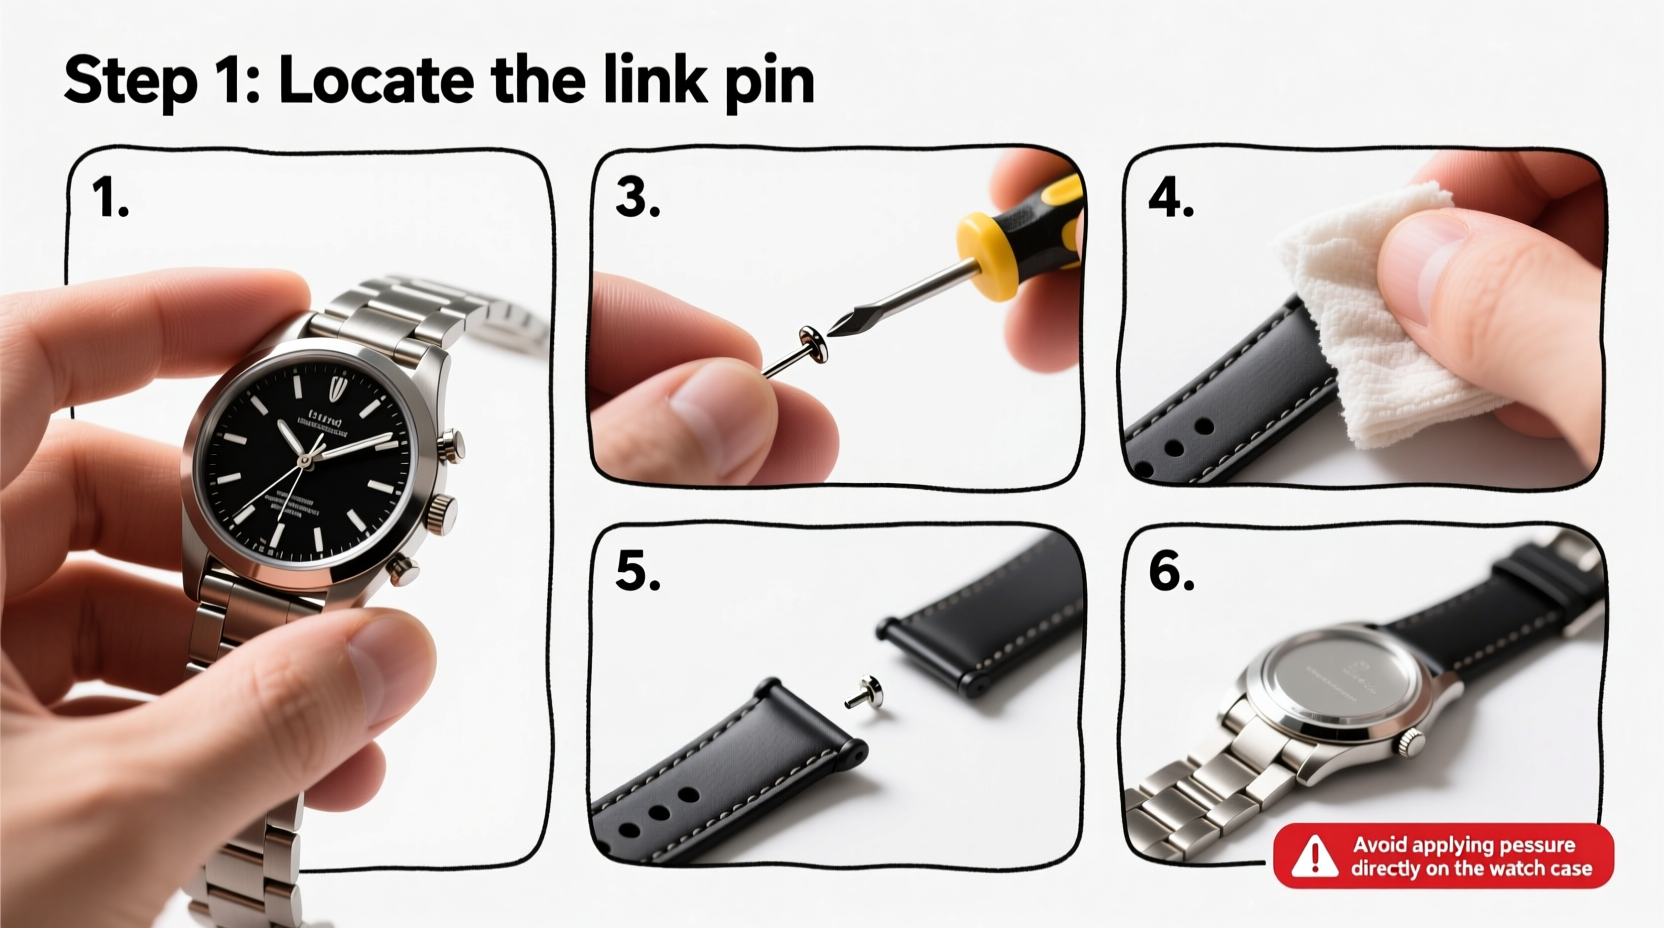
- Locate the pins and direction arrows. Flip the band over and inspect the edges. Look for tiny grooves between links and stamped arrows indicating the removal direction. Pins almost always exit toward the clasp end.
- Select your extraction point. Choose a pin in the link you plan to remove. If removing multiple links, start from the outer ones first. Insert the tip of a pushpin or narrow nail into the groove beside the pin head.
- Gently tap the pin out. Hold the nail steady and lightly tap it with a hammer. Apply short, controlled taps. The pin will gradually emerge from the opposite side. Stop once enough of the pin protrudes to grip with pliers or tweezers.
- Pull the pin completely. Use needle-nose pliers or tweezers to pull the pin the rest of the way out. Be careful not to fling it across the room—it’s small and easy to lose.
- Disconnect the link. Once the pin is removed, the adjacent link will separate easily. Set aside the removed link and pin together in a small container.
- Repeat for additional links. Work symmetrically if adjusting both sides. Keep all pins organized—some will be directional (tapered), so note their original orientation.
- Reconnect the remaining links. Slide the links back together. Reinsert the pin from the correct side (opposite the arrow direction). Tap gently until fully seated. Ensure the pin is flush and doesn’t protrude.
- Test the fit and movement. Put on the watch. Check that the band flexes naturally and the clasp operates smoothly. Wiggle the links slightly to confirm no looseness or binding.
Do’s and Don’ts: Best Practices Summary
| Do’s | Don’ts |
|---|---|
| Work slowly and apply gentle pressure when tapping pins. | Use excessive force with the hammer—this can deform links. |
| Keep track of pin orientation; some are tapered or directional. | Remove too many links at once—adjust gradually. |
| Use a soft mallet or wrap the hammer tip in cloth to reduce impact. | Work on a hard, slippery surface where the watch can slide. |
| Clean the band before and after adjustment to remove debris. | Ignore manufacturer instructions—if provided, follow them. |
| Store removed links and pins in case you need to reassemble later. | Attempt this on a valuable or antique watch without practice. |
Real Example: Adjusting a Gifted Watch for a Family Member
Sarah received her father’s old Seiko automatic watch after he downsized to a smaller model. While the timepiece was in excellent condition, the band was too large for her slender wrist. Rather than pay $25 at a jewelry store, she decided to try adjusting it herself.
Using a pushpin, a wooden cutting board, and a small hammer from her kitchen toolkit, she followed the steps above. She discovered arrows etched inside the links pointing outward, confirming the pin direction. After carefully removing two links (one from each side), she reassembled the band. The result was a perfect fit—secure, comfortable, and indistinguishable from a professional job. Sarah saved money and gained confidence in maintaining her growing watch collection.
Frequently Asked Questions
Can I remove watch links without scratching the band?
Yes, if you work carefully. Always place the watch on a soft cloth and avoid letting tools slip across the metal surface. Using a smaller-diameter nail or pin reduces the risk of marring the link edges.
What if the pin gets stuck or bends?
If a pin resists movement, stop immediately. It may be inserted in reverse or could be a solid rivet (not removable). Applying more force can damage the link. In such cases, consult a professional rather than risk ruining the band.
Are all watch pins the same size?
No. Pin diameter varies by brand and model—typically between 1.0mm and 2.0mm. That’s why thinner tools like sewing needles work better for initial alignment. Never force a larger tool into a tight hole.
Final Checklist Before You Begin
- ✔️ Identified the band as a removable pin type
- ✔️ Counted how many links to remove
- ✔️ Found the direction arrows on the links
- ✔️ Gathered a small nail, hammer, and soft support surface
- ✔️ Placed the watch securely on a non-slip, padded area
- ✔️ Have a small container ready for removed pins and links
Conclusion: Confidence Comes with Care
Removing watch links at home isn’t reserved for experts or those with expensive kits. With attention to detail and everyday tools, anyone can perform this simple maintenance task successfully. The key lies in preparation, patience, and respecting the delicate mechanics of your timepiece. Whether you’re customizing a new purchase or reviving a vintage heirloom, mastering this skill empowers you to maintain your watches with pride and precision.


 浙公网安备
33010002000092号
浙公网安备
33010002000092号 浙B2-20120091-4
Comments
No comments yet. Why don't you start the discussion?