
A single missing shingle might seem like a minor issue, but it can open the door to serious problems—water infiltration, mold growth, insulation damage, and even compromised structural integrity. The longer a gap remains exposed, the greater the risk. Fortunately, replacing missing shingles is a manageable DIY project if approached with care, the right tools, and proper safety measures. This guide walks you through every critical phase: assessing the damage, gathering materials, executing the repair, and preventing future issues—all while keeping yourself and your home safe.
Why Replacing Missing Shingles Matters
Asphalt shingles are designed to shed water and protect the underlying roof deck from the elements. When one goes missing, the underlayment beneath is exposed. Even a small gap can allow rain, snowmelt, or wind-driven moisture to seep into the roof structure. Over time, this leads to rot, weakened rafters, and interior leaks that stain ceilings or damage drywall.
According to the National Roofing Contractors Association (NRCA), “Timely repair of damaged or missing shingles can extend a roof’s life by several years and prevent secondary damage that often costs five to ten times more than the initial fix.” Addressing the problem early isn’t just about aesthetics—it’s a financial and structural necessity.
Safety First: Preparing for Roof Work
Working on a roof is inherently risky. Falls are the leading cause of injury in residential roofing tasks. Before climbing a ladder, prioritize personal safety and site preparation.
- Choose a dry, calm day – Never work on a wet or windy roof. Moisture increases slip risk, and strong winds can destabilize ladders.
- Use a sturdy extension ladder – Position it at a 75-degree angle (follow the 1:4 rule: for every four feet of height, move the base one foot outward).
- Wear proper footwear – Soft-soled, rubber boots with good grip help maintain traction on asphalt surfaces.
- Secure the ladder – Use ladder stabilizers or have someone hold the base during ascent and descent.
- Use fall protection – For steep roofs (over 6:12 pitch), consider a harness anchored to a secure point.
Keep tools in a bucket clipped to a belt or rope to avoid dropping them. Never overreach—move the ladder frequently to stay within safe reach.
Step-by-Step Guide to Replacing a Missing Shingle
- Assess the Damage
Locate the missing shingle and examine surrounding areas. Look for cracked, curled, or loose shingles nearby that may also need replacement. - Gather Materials and Tools
You’ll need:- New asphalt shingle (match type and color if possible)
- Roofing nails (galvanized or stainless steel, 1–1.25 inches long)
- Roofing cement or sealant
- Putty knife or flat bar
- Hammer or nail gun
- Tape measure
- Utility knife
- Remove Damaged Surrounding Material
If adjacent shingles are cracked or lifting, gently pry up their edges using a putty knife. Avoid tearing the undamaged ones. - Cut and Fit the Replacement Shingle
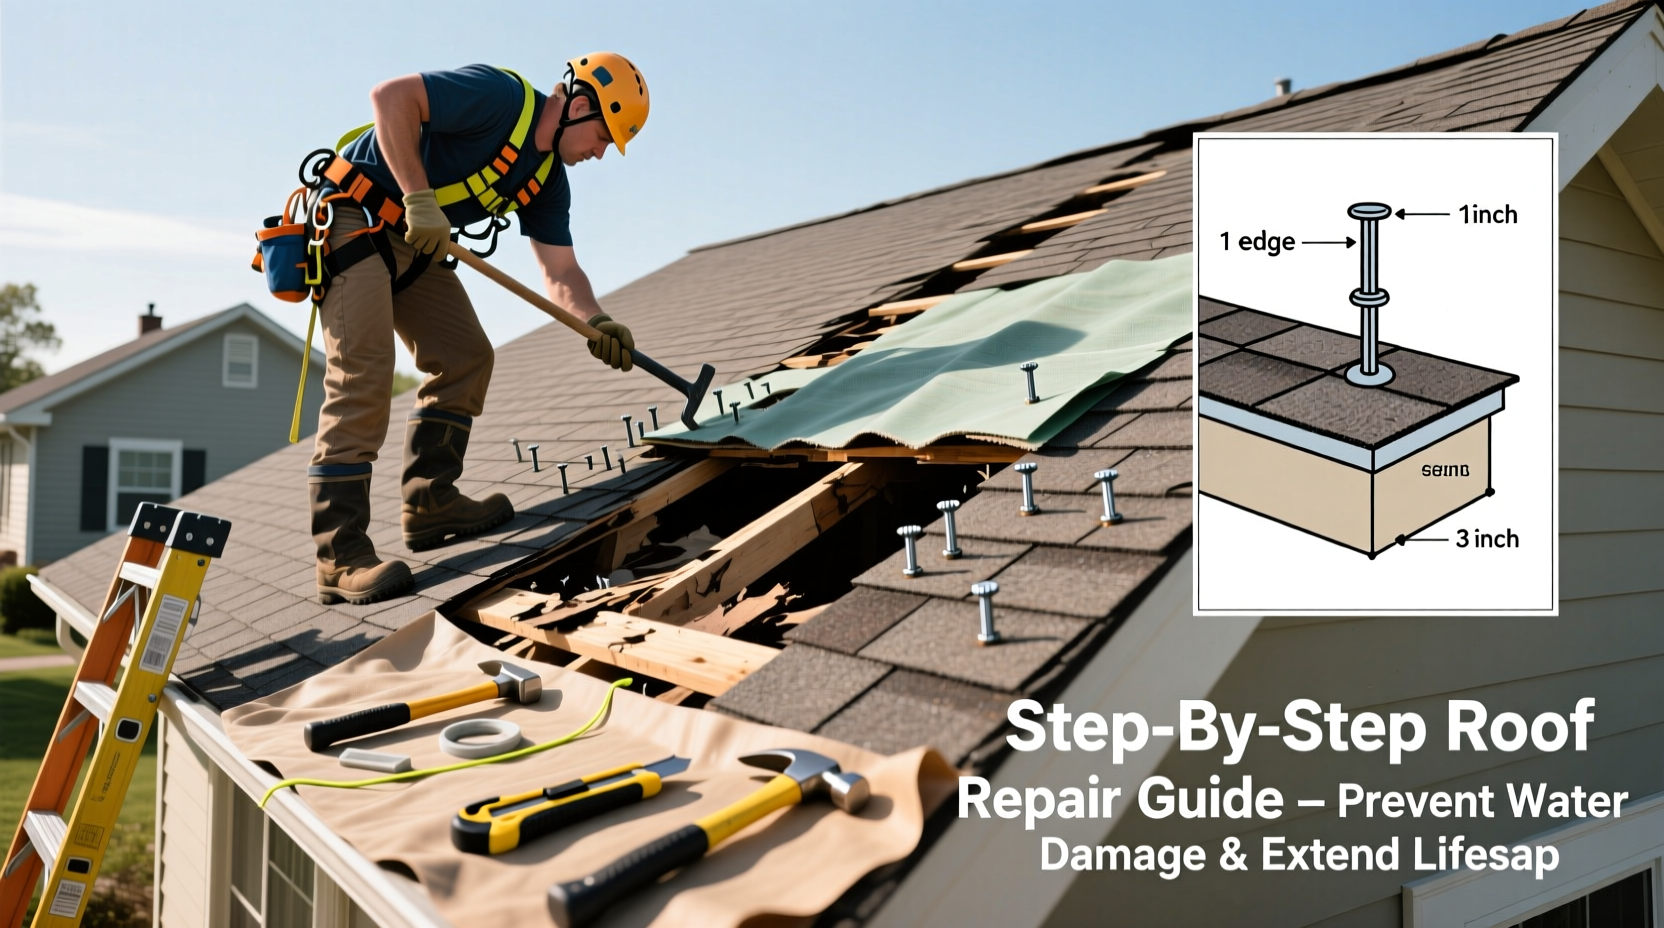
Measure the space and cut the new shingle to match. Most three-tab shingles are 12 inches wide. Slide the new piece partially under the upper shingle above the gap. - Secure the Shingle
Nail through the top edge of the replacement shingle, placing four nails near the top—just below the adhesive strip area. Ensure nails go through the roof deck without protruding underneath. - Seal the Edges
Apply roofing cement under the front edge and along the sides of the new shingle to create a watertight bond. Press firmly to ensure adhesion. - Reattach the Overlying Shingle Tab
The shingle directly above overlaps the one being replaced. Carefully lift its lower edge and apply a dab of roofing cement beneath it where it seals to your new shingle. Press down gently to reseal.
“Improper nailing or skipping sealant application is the most common reason DIY shingle repairs fail prematurely.” — Mark Thompson, Master Roofer & NRCA Instructor
Do’s and Don’ts of Shingle Replacement
| Do’s | Don’ts |
|---|---|
| Match the shingle type and color as closely as possible | Use mismatched shingles that disrupt roof aesthetics and performance |
| Apply roofing cement to seal edges and nail heads | Leave nail heads exposed—they can corrode and leak |
| Work from the eaves upward to avoid stepping on loose edges | Walk on fragile or aged shingles without crawling boards |
| Replace multiple damaged shingles at once if clustered | Ignore signs of widespread aging or granule loss |
| Dispose of old shingles properly (check local regulations) | Leave debris on the roof or yard—wind can scatter them |
Real Example: Preventing a Costly Leak
In suburban Ohio, homeowner Lisa Chen noticed a dark spot on her living room ceiling after a heavy spring storm. A quick exterior check revealed two missing shingles near a dormer vent. Instead of calling a contractor immediately, she followed a methodical repair process: inspected the attic for mold or dampness (none found), sourced matching shingles from a local hardware store, and completed the replacement over a weekend morning. By sealing the gap early, she prevented further water intrusion that an inspector later estimated could have led to $1,500+ in drywall and insulation repairs.
This case underscores the value of vigilance and timely action. Minor roof damage, when caught early, can be resolved affordably and independently.
When to Call a Professional
While replacing one or two shingles is feasible for most homeowners, certain situations require expert intervention:
- Extensive damage (more than five missing or severely damaged shingles)
- Signs of roof deck sagging or soft spots underfoot
- Active leaks inside the home despite external patching
- Roof age exceeding 15–20 years with widespread wear
- Complex roof features like valleys, skylights, or metal flashing involved
Professionals have access to higher-grade materials, safety equipment, and diagnostic tools to assess hidden damage. They can also advise whether a full section needs re-shingling for uniform protection.
Frequently Asked Questions
Can I use regular caulk instead of roofing cement?
No. Standard silicone or household caulk lacks UV resistance and flexibility needed for roofing applications. Use only UL-listed roofing cement or asphalt plastic cement designed for shingle repair.
How long will a repaired shingle last?
If installed correctly, a replacement shingle should last as long as the surrounding ones—typically 15 to 30 years, depending on climate and material quality. However, color fading may make newer patches slightly visible over time.
Is it okay to replace a shingle in the rain?
Absolutely not. Working on a wet roof is extremely dangerous due to slip hazards. Additionally, moisture prevents proper adhesion of roofing cement, compromising the repair’s durability.
Final Checklist for Safe Shingle Replacement
- Inspect roof after storms or seasonal changes
- Confirm weather is dry and wind-free
- Gather matching shingle, nails, roofing cement, and tools
- Set up ladder safely with stabilization
- Slide new shingle into place beneath overlapping layer
- Secure with four nails, avoiding over-driving
- Seal edges and reattach upper shingle tab with cement
- Clean up debris and test for stability
Conclusion: Protect Your Home Before Small Problems Become Big Ones
A missing roof shingle is more than a cosmetic flaw—it's a vulnerability. By addressing it promptly and correctly, you preserve your roof’s integrity, prevent water damage, and save significant repair costs down the line. With the right preparation, tools, and attention to detail, most homeowners can handle this task confidently and safely. Don’t wait for a leak to appear. Take action today, and give your home the protection it deserves.


 浙公网安备
33010002000092号
浙公网安备
33010002000092号 浙B2-20120091-4
Comments
No comments yet. Why don't you start the discussion?