
Getting a new iPhone is exciting, but the setup process can feel overwhelming—especially if you're worried about losing photos, messages, or app preferences. The good news? Apple has refined its migration tools so that transitioning from an old iPhone to a new one is smoother than ever. With the right preparation and method, you can transfer everything you care about in under an hour. This guide walks you through every stage of the process, ensuring a seamless transition without data loss or unnecessary frustration.
Why Seamless Setup Matters
A smooth transfer isn’t just about convenience—it’s about continuity. Your iPhone holds years of memories, contacts, health data, and personalized settings. Losing any of it disrupts workflows, compromises security, and diminishes trust in the upgrade process. Apple’s ecosystem is designed for frictionless transitions, but only if you follow best practices. Whether you’re upgrading from an iPhone 8 to an iPhone 15 or switching between models within the same generation, the principles remain consistent.
“Apple’s Quick Start feature reduces setup time by up to 70% compared to manual restoration from iCloud backups.” — Sarah Lin, Senior iOS Support Analyst at AppleCare
Step-by-Step Guide to Transferring Data
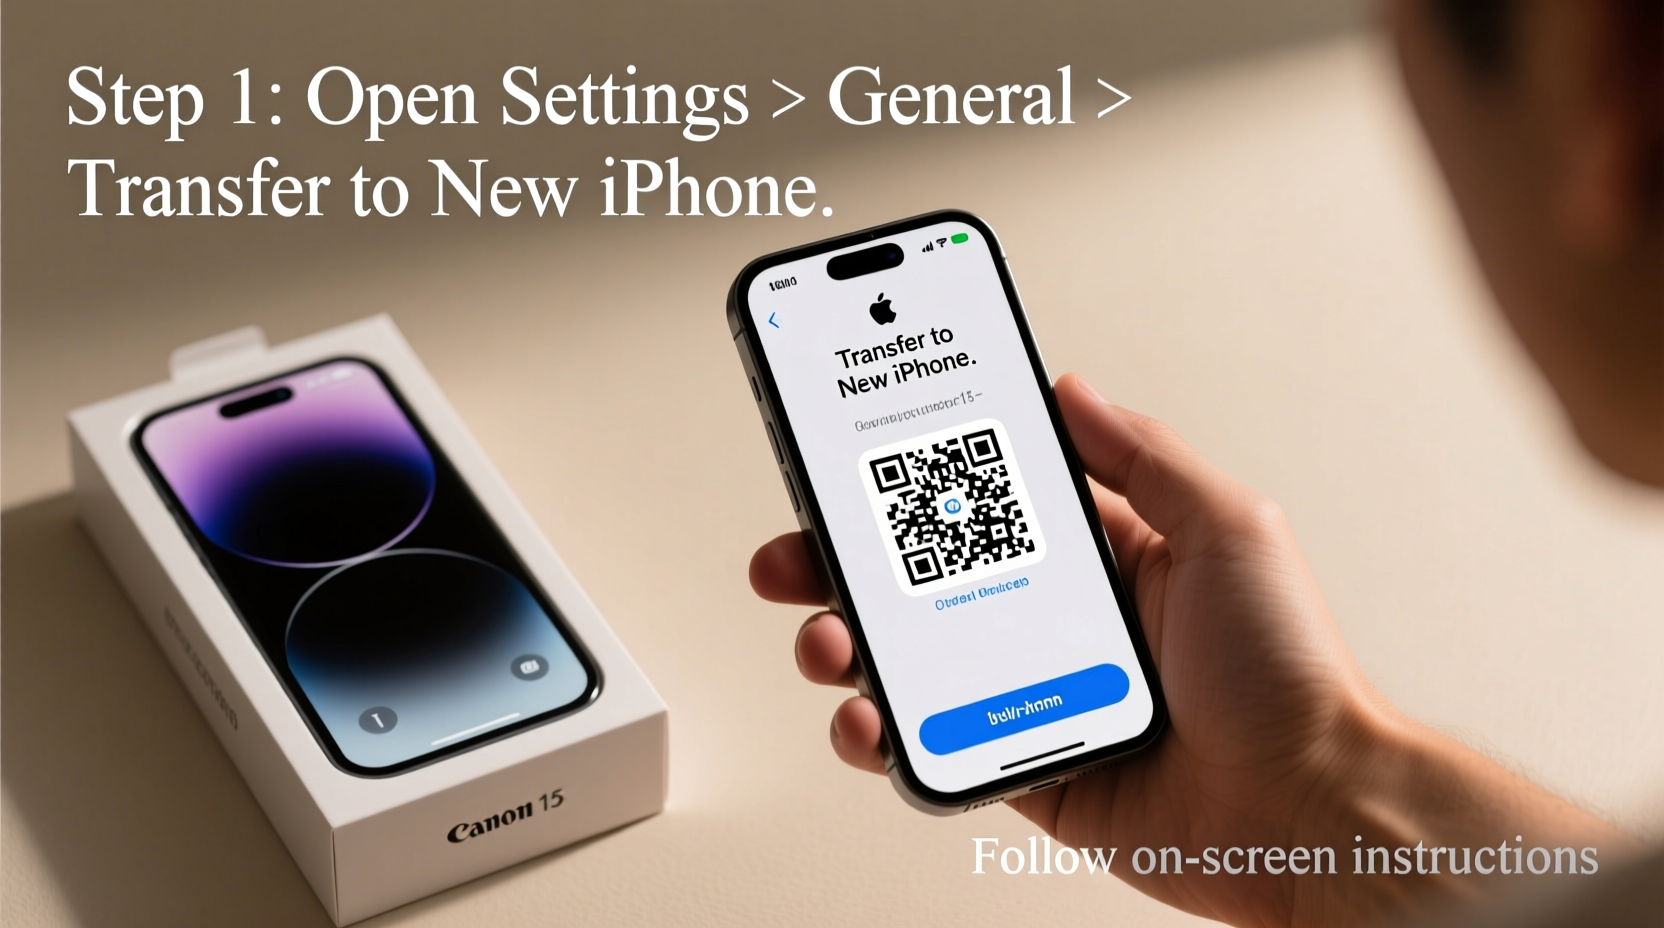
The most reliable method for transferring data from your old iPhone to your new one uses Apple’s built-in wireless migration tool called Quick Start. This process requires both devices to be nearby, charged, and connected to Wi-Fi.
- Prepare Both Devices: Ensure your old iPhone is updated to the latest version of iOS. Charge both phones to at least 50%, and connect them to power if possible during the transfer.
- Turn On Your New iPhone: Press and hold the side button until the Apple logo appears. Place it near your current iPhone.
- Use Quick Start: Your old iPhone will detect the new one and display a “Set Up New iPhone” animation. Tap Continue.
- Authenticate with Face ID or Touch ID: Use your existing biometric data to securely transfer your Apple ID and keychain information.
- Choose Transfer Option: Select “Transfer Directly from iPhone” instead of restoring from a backup. This ensures all apps, messages, and settings move over in real time.
- Wait for Completion: Keep both devices close and powered on. The transfer can take 10 minutes to over an hour depending on data size.
- Sign In and Finish Setup: Once complete, sign into your Apple ID, enable two-factor authentication, and customize privacy settings.
Alternative Methods: When Quick Start Isn’t Possible
If your old iPhone is damaged, lost, or incompatible (iOS 12.4 or earlier), you can still migrate your data using iCloud or iTunes (now Finder on macOS Catalina and later).
Using iCloud Backup
- On your old iPhone, go to Settings > [Your Name] > iCloud > iCloud Backup.
- Tap “Back Up Now” and wait for completion.
- On your new iPhone, during setup, choose “Restore from iCloud Backup” and sign in with your Apple ID.
- Select the most recent backup and wait for download and installation.
Using Computer Backup (iTunes/Finder)
- Connect your old iPhone to your computer.
- Open Finder (macOS) or iTunes (Windows).
- Select your device, click “Back Up Now,” and check “Encrypt local backup” to include Health and HomeKit data.
- After setting up the new iPhone until the Apps & Data screen, choose “Restore from Mac or PC” and connect to the same computer.
What Gets Transferred—and What Doesn’t
Not all data moves automatically. Understanding what migrates helps you prepare for potential gaps.
| Data Type | Transfers Automatically? | Notes |
|---|---|---|
| Photos & Videos | Yes | Includes Camera Roll, albums, and shared content |
| Messages (iMessage & SMS) | Yes | Entire history transfers via direct method |
| App Data | Yes | Game progress, login states, documents |
| Call History | Yes | Last several weeks retained |
| Health Data | Only with encrypted backup | Not included in iCloud unless backed up securely |
| Apple Watch Pairings | No | Must re-pair manually |
| Third-Party App Login Tokens | Sometimes | Some services require re-login for security |
Checklist: Before You Begin
To avoid hiccups during migration, run through this essential checklist:
- ✅ Update your old iPhone to the latest iOS version
- ✅ Charge both devices to at least 50%
- ✅ Connect both phones to the same Wi-Fi network
- ✅ Back up your old iPhone to iCloud as a safety net
- ✅ Disable Find My iPhone temporarily if selling or trading in (only after backup)
- ✅ Note down important passwords or use iCloud Keychain
- ✅ Close all background apps on the old device
Real-World Example: Migrating After Water Damage
Jamal upgraded his iPhone 12 after dropping it in water. Though the screen flickered, he could still access settings. He followed the Quick Start process by placing his new iPhone 14 next to the damaged one. Within 25 minutes, all his messages, photos, and even unread emails transferred perfectly. Because he had encrypted backups enabled, his Wi-Fi passwords and saved notes came across too. Even though the old phone died the next day, Jamal never missed a beat—his digital life moved forward uninterrupted.
“Having a working device—even briefly—is often enough to initiate a full transfer. Don’t assume data is lost just because the phone is failing.” — Carlos Mendez, Apple Authorized Service Provider
Frequently Asked Questions
Can I transfer data from an Android phone to a new iPhone?
Yes, but not via Quick Start. Use Apple’s “Move to iOS” app on your Android device before initial setup. It transfers contacts, messages, photos, web bookmarks, and Google accounts. Note: App data and call history won’t migrate.
My transfer got interrupted. What should I do?
If the process stops mid-transfer, restart both devices. Turn on the new iPhone again and repeat the Quick Start steps. If unsuccessful, restore from an iCloud or computer backup created before the failed attempt.
Will my apps need to redownload?
During direct transfer, apps install in the background. Some may appear grayed out initially and require re-downloading from the App Store, especially large games or updates released after the backup.
Final Tips for a Flawless Transition
Once your data is transferred, take a few extra moments to verify everything arrived intact. Open Messages to confirm chat history, check Photos for recent albums, and test critical apps like banking or email. Enable iCloud Photos and iCloud Drive to keep future backups automatic. Finally, erase your old iPhone by going to Settings > General > Transfer or Reset iPhone > Erase All Content and Settings—this protects your privacy if you plan to sell or recycle it.
Conclusion
Setting up a new iPhone doesn’t have to be stressful or time-consuming. By leveraging Apple’s built-in tools and following a clear sequence of steps, you can preserve your digital identity and enjoy your new device immediately. Whether you're using Quick Start, iCloud, or a computer backup, the key is preparation and patience. Now that your new iPhone is fully configured, explore its features, optimize battery settings, and make it truly yours.


 浙公网安备
33010002000092号
浙公网安备
33010002000092号 浙B2-20120091-4
Comments
No comments yet. Why don't you start the discussion?