
Your Google Account is the gateway to your digital life—Gmail, Drive, Photos, YouTube, and more. Ensuring its security starts with accurate, up-to-date contact information. One of the most critical elements is your phone number. It’s used not only for account recovery but also for two-factor authentication (2FA), password resets, and fraud detection. However, adding or updating this sensitive data requires care to avoid exposing yourself to phishing, SIM swapping, or unauthorized access.
This guide walks you through how to safely add, verify, manage, and protect your phone number within your Google Account, with best practices at every stage.
Why Your Phone Number Matters in Google Account Security
A verified phone number strengthens your account's defense against unauthorized access. Google uses it as a secondary verification method when logging in from new devices, resetting passwords, or detecting suspicious activity. According to Google’s Security Team, accounts with both a recovery phone and email are 30% less likely to be permanently locked out after a compromise.
“Your phone number is one of the fastest ways to regain access to your account—if it’s properly secured.” — Google Security Engineering Team
However, relying solely on SMS-based 2FA or storing outdated numbers can introduce vulnerabilities. The goal is to use your phone number wisely—not just as a backup, but as part of a layered security strategy.
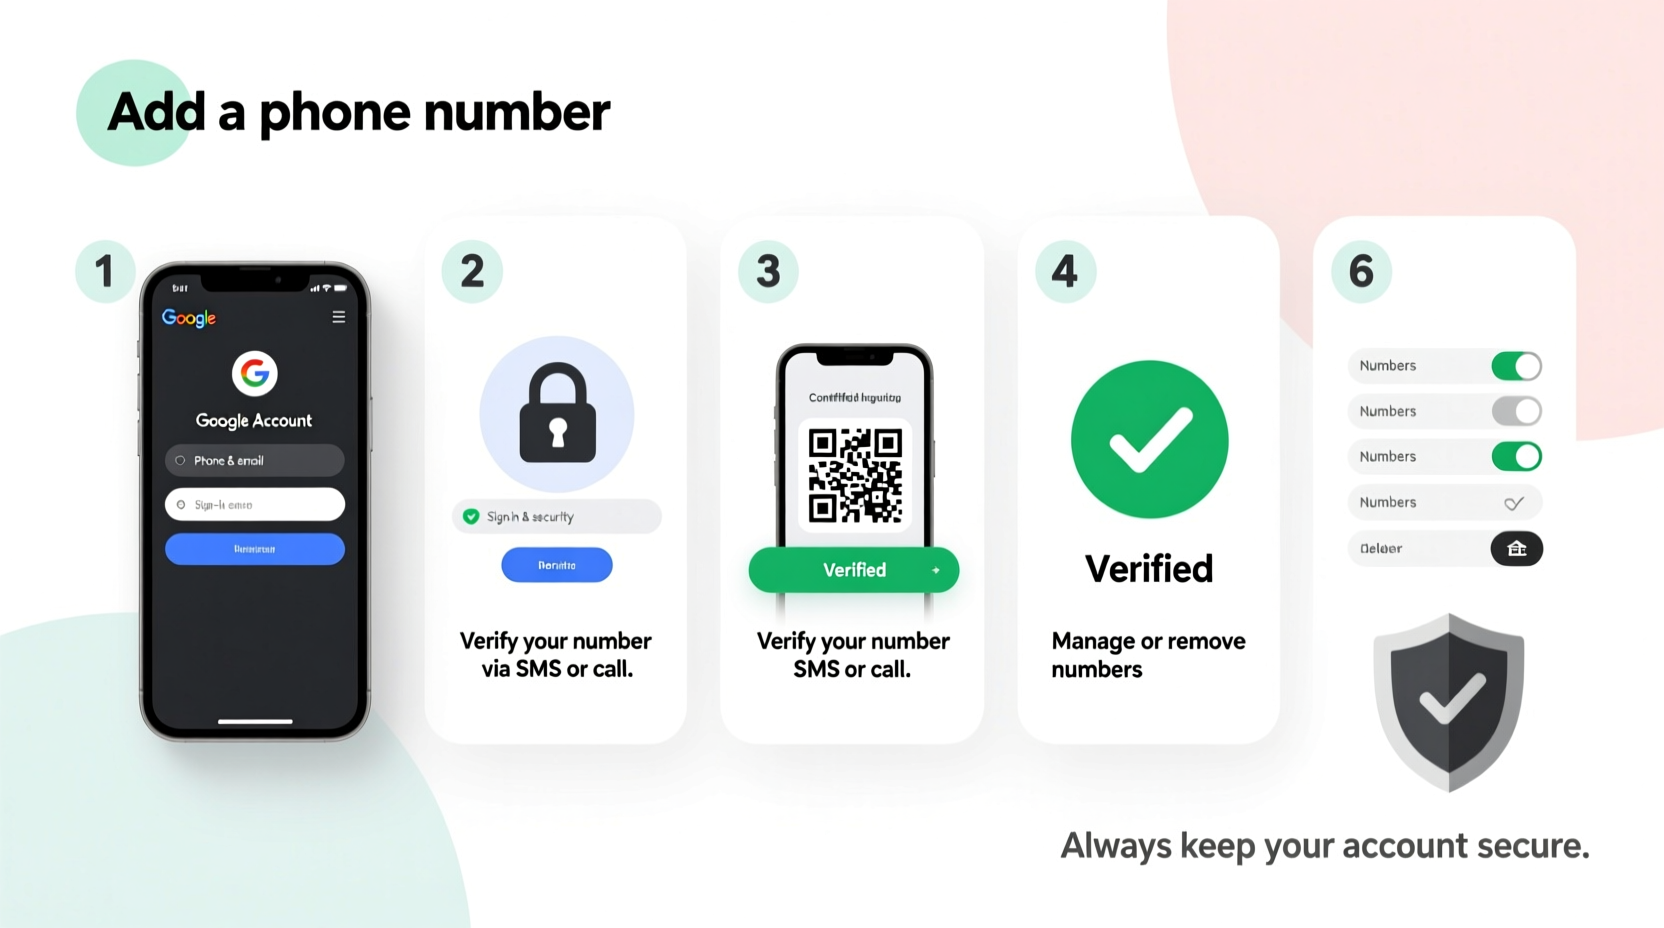
Step-by-Step: How to Add a Phone Number to Your Google Account
Follow these steps to securely register a phone number with your Google Account:
- Sign in to your Google Account: Go to myaccount.google.com and log in using your credentials.
- Navigate to “Security”: In the left-hand menu, click on Security.
- Find “Recovery phone”: Under the “Ways we can verify it’s you” section, select Recovery phone.
- Click “Add a recovery phone”: You may need to re-enter your password or complete a challenge to proceed.
- Select country code and enter your number: Ensure the number is active and under your control. Avoid using shared or temporary numbers.
- Verify via SMS or call: Google will send a 6-digit code. Enter it promptly to confirm ownership.
- Save changes: Once verified, your number is linked to your account.
Managing Multiple Numbers: Best Practices
You can store more than one phone number in your Google Account—for example, a primary mobile and a secondary landline or alternate mobile. This redundancy improves recovery options if one device is lost.
| Type of Number | Recommended Use | Risks to Avoid |
|---|---|---|
| Primary Mobile | 2FA codes, real-time alerts, recovery | Using an unsecured device or shared SIM |
| Secondary Mobile | Backup recovery option | Outdated or inactive lines |
| Landline | Account recovery only (no 2FA) | Using unmonitored home phones |
- To add a second number, repeat the same process under “Recovery phone.”
- To set a default number for verification, Google automatically selects the most recently used verified number unless specified otherwise.
- Remove old or unused numbers immediately—they’re potential entry points for attackers.
Real Example: Recovering Access After a Lost Device
Sophie, a freelance designer, accidentally locked herself out of her Gmail after changing browsers and triggering a security check. Her primary phone was dead, but she had added a secondary mobile number three months earlier during a routine security review.
Google offered her the option to receive a verification code via call to her backup number. She retrieved the code, regained access, and later updated her recovery settings to include an authenticator app for faster, more secure logins.
This scenario highlights the importance of having multiple trusted recovery methods—and keeping them current.
Securing Your Recovery Number: Do’s and Don’ts
Your phone number is valuable. Cybercriminals use social engineering and SIM-swapping attacks to hijack numbers and bypass account protections. Protect yourself with these guidelines:
| Do’s | Don’ts |
|---|---|
| Use a number you actively control | Share your recovery number publicly online |
| Enable carrier PIN or port-out protection | Use VoIP numbers for 2FA (unless supported) |
| Review recovery info quarterly | Keep old numbers listed after switching providers |
| Combine with authenticator apps or security keys | Rely solely on SMS for high-risk accounts |
Updating or Removing a Phone Number
If you change numbers or no longer use a device, update your Google Account immediately:
- Go to myaccount.google.com > Security.
- Under “Recovery phone,” click on your current number.
- Select Edit, then either:
- Enter a new number and verify it, or
- Click Remove if you’re replacing it.
- Confirm the action with your password or another verification method.
After removal, ensure at least one other recovery method remains active—such as a recovery email or 2FA app—to prevent lockout.
FAQ: Common Questions About Google Recovery Numbers
Can I use a VoIP number like Google Voice as my recovery number?
Yes, Google supports many VoIP services, including Google Voice, for account recovery. However, avoid using VoIP for two-factor authentication if possible, as some services may not reliably deliver SMS or calls during outages or due to filtering.
How often should I verify my recovery phone number?
Google may prompt re-verification periodically, especially after long inactivity. As a best practice, test your recovery options every 3–6 months by initiating a password reset (without completing it) to confirm access paths still work.
Is it safe to have my phone number linked to Google?
Yes, provided you take additional precautions: use strong passwords, enable 2FA beyond SMS, and monitor for unusual login attempts. Google does not publicly display your number, but remember that any linked data increases your digital footprint slightly—balance convenience with awareness.
Essential Security Checklist
Ensure your phone number enhances, rather than weakens, your Google Account security:
- ✅ Add a personal, active mobile number as your recovery phone
- ✅ Verify the number using SMS or automated call
- ✅ Remove outdated or unused numbers immediately
- ✅ Set up a second recovery method (e.g., authenticator app or backup email)
- ✅ Enable SIM swap protection with your mobile carrier
- ✅ Review recovery settings every 90 days
- ✅ Avoid using the same number across multiple high-value accounts without safeguards
Final Thoughts: Strengthen Your Digital Foundation
Your Google Account holds vast amounts of personal and professional data. A verified phone number is a powerful tool for securing and recovering access—but only when managed responsibly. By following these steps, you're not just ticking a box; you're building a resilient identity infrastructure that can withstand real-world threats.
Take five minutes today to audit your recovery options. Update expired numbers, remove obsolete ones, and layer your protection with stronger 2FA methods. Small actions now can prevent major disruptions later.


 浙公网安备
33010002000092号
浙公网安备
33010002000092号 浙B2-20120091-4
Comments
No comments yet. Why don't you start the discussion?