
Fishing is more than just casting a line—it’s a blend of patience, preparation, and understanding the basics of gear and technique. For beginners, one of the most important skills to master is properly setting up a fishing line. A well-rigged line increases your chances of catching fish and reduces frustration from tangles, breakages, or missed bites. This guide walks you through each stage of setting up your line, explains essential components, and shares proven tips to help you get started confidently.
Understanding Your Fishing Setup
Before tying knots or attaching lures, it's crucial to understand the basic parts of your fishing rig. A typical setup includes the rod, reel, mainline, leader (optional), hook, sinker, float (bobber), and bait or lure. Each component plays a role in how effectively you present your bait and detect bites.
The type of fishing—whether freshwater or saltwater, shore or boat—affects your choice of gear. For beginners, a spinning rod and reel combo between 5.5 and 7 feet long is ideal. It’s forgiving, easy to cast, and versatile enough for lakes, rivers, and ponds.
Step-by-Step Guide to Setting Up Your Fishing Line
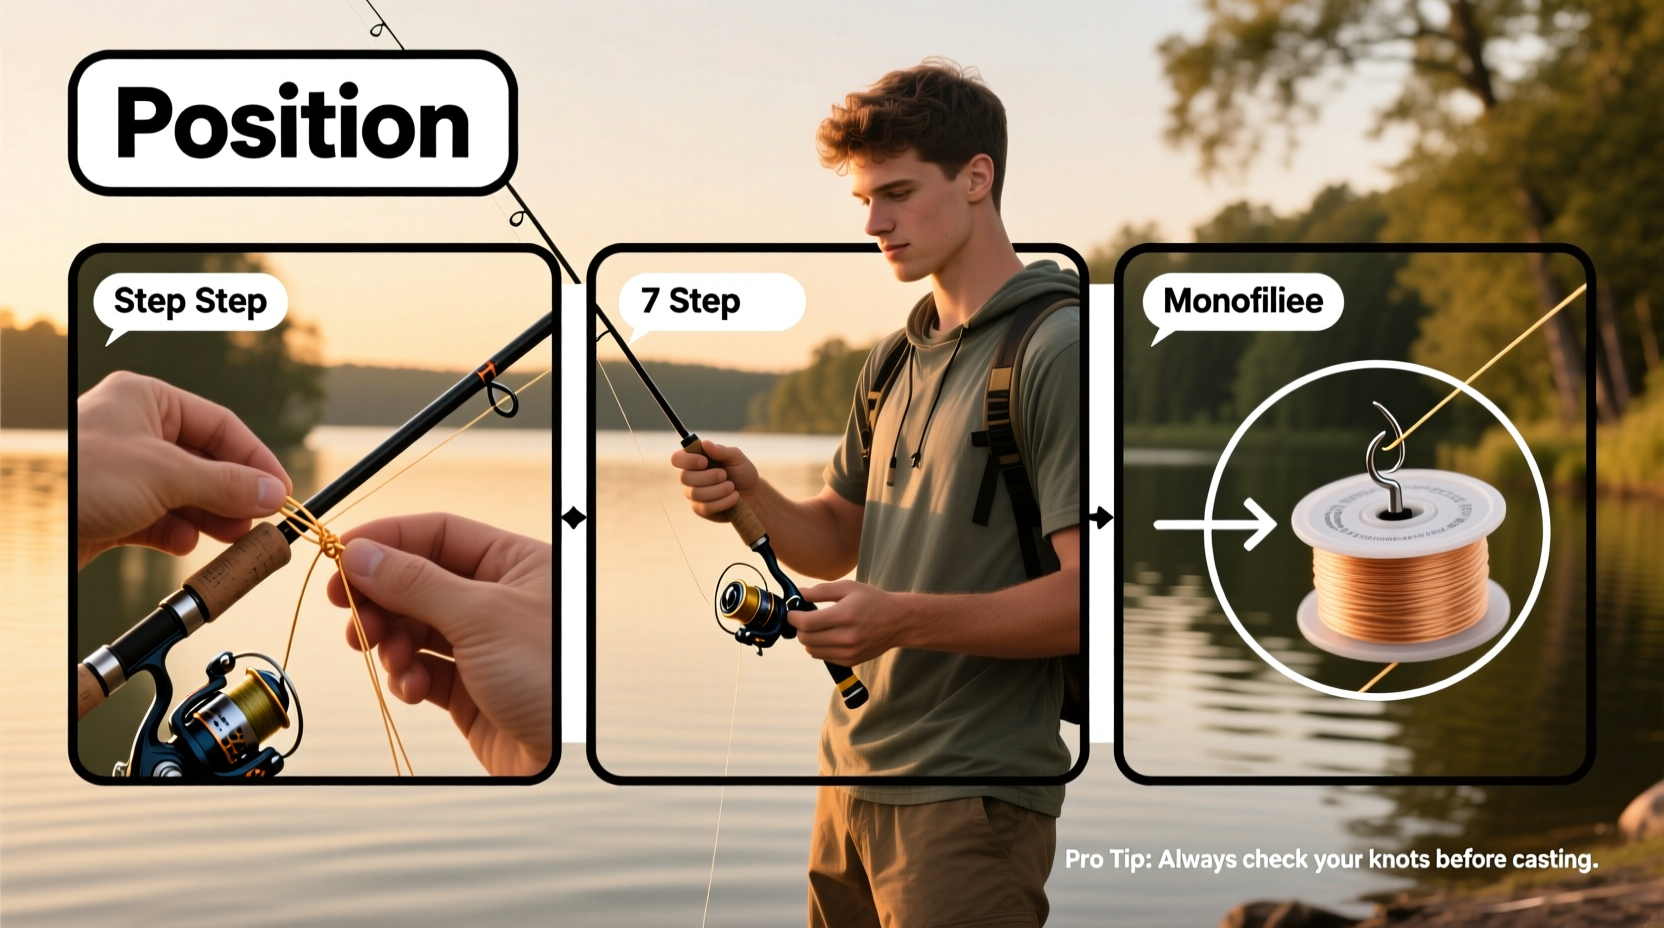
- Attach the Reel to the Rod
Select a compatible spinning reel and secure it to the rod’s reel seat. Tighten the locking ring until snug but not over-tightened. - Choose the Right Fishing Line
Monofilament is recommended for beginners due to its stretch, affordability, and ease of handling. Use 4–8 lb test line for small freshwater fish like bluegill or trout. Spool about 100 yards onto your reel. - Spool the Line Onto the Reel
Open the bail (the wire arm on the reel). Pass the end of the line through the rod’s guides starting from the tip. Tie the line to the spool using an arbor knot. Hold the line with a finger to prevent twists as you wind it slowly using the handle. Keep light tension with a cloth to avoid loose coils. - Add a Leader (Optional)
In clear water or when targeting wary fish, attach a 1–3 foot fluorocarbon leader using a double uni knot. Fluorocarbon is nearly invisible underwater and resists abrasion. - Tie on a Hook
Select a size 6–10 hook for panfish or size 1/0 for larger species. Use a reliable knot like the improved clinch knot: pass the line through the eye, wrap it around the standing line 5–7 times, thread the tag end back through the first loop near the eye, then through the large loop. Moisten and pull tight. - Add Sinkers and Floats
Slide on a split shot sinker 12–24 inches above the hook to keep your bait down. If using a bobber, place it 2–4 feet above the hook so the bait hovers off the bottom. Adjust depth based on where fish are feeding. - Bait the Hook
Use live bait like worms or crickets for natural movement, or soft plastics like grubs for artificial appeal. Thread the hook through the bait without tearing it apart—keep it intact to stay on longer and look more lifelike.
Essential Knots Every Beginner Should Know
Knot strength is often the weakest link in your setup. Learning two or three reliable knots ensures your hook stays tied and your catch doesn’t escape.
| Knot | Best For | Key Benefit |
|---|---|---|
| Improved Clinch Knot | Attaching hooks, lures, swivels | Strong, simple, widely trusted |
| Double Uni Knot | Joining lines (e.g., mainline to leader) | Secure connection between different diameters |
| Palomar Knot | Braided line or heavy cover | High strength, easy to tie in low light |
Always wet the knot before tightening to reduce friction and prevent weakening the line. After tying, give a firm tug to check security.
Avoiding Common Mistakes
New anglers often make preventable errors that lead to lost fish or poor performance. Recognizing these early can save time and boost confidence.
- Using line that’s too heavy or too light for the target species
- Skipping the reel spooling tension check, causing backlash
- Tying knots incorrectly or failing to moisten them before tightening
- Overloading with too many sinkers or hooks, making casting difficult
- Not checking gear for nicks, frays, or corrosion before heading out
“Most beginner losses happen at the knot. Spend five minutes learning to tie one good knot properly, and you’ll catch more fish.” — Mark Reynolds, Veteran Angler & Outdoor Educator
Checklist: Pre-Fishing Line Setup Routine
Run through this quick checklist before every outing to ensure your line is ready:
- ✅ Rod and reel securely connected
- ✅ Line properly spooled with no twists or slack coils
- ✅ Correct line weight and type for target fish
- ✅ Hooks sharp and rust-free
- ✅ Knots tied correctly and tested for strength
- ✅ Bobber and sinkers positioned appropriately
- ✅ Bait fresh and securely attached
- ✅ Extra line, hooks, and sinkers packed in tackle box
Real Example: Jake’s First Successful Trip
Jake, a 28-year-old office worker, had always wanted to try fishing but felt overwhelmed by gear choices. He bought a budget spinning combo and watched several online videos, but his first two attempts ended in tangled line and zero bites. Discouraged, he reached out to a local fishing club.
They advised him to simplify: use 6 lb monofilament, spool carefully, and stick to one rig—a bobber, split shot, size 8 hook, and nightcrawler. He practiced the improved clinch knot at home until he could tie it blindfolded. On his third trip, he caught six bluegills in under two hours. “I didn’t realize how much difference a properly set line made,” he said. “It wasn’t magic—just doing the basics right.”
Frequently Asked Questions
How often should I replace my fishing line?
Monofilament degrades after 1–2 years due to UV exposure and moisture. Even if unused, replace it annually. Check for stiffness, discoloration, or micro-frays. Braid lasts longer (3+ years) but inspect regularly for abrasion.
Can I use the same line for different fish?
You can, but adjust the pound test accordingly. A 6 lb line may work for trout and panfish but will struggle with largemouth bass or catfish. Switch to 10–12 lb for bigger species or weedy environments.
Why does my line keep breaking?
Common causes include weak knots, worn line, sharp hook edges, or snagging on rocks/structure. Always check your knot integrity and inspect the last few feet of line after a break.
Final Tips for a Successful Start
Success in fishing starts long before you reach the water. Taking time to set up your line correctly pays off in smoother casts, better bait presentation, and more hooked fish. Focus on mastering one rig at a time, practice your knots, and don’t rush the process. Nature rewards patience and preparation.
Keep a small notebook to record what worked—depth, bait type, location—and refine your approach over time. Most importantly, enjoy the experience. The sound of water, the rhythm of casting, and even the quiet moments between bites are part of what makes fishing truly special.


 浙公网安备
33010002000092号
浙公网安备
33010002000092号 浙B2-20120091-4
Comments
No comments yet. Why don't you start the discussion?