
Setting up an email account on your iPhone doesn’t have to be complicated. Whether you’re switching from Android, replacing a lost device, or just adding a new work or personal account, the process is straightforward—once you know where to look and what settings to use. Apple’s built-in Mail app supports most major providers out of the box, but even less common accounts can be configured manually with minimal effort.
This guide walks you through every step, from accessing settings to troubleshooting connection issues. By the end, you’ll not only have your inbox working smoothly but also understand how to maintain it securely and efficiently across devices.
Supported Email Providers and Automatic Setup
The iPhone natively supports several major email services, including Gmail, iCloud, Outlook.com (formerly Hotmail), Yahoo Mail, and AOL. When you enter your email address and password during setup, iOS often auto-detects the correct server settings using its configuration database.
If your provider is supported, this automatic detection means you won’t need to manually input incoming or outgoing server details. However, if you're using a custom domain (e.g., yourname@yourbusiness.com) or a lesser-known service, manual configuration may be required.
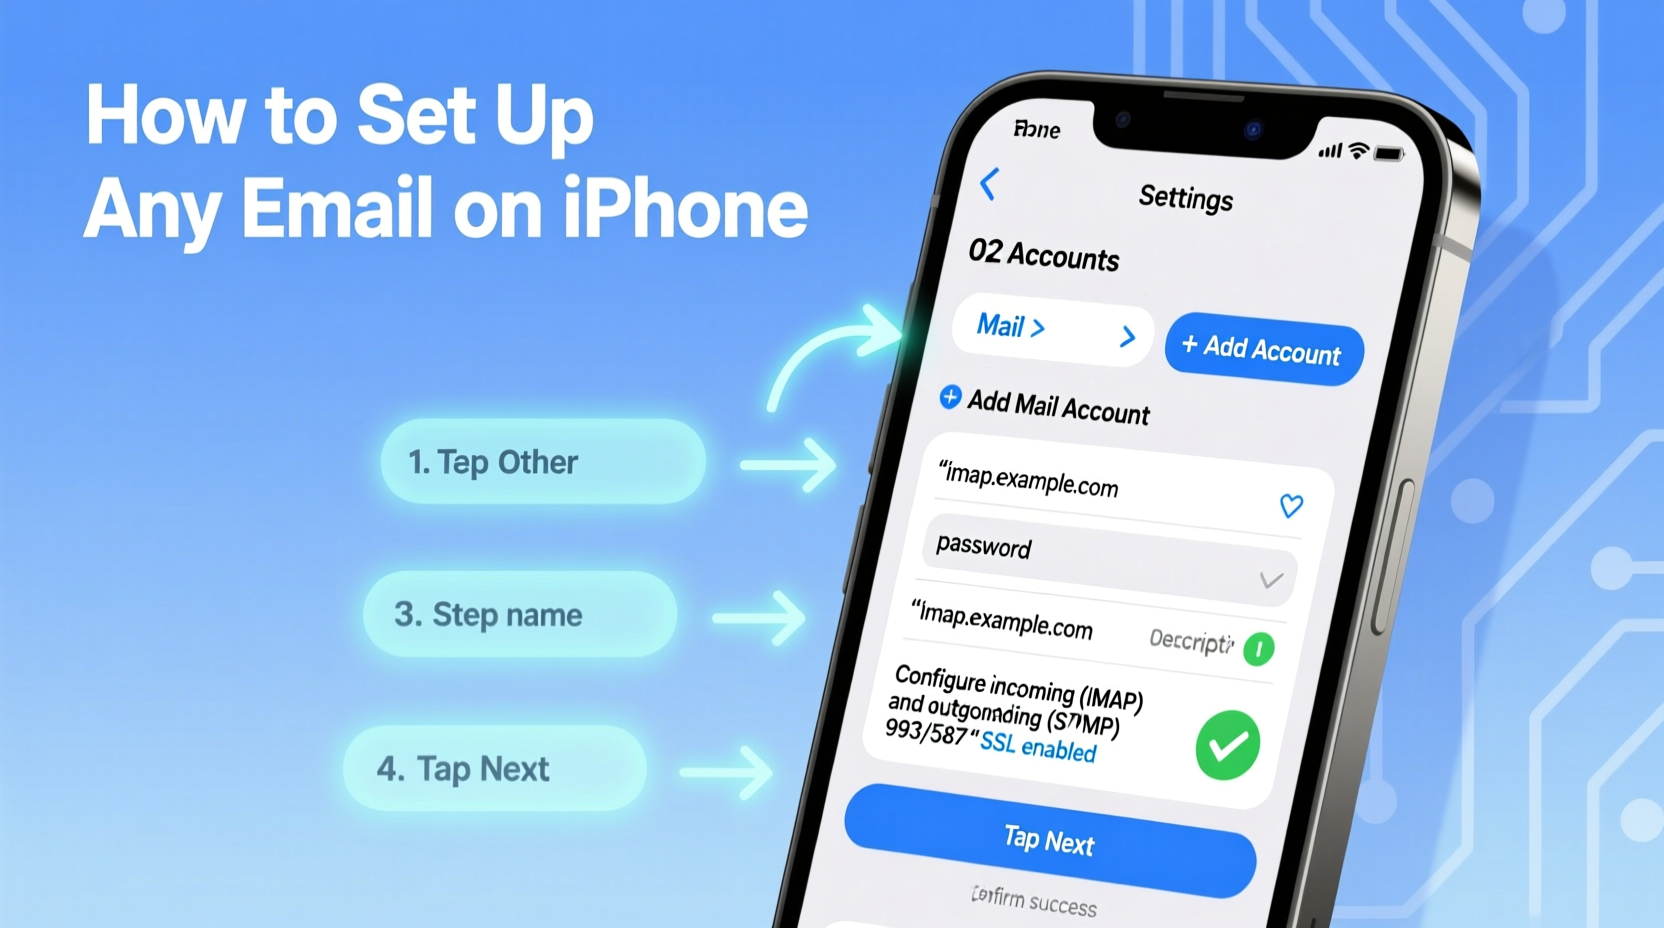
Step-by-Step: Adding an Email Account via Settings
- Open the Settings app on your iPhone.
- Scroll down and tap Mail.
- Select Accounts, then tap Add Account.
- Choose your email provider from the list:
- iCloud
- Gmail
- Yahoo
- Outlook.com
- Exchange
- Other
- If your provider isn’t listed, select Other at the bottom.
- Enter your name (as you want it to appear to recipients), email address, password, and a description (e.g., “Work Email”).
- Tap Next. The iPhone will attempt to verify your credentials and fetch server settings automatically.
- If verification fails, you’ll be prompted to enter server information manually.
Once verified, you can choose which data to sync: Mail, Contacts, Calendars, and Notes. Enable only what you need to save battery and storage.
Manual Configuration for Non-Standard Accounts
For self-hosted domains or smaller email providers, automatic setup may fail. In such cases, you must configure IMAP or POP settings manually under the \"Other\" option.
Here’s what you’ll typically need:
- Incoming Mail Server (IMAP): Hostname, port, encryption type (SSL/TLS), username, and password.
- Outgoing Mail Server (SMTP): Same details, usually on a different port.
Example settings for common configurations:
| Provider | IMAP Server | Port | Encryption | SMTP Server | Port |
|---|---|---|---|---|---|
| Gmail | imap.gmail.com | 993 | SSL | smtp.gmail.com | 465 or 587 |
| Outlook.com | imap-mail.outlook.com | 993 | SSL | smtp-mail.outlook.com | 587 |
| Yahoo | imap.mail.yahoo.com | 993 | SSL | smtp.mail.yahoo.com | 465 or 587 |
| Custom IMAP | mail.yourdomain.com | 993 | SSL | mail.yourdomain.com | 587 |
“Many users overlook two-factor authentication when setting up third-party apps. If enabled, you'll need an app-specific password instead of your regular login.” — David Lin, Mobile Security Analyst
Troubleshooting Common Setup Issues
Even with correct information, some accounts fail to connect. Here are frequent causes and solutions:
- Authentication Errors: Double-check your password. If using 2FA, ensure you’ve generated an app-specific password.
- Server Not Responding: Confirm the hostname spelling and internet connection. Try switching between Wi-Fi and cellular data.
- Certificate Warnings: Rare but possible. Only proceed if you trust the server; otherwise, contact your IT administrator.
- Emails Not Syncing: Check sync frequency in Settings > Mail > Accounts > Fetch New Data. Set to “Push” or “Fetch” every 15 minutes.
If problems persist, temporarily disable any firewall or security suite on your network that might block IMAP/SMTP traffic.
Mini Case Study: Setting Up a Custom Domain Email
Sophie runs a small design studio and recently purchased a professional email like hello@lunadesign.co. She tried adding it directly in the Mail app but got stuck after entering her password.
Her hosting provider didn’t offer clear instructions, so she followed these steps:
- Visited her web host’s support page and found the IMAP/SMTP settings.
- Chose “Other” in the iPhone’s Add Account menu.
- Entered her full email and password.
- Configured incoming server: imap.zoho.com, SSL, port 993.
- Set outgoing server: smtp.zoho.com, TLS, port 587.
After saving, her emails synced within seconds. Now she receives client messages directly on her phone without relying on a browser.
Email Setup Checklist
Use this checklist to ensure smooth configuration every time:
- ✅ Know your full email address and current password
- ✅ Determine if your provider requires app-specific passwords (especially Gmail)
- ✅ Have server settings ready (IMAP/SMTP hostnames, ports, encryption)
- ✅ Verify internet connectivity on your iPhone
- ✅ Decide which data to sync (Mail, Contacts, Calendar)
- ✅ Test sending and receiving a message after setup
Security Best Practices After Setup
Once your account is active, protect it with smart habits:
- Enable Two-Factor Authentication (2FA): Adds a second layer of protection beyond passwords.
- Use App-Specific Passwords: Especially important for accounts like Google or Microsoft when accessed via third-party apps.
- Review Connected Devices: Periodically check which devices are linked to your email and remove outdated ones.
- Update Passwords Regularly: Consider changing them every 3–6 months, especially for sensitive accounts.
Frequently Asked Questions
Can I add multiple email accounts to one iPhone?
Yes. There’s no practical limit to how many email accounts you can add. Each appears under the same Mail app, and you can switch between inboxes or consolidate them into a unified view.
Why does my email keep asking for a password?
This usually indicates an authentication issue. It could be due to a changed password, expired app-specific token, or server outage. Re-enter your credentials or regenerate the app password if using 2FA.
Is it safe to store email on my iPhone?
Yes, provided your phone is secured with a strong passcode, Face ID, or Touch ID. iOS encrypts stored data, and remote wipe features help protect your information if the device is lost.
Final Thoughts and Next Steps
Setting up an email account on your iPhone is a simple yet essential task that enhances productivity and keeps you connected. With the right information and a few careful taps, you can have personal, work, or business emails running seamlessly on one device.
Now that your inbox is accessible on the go, consider organizing it further: create folders, set up signatures, enable notifications selectively, and explore advanced filtering options. A well-configured email system saves time, reduces stress, and ensures nothing important slips through the cracks.


 浙公网安备
33010002000092号
浙公网安备
33010002000092号 浙B2-20120091-4
Comments
No comments yet. Why don't you start the discussion?