
Setting up your email on an iPhone should be simple, but getting it right matters—especially when it comes to security and long-term usability. Whether you're using Gmail, iCloud, Outlook, or a custom business domain, the process involves more than just entering a password. A poorly configured account can expose your data, miss critical notifications, or sync inconsistently across devices.
This guide walks you through each stage of configuring your email on an iPhone with clarity and precision. You'll learn how to choose the right setup method, enable two-factor authentication, troubleshoot common issues, and protect your inbox from unauthorized access—all while maintaining full functionality across Apple’s ecosystem.
1. Understand Your Email Type and Protocol Options
Before diving into settings, recognize that not all email accounts work the same way. The protocol used (IMAP, POP, or Exchange) affects how messages are stored, synced, and accessed across devices.
| Protocol | Best For | Syncs Across Devices? | Security Notes |
|---|---|---|---|
| IMAP | Gmail, Yahoo, iCloud | Yes – keeps folders in sync | Requires app-specific passwords if 2FA is enabled |
| POP | Single-device use only | No – downloads locally | Less secure; messages deleted from server after download |
| Exchange / Microsoft 365 | Work or school accounts | Yes – includes calendar & contacts | Highly secure with encryption and remote wipe capabilities |
For most users, IMAP is ideal because it allows seamless access from multiple devices. If your workplace uses Microsoft 365 or Google Workspace, you’ll likely need to set up via Exchange ActiveSync or OAuth, which provides tighter integration and better security.
2. Prepare Your Account for Secure Setup
Modern email services like Gmail and Outlook no longer allow basic password-only sign-ins due to security risks. To connect your account safely, follow these preparatory steps:
- Enable Two-Factor Authentication (2FA): This adds a second layer of protection beyond your password. Use an authenticator app or SMS verification.
- Generate an App-Specific Password (if required): For accounts like iCloud or Gmail with 2FA enabled, create a unique 16-character password specifically for your iPhone email client.
- Verify Device Compatibility: Ensure your iPhone runs iOS 14 or later for optimal compatibility with modern authentication standards.
- Update Security Questions and Recovery Email: Make sure recovery options are current in case access is lost.
“Using app-specific passwords instead of your main login significantly reduces the risk of full account compromise.” — David Lin, Mobile Security Analyst at CyberShield Labs
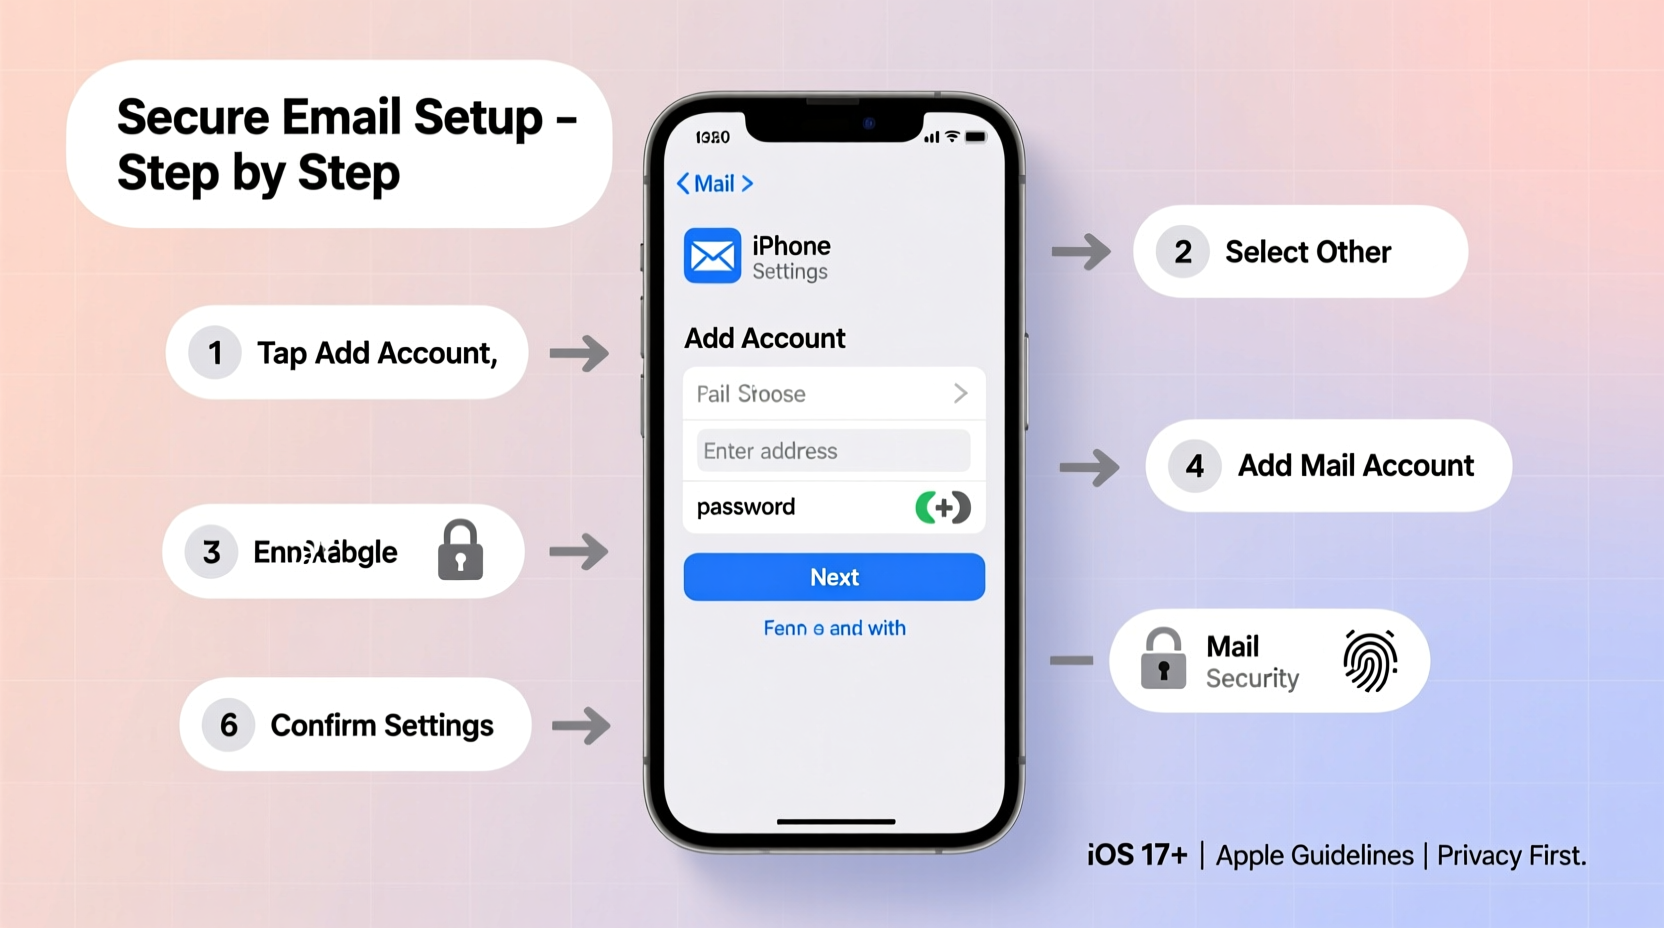
3. Step-by-Step: Adding Your Email Account to iPhone
The actual setup varies slightly depending on your provider, but the general path remains consistent. Follow this sequence carefully:
Step 1: Open Settings and Navigate to Mail
- Tap Settings on your home screen.
- Scroll down and select Mail.
- Tap Accounts, then Add Account.
Step 2: Choose Your Email Provider
Select from the list: iCloud, Gmail, Yahoo, Outlook.com, Exchange, or Other. If your provider isn’t listed (e.g., a custom domain), choose “Other” and proceed manually.
Step 3: Enter Login Credentials
- Type your full email address and password.
- If prompted, enter an app-specific password instead of your regular one.
- Tap Next and wait for verification.
Step 4: Configure Sync Options
After authentication, you’ll see a screen asking what data to sync:
- Mail – always enable
- Contacts – useful for auto-fill in Messages and Calls
- Calendars – essential if you manage appointments via email
- Notes – helpful for cross-device note syncing
- Reminders – optional based on usage
Select only what you need. More synced data increases battery and data usage.
Step 5: Finalize and Test
- Tap Save.
- Open the Mail app to confirm messages appear.
- Send a test email to yourself to verify sending works correctly.
4. Enhance Security After Setup
Just connecting your email isn't enough. Protect your communications with these advanced safeguards:
Enable Remote Wipe Capability
If your iPhone supports Find My iPhone, activate it under Settings > [Your Name] > Find My. This lets you erase your device remotely if lost or stolen—preventing email data leaks.
Use Strong Passcode and Biometric Lock
Set a six-digit passcode (or alphanumeric) and ensure Face ID or Touch ID is active. Without device-level protection, anyone with physical access can open your inbox.
Review Background App Refresh Settings
Go to Settings > General > Background App Refresh. Disable unnecessary refreshes for Mail to reduce background data exposure and improve battery life.
Regularly Audit Connected Devices
Log into your email provider’s website periodically and review \"Devices\" or \"Security Activity.\" Remove any unrecognized sessions or outdated authorizations.
Encrypt Sensitive Emails (Optional)
For highly confidential correspondence, consider third-party tools like ProtonMail Bridge or Virtru, which integrate with iOS Mail via SMTP/IMAP and add end-to-end encryption.
5. Troubleshooting Common Issues
Even with careful setup, problems may arise. Here are frequent issues and their solutions:
- Email Not Syncing Properly
- Check Settings > Mail > Accounts > Fetch New Data. Set fetch interval to “Push” or “Every 15 Minutes.” Avoid “Manually” unless intentional.
- Password Keeps Failing
- Ensure you’re using an app-specific password if 2FA is on. Reset the password through your provider’s security dashboard.
- Sent Emails Don’t Appear in Sent Folder
- In Mail settings, go to Accounts > [Your Account] > Account > Advanced > Outgoing Mail Server (SMTP). Confirm the sent folder is mapped correctly (usually “Sent” or “Sent Messages”).
- Slow Performance or High Battery Drain
- Reduce the number of synced mail days under Account > Mailbox Behaviors > Download Recent Messages. Choose “Last 3 Days” instead of “All.”
Mini Case Study: Recovering a Locked-Out Business User
Jamal, a small business owner, couldn’t access his company email after upgrading his iPhone. His IT team had enforced strict Exchange policies, including mandatory device encryption and minimum passcode length. During setup, he skipped enabling a strong passcode, causing the account to reject the connection. After revisiting Settings > Mail > Accounts, enabling a six-digit code, and re-adding the account with updated credentials, synchronization resumed immediately. The issue wasn’t the email itself—but compliance with backend security rules.
Frequently Asked Questions
Can I have multiple email accounts on one iPhone?
Yes. iPhones support unlimited email accounts. They can all be managed within the same Mail app, with customizable inboxes and swipe actions per account.
Why does my iPhone ask for a password repeatedly?
This often happens when an app password expires or the server rejects the current credentials. Re-enter your password or generate a new app-specific one. Also check if your provider requires periodic re-authentication.
Is it safe to use public Wi-Fi with my email on iPhone?
Only if you have additional protections. Avoid opening attachments or logging in over unsecured networks. Use a trusted VPN service to encrypt traffic when on public internet connections.
Final Checklist Before You Go
- ✅ Enabled two-factor authentication on your email provider
- ✅ Generated an app-specific password (if needed)
- ✅ Successfully added the account via Settings > Mail > Accounts
- ✅ Verified both incoming and outgoing mail functions
- ✅ Configured sync preferences for optimal performance
- ✅ Activated Find My iPhone and a strong device passcode
- ✅ Reviewed connected devices and signed out of unused ones
Take Control of Your Digital Inbox Today
Your email is one of your most sensitive digital assets—used for banking, social logins, and personal communication. Taking the time to configure it properly on your iPhone ensures reliability, privacy, and peace of mind. With secure protocols, updated credentials, and smart device habits, you’re not just setting up an app—you’re building a trusted communication hub.


 浙公网安备
33010002000092号
浙公网安备
33010002000092号 浙B2-20120091-4
Comments
No comments yet. Why don't you start the discussion?