
Setting up an iTunes account is a fundamental step for anyone using Apple devices. Whether you're syncing music, purchasing apps, or backing up your iPhone, having an active iTunes account unlocks the full potential of the Apple ecosystem. While the process is straightforward, first-time users or those switching from older systems may find themselves unsure where to begin. This guide walks you through every stage with precision, offering tips, common pitfalls to avoid, and expert-backed advice to get your account running in minutes.
Why You Need an iTunes Account
An iTunes account—now unified under your Apple ID—is your gateway to Apple’s digital services. It allows you to download apps from the App Store, purchase music and movies, back up your device, sync data across devices, and use iCloud services. Even if you don’t plan on buying content, many features require authentication through an Apple ID, making setup essential for full functionality.
Apple has streamlined the experience so that creating an iTunes account automatically creates your Apple ID, which works across all Apple services including iMessage, FaceTime, and Find My.
What You’ll Need Before Starting
Gathering the necessary information ahead of time will make the setup smooth and fast. Here’s what you should have ready:
- A working email address (preferably one you control long-term)
- A strong password (or a password manager to generate one)
- Your real name and birthdate
- A payment method (credit card, PayPal, or the option to select “None”)
- Access to a computer or iOS device with internet connection
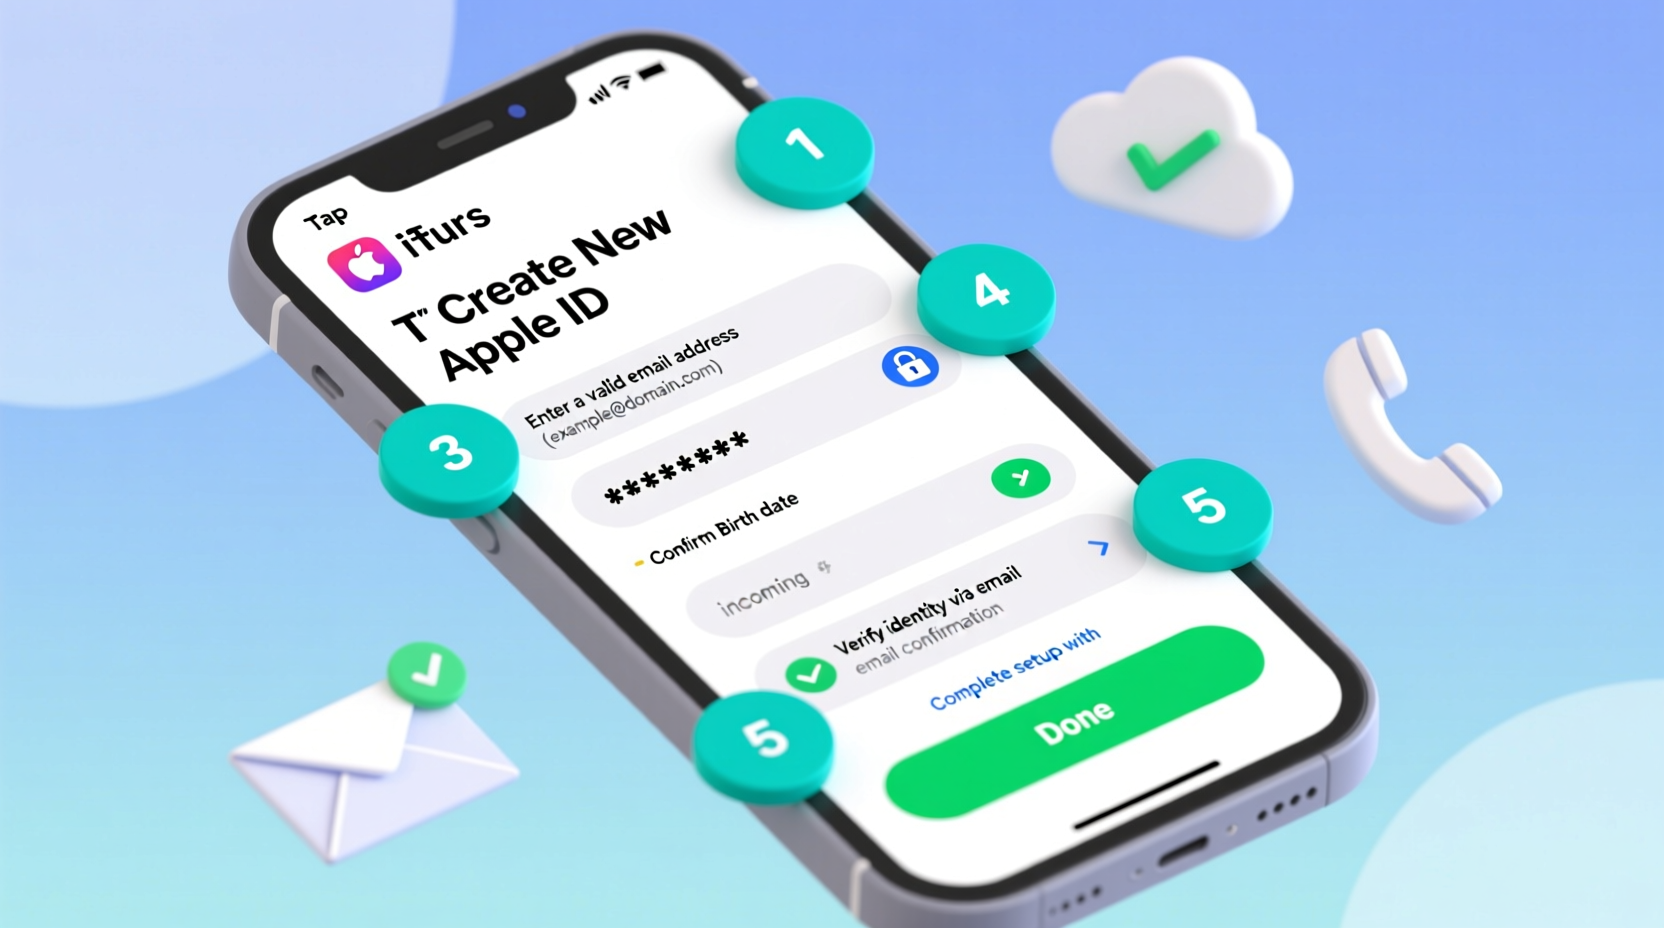
Step-by-Step Guide to Creating Your iTunes Account
The process varies slightly depending on whether you’re using a computer (via iTunes or Finder) or an iOS device. Below is the most reliable method using a computer, followed by mobile alternatives.
- Open iTunes (or Finder on macOS Catalina and later)
Launch the app on your Mac or PC. If you don’t have it installed, download it from apple.com/itunes. - Navigate to the Account Section
In iTunes, click on \"Account\" in the top menu bar, then select \"Sign In.\" Choose \"Create New Apple ID\" when prompted. - Agree to Terms and Select Account Type
Read the terms and conditions (you can skim, but it’s wise to understand data usage policies). Choose \"Continue\" and select your country or region carefully—this affects available content and payment options. - Enter Your Email and Create a Password
Type in your email address. Apple will use this as your Apple ID. Create a strong password with at least eight characters, including uppercase, lowercase, numbers, and symbols. - Add Personal Information
Fill in your name and birthdate accurately. This helps protect your account and enables age-appropriate content filtering. - Set Up Security Questions (if prompted)
Answer three security questions. Choose ones only you would know, and consider storing answers in a secure password manager. - Add a Payment Method
Select your preferred payment option. If you don’t want to add a card, choose “None” — but note this option may not appear in all countries or during certain promotional periods. - Verify Your Email
Apple will send a verification link to your inbox. Open it and confirm your email address to activate your account. - Sign In Across Devices
Use your new Apple ID and password to sign in on your iPhone, iPad, or Mac under Settings > [Your Name] > Sign in to Your iPhone.
Alternative: Setting Up Directly on an iPhone
If you're setting up a new iPhone, you'll be guided through Apple ID creation during initial setup. When prompted:
- Select “Don’t have an Apple ID?”
- Follow prompts to enter your email, create a password, and add personal details.
- Choose “None” under payment method if available.
- Verify via email and complete setup.
Do’s and Don’ts During Setup
| Do’s | Don’ts |
|---|---|
| Use a permanent, personal email address | Use a temporary or shared email |
| Choose a strong, unique password | Reuse passwords from other accounts |
| Select “None” as payment if you don’t plan to buy | Enter fake credit card details |
| Verify your email promptly | Ignore the verification email |
| Enable two-factor authentication | Skip security setup to save time |
“Over 70% of compromised Apple IDs result from weak passwords or unverified recovery methods. Taking ten extra minutes during setup can prevent years of headaches.” — James Reed, Cybersecurity Analyst at TechShield Solutions
Real Example: Maria’s Smooth Setup Experience
Maria, a college student getting her first iPhone, was nervous about setting up her iTunes account. She didn’t want to give a credit card and worried about complicated forms. Following a simple checklist, she used her Gmail address, created a strong password with a password manager, selected “None” for payment, and verified her email within minutes. Two-factor authentication was enabled automatically, and she signed in seamlessly across her iPad and MacBook. Within 15 minutes, she was downloading free apps and syncing her photos to iCloud—no hiccups, no confusion.
Her key takeaway? Preparation made all the difference. By knowing what to expect and avoiding common traps like fake card entries, she completed the process faster than expected.
Essential Checklist for a Successful Setup
Print or bookmark this checklist to ensure nothing is missed:
- ✅ Choose a long-term, personal email address
- ✅ Create a strong password (use a password manager if needed)
- ✅ Accurately enter your name and birthdate
- ✅ Select your correct country or region
- ✅ Pick “None” for payment if you don’t have or want to add a card
- ✅ Verify your Apple ID via email
- ✅ Turn on two-factor authentication
- ✅ Sign in on all your Apple devices
Frequently Asked Questions
Can I create an iTunes account without a credit card?
Yes, you can. When prompted for payment, select “None” as your option. Note: This choice may not be available in all countries, and you must have a device capable of supporting the latest iOS or macOS versions.
What if I don’t receive the verification email?
First, check your spam or junk folder. If it’s not there, go back into your device settings or iTunes, navigate to your Apple ID settings, and request a new verification email. Ensure you entered the correct email address during signup.
Is an iTunes account the same as an Apple ID?
Yes. Apple merged iTunes accounts into the broader Apple ID system. Your Apple ID now works across all Apple services—iTunes, App Store, iCloud, iMessage, and more. The term “iTunes account” is largely legacy, but the setup still leads to creating or signing in with your Apple ID.
Final Steps: Securing and Using Your Account
Once your account is active, take a moment to review your settings. Go to appleid.apple.com and log in to manage your security, trusted devices, and recovery options. Add a recovery contact or phone number to ensure you can regain access if locked out.
You’re now ready to explore the App Store, sync music, back up your phone, and enjoy seamless integration across Apple devices. Remember, your Apple ID is central to your digital life with Apple—protect it like you would a bank account.


 浙公网安备
33010002000092号
浙公网安备
33010002000092号 浙B2-20120091-4
Comments
No comments yet. Why don't you start the discussion?