
Sewing a handmade toy dog is more than just a craft project—it’s an act of creativity, patience, and love. Whether you’re making a gift for a child, crafting a nostalgic keepsake, or simply exploring soft sculpture, the process offers deep satisfaction. With simple tools and thoughtful attention to detail, even beginners can create a plush companion that feels both professional and personal. This guide walks you through every stage, from selecting materials to adding expressive features, while offering insights that will elevate your skills over time.
Selecting Materials and Tools
The foundation of any successful sewing project lies in choosing the right supplies. For a toy dog, softness, durability, and safety are key. Unlike garments, toys endure frequent handling, so fabric and thread must withstand wear without compromising comfort.
- Fabric: Cotton, fleece, minky, or felt work well. Beginners should start with cotton—it’s easy to cut, doesn’t fray excessively, and holds stitches reliably.
- Stuffing: Polyester fiberfill is ideal—lightweight, hypoallergenic, and moldable. Avoid using old clothing scraps unless thoroughly cleaned and safe for children.
- Thread: Use strong polyester or cotton-wrapped polyester thread. It resists breaking during stuffing and play.
- Needles: A size 70/10 universal needle works for most fabrics. For thicker materials like fleece, upgrade to 80/12.
- Extras: Embroidery floss for facial details, safety eyes (if age-appropriate), pins, scissors, and a water-soluble fabric marker.
Creating and Cutting the Pattern
A well-drafted pattern ensures balanced proportions and clean seams. You can design your own or adapt a free template online. For a classic standing dog, include body, head, ears, legs, tail, and optional collar pieces.
- Sketch a simple side profile of a dog on paper, focusing on rounded shapes for a friendly look.
- Divide the body into symmetrical front and back halves. The head should attach seamlessly at the neck.
- Add a ¼-inch seam allowance around all edges using a ruler or French curve.
- Transfer the pattern to cardstock for durability, then trace onto fabric with a fabric marker.
- Cut two of each piece—body, head, legs, etc.—ensuring mirrored symmetry.
| Pattern Piece | Quantity per Toy | Notes |
|---|---|---|
| Body | 2 | Main torso; may include neck base |
| Head | 2 | Round or oval shape depending on breed |
| Ears | 4 | Two outer, two inner (optional lining) |
| Legs | 4 | Can be cylindrical or tapered |
| Tail | 2 | Curved or straight, based on design |
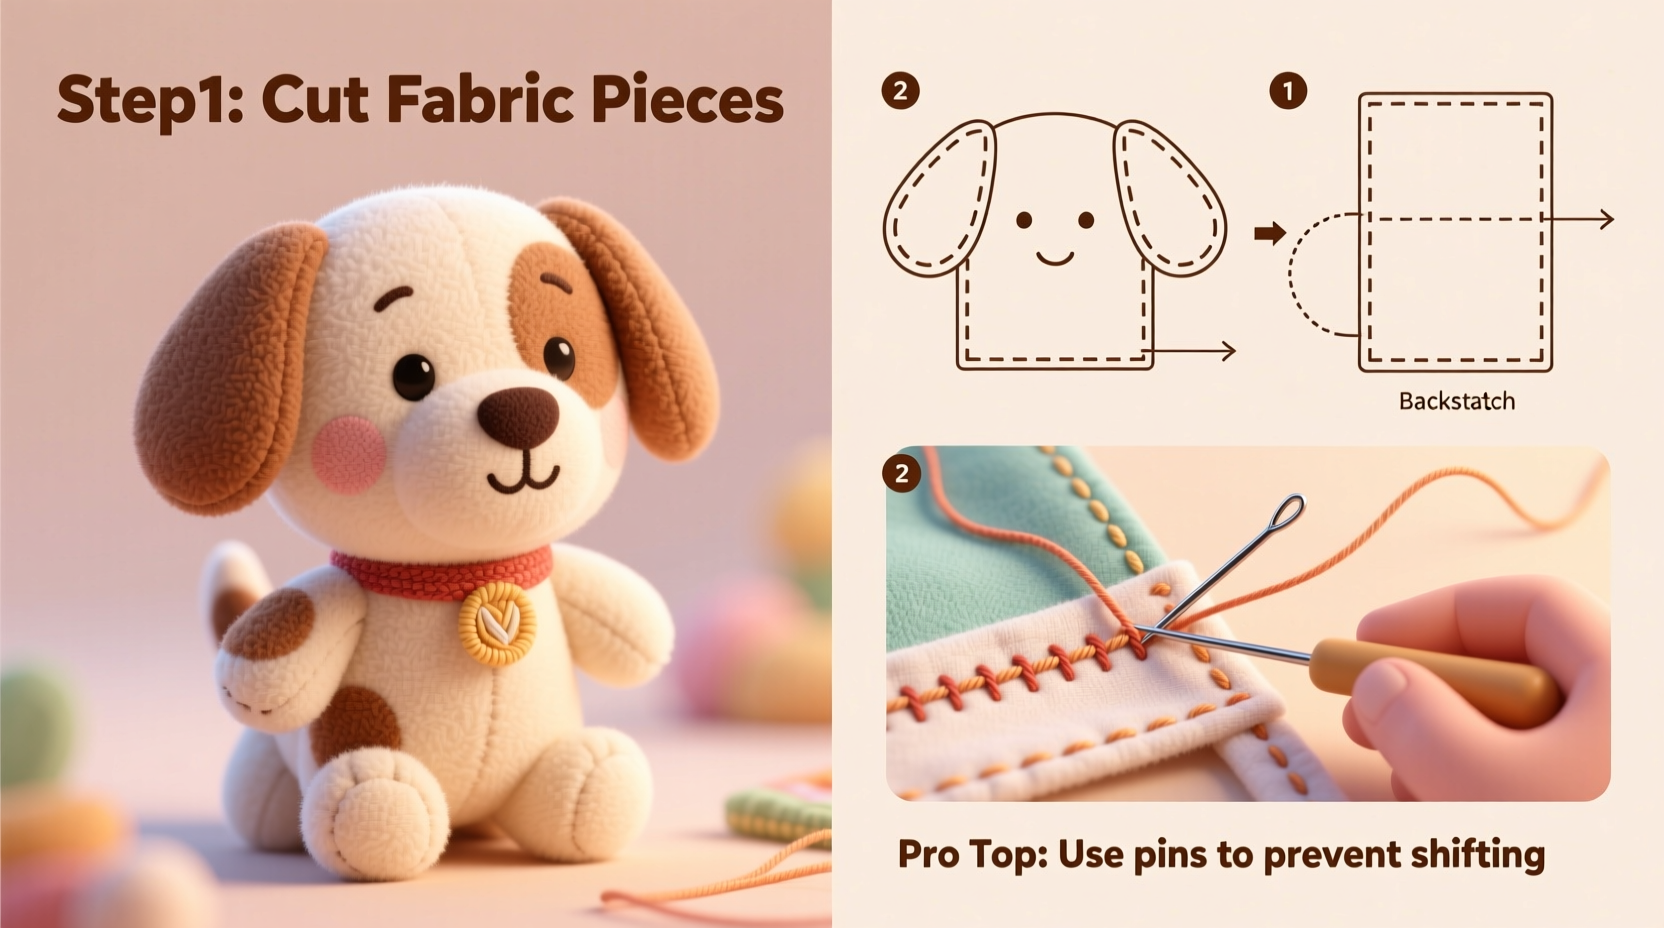
Stitching and Assembly Process
Begin with individual components before assembling the full figure. Always sew with right sides together and use a small stitch length (2.0–2.5 mm) for strength.
- Sew ear pieces together, leaving the base open. Turn right side out and flatten gently with a chopstick. Repeat for all four.
- Attach legs and tail to the body front piece before joining the back. This hides raw edges inside the main seam.
- Pin head and body pieces carefully, matching center points. Sew around the neck opening, leaving a gap for turning.
- Clip curves lightly to allow smooth turning without distorting the shape.
- Turn all pieces right side out and push out corners with a blunt tool.
- Lightly stuff legs and tail first, then the body, saving the head for last to maintain shaping control.
- Hand-stitch the openings closed using a ladder (invisible) stitch.
Adding Character: Faces and Finishing Touches
This is where your toy comes to life. Subtle details make a lasting impression.
Use black or dark brown embroidery floss to create eyes, nose, and mouth. A simple French knot makes a textured nose. Stitch whisker dots sparingly—one or two per side—for realism without clutter. If using safety eyes, install them before stuffing the head, securing washers tightly on the inside.
For breed-specific traits:
- Spaniels: Long, floppy ears lined with contrasting fabric.
- Poodles: Curly texture simulated with layered zigzag stitching.
- Dachshunds: Elongated body with short legs.
“Expression is everything in toy animals. A slight tilt in the eye or curve of the mouth can convey curiosity, sleepiness, or joy.” — Clara Mendez, Soft Sculpture Artist and Instructor
Consider adding a fabric collar with a tiny bell or embroidered name tag. Use contrasting thread for topstitching along ears or paws to highlight edges.
Checklist: From Start to Finish
- Choose soft, durable fabric and pre-wash it
- Print or draft a balanced pattern with seam allowances
- Cut all pieces accurately, marking notches if needed
- Sew components in order: ears, limbs, body, head
- Clip curves and turn pieces carefully
- Stuff firmly but evenly—avoid lumps
- Close openings invisibly with hand stitching
- Add facial features with embroidery or safety parts
- Inspect seams and reinforce stress points if necessary
- Give your toy a final fluff and pose for photos!
Common Challenges and How to Solve Them
Even experienced sewers encounter issues when working with small, curved seams. Here’s how to handle frequent problems:
| Issue | Solution |
|---|---|
| Uneven stuffing | Use small handfuls of fiberfill, pushing down into limbs with a pencil or dowel |
| Fabric puckering at curves | Clip seam allowances carefully and press lightly with fingers after turning |
| Misaligned seams | Pin at center points and quarter marks before sewing |
| Visible closure stitches | Practice the ladder stitch on scrap fabric first; pull tight between each pass |
Mini Case Study: Sarah’s First Toy Dog
Sarah, a beginner sewer, wanted to make a birthday gift for her niece. She chose a simple dachshund pattern printed from a free blog. Her first attempt had lumpy stuffing and crooked ears, but she didn’t give up. After watching a tutorial on invisible stitching and switching to shorter embroidery threads, her second version showed dramatic improvement. She added red polka-dot ears and a stitched bowtie, which delighted her niece. “It doesn’t look store-bought,” Sarah said, “but that’s what makes it special.”
Frequently Asked Questions
Can I machine-wash a handmade toy dog?
Yes, but only if made with colorfast, pre-washed fabrics and securely attached parts. Hand-washing in cool water with mild soap is safer. Air dry completely to prevent mold.
Are safety eyes safe for toddlers?
Only if securely installed with washers and reinforced backing. For children under 3, embroider facial features instead to eliminate choking hazards.
How do I make my toy look more professional?
Press seams open before turning when possible, use consistent stitch length, and take time with detailing. Professional finish comes from patience, not perfection.
Conclusion: Bring Your Creation to Life
Sewing a toy dog is a journey that blends technical skill with heartfelt expression. Each stitch carries intention, and every choice—from fabric texture to eye placement—shapes the personality of your creation. Beginners gain confidence with each completed piece, while experienced crafters find joy in refining details and experimenting with new techniques. There’s no single “right” way to make a toy animal; charm emerges from authenticity, not precision.


 浙公网安备
33010002000092号
浙公网安备
33010002000092号 浙B2-20120091-4
Comments
No comments yet. Why don't you start the discussion?