
Upgrading your aging laptop with a solid-state drive (SSD) is one of the most cost-effective ways to breathe new life into your machine. Whether you're struggling with slow boot times, laggy application launches, or general sluggishness, replacing your traditional hard disk drive (HDD) with an SSD can dramatically improve performance. Unlike HDDs, which rely on spinning platters and moving read/write heads, SSDs use flash memory with no moving parts, enabling near-instant access to data. This guide walks you through every phase of the upgrade process—from verifying compatibility to transferring your operating system—so you can complete the job confidently and safely.
Why Upgrade to an SSD?
An SSD doesn’t just make your laptop feel faster—it makes it functionally faster. Boot times often drop from over a minute to under 15 seconds. Applications launch almost instantly, files transfer quicker, and multitasking becomes smoother. Even older laptops with modest processors benefit significantly because storage speed is often the real bottleneck in daily performance.
According to Dr. Alan Park, a hardware systems engineer at the University of Michigan, “The difference between an HDD and SSD in a typical productivity workflow is like comparing a bicycle to a scooter. Both get you there, but one gets you there much faster and with far less effort.”
“Replacing an HDD with an SSD is the single most impactful upgrade you can make to an older laptop.” — Dr. Alan Park, Hardware Systems Engineer
Check Compatibility Before You Begin
Not all laptops support SSD upgrades, and even among those that do, there are variations in form factors and interfaces. Before purchasing any hardware, verify what type of drive your laptop supports.
- SATA vs NVMe: Most older laptops use 2.5-inch SATA drives. Newer models may have M.2 slots supporting either SATA or PCIe NVMe drives. NVMe is significantly faster than SATA, but only if your laptop supports it.
- Physical space: Some ultrabooks lack drive bays or use proprietary mounting systems. Check your laptop’s service manual or online teardown guides (sites like iFixit are excellent resources).
- Boot mode: Ensure your system supports UEFI booting if you plan to install a modern OS on an NVMe drive.
Essential Tools and Materials
Gather everything before starting to avoid interruptions. Here's what you’ll need:
- A compatible SSD (SATA 2.5” or M.2, depending on your laptop)
- Small Phillips-head screwdriver (#0 or #00)
- Anti-static wrist strap (optional but recommended)
- External USB-to-SATA adapter or enclosure (for cloning)
- Backup storage device (external hard drive or cloud)
- USB flash drive (8GB or larger, for creating recovery media)
- Patience and a clean, well-lit workspace
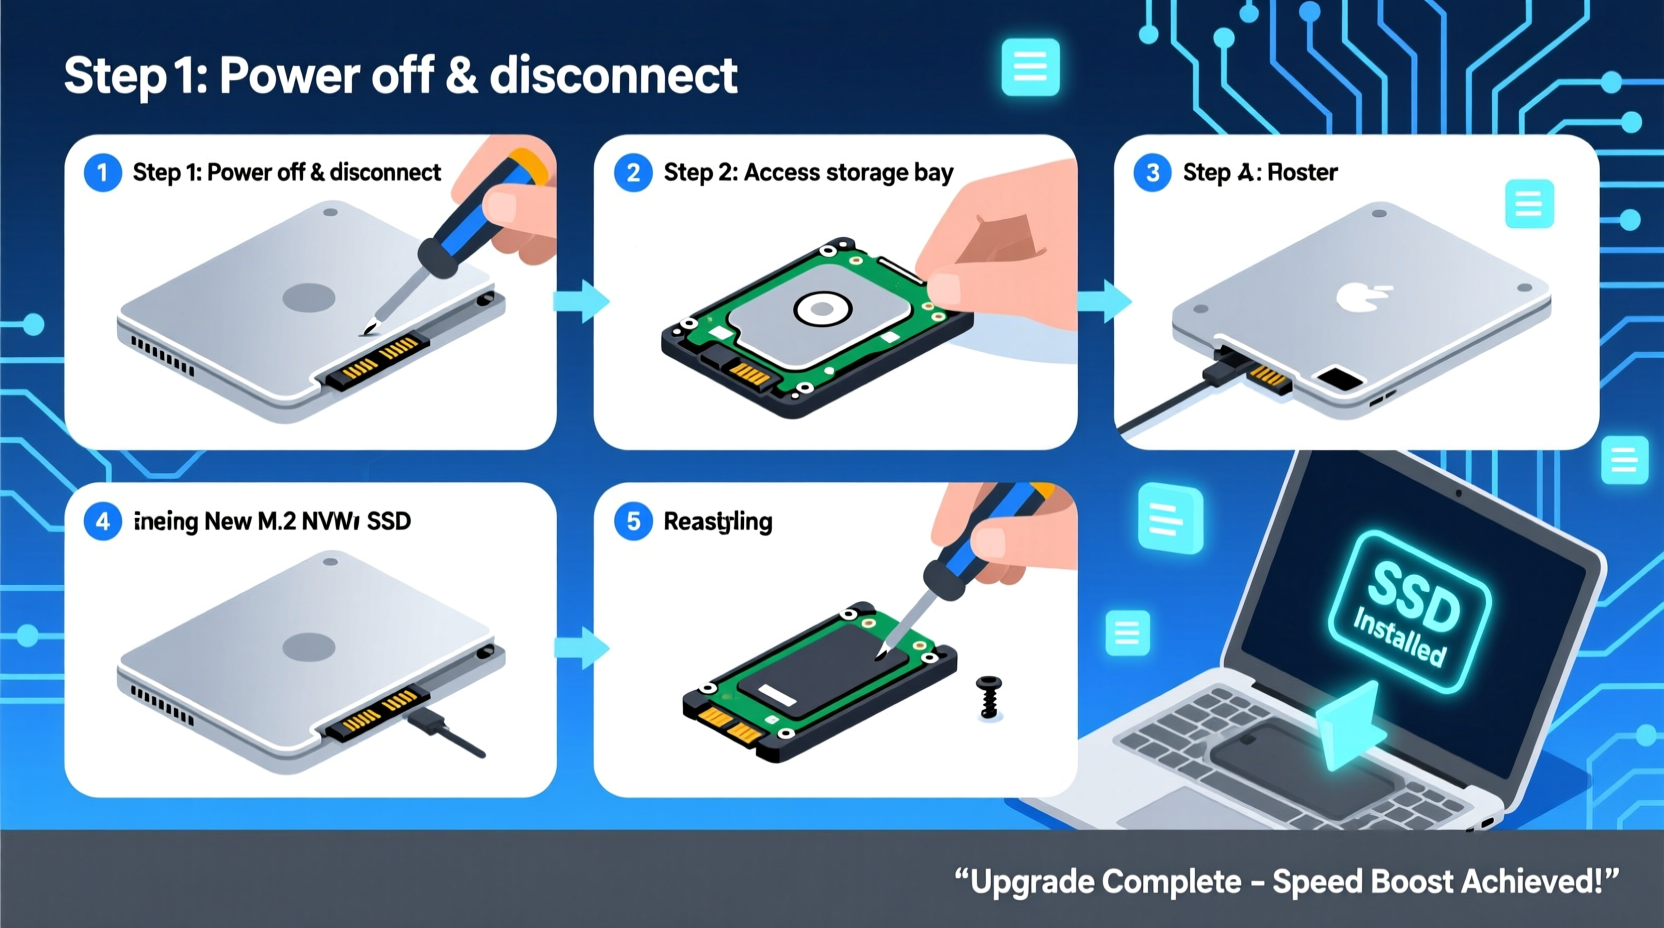
Step-by-Step Installation Guide
- Back up your data. Use File History (Windows), Time Machine (Mac), or third-party software to ensure all personal files are safe. An unexpected error during cloning could result in data loss.
- Create a system recovery drive. In Windows, go to Settings > Update & Security > Recovery > Create a recovery drive. This allows you to restore your OS if something goes wrong post-upgrade.
- Power down and disconnect. Shut down your laptop completely. Unplug the charger and remove the battery if it’s user-accessible. This prevents electrical damage during installation.
- Open the access panel. Locate the bottom panel covering the hard drive. It’s usually marked with a drive icon. Remove the screws carefully and set them aside in a small container.
- Remove the old drive. For 2.5” SATA drives, gently unplug the data and power cables and slide the drive out. For M.2 drives, unscrew the retention screw and pull the drive straight out at a 30-degree angle.
- Install the new SSD. Insert the SSD into the same slot. For M.2 drives, align the notch correctly and secure with the screw. For 2.5” drives, reconnect both cables firmly.
- Reassemble the laptop. Replace the panel and screws. Reattach the battery if removed.
Cloning vs. Clean Install: Choosing Your Approach
You now have two options: clone your existing drive or perform a clean OS installation.
| Method | Pros | Cons |
|---|---|---|
| Cloning | Preserves all files, settings, and apps; fast transition | Potentially transfers clutter, malware, or bloated registry entries |
| Clean Install | Fresh start; optimal performance; removes legacy junk | Requires reinstalling apps and reconfiguring settings |
If you choose cloning, use reliable software like Macrium Reflect (free), Clonezilla, or Samsung Data Migration. Connect your old drive via a USB adapter, select the source (old drive) and destination (new SSD), then start the clone. Ensure the partition is properly aligned for SSDs (most tools do this automatically).
For a clean install, create a bootable USB using Microsoft’s Media Creation Tool, boot from it, and follow the setup prompts. When prompted, delete all partitions on the SSD to start fresh.
fsutil behavior query DisableDeleteNotify should return '0') to maintain SSD performance over time.
Real-World Example: Upgrading a 2013 Dell Inspiron
Mark, a freelance writer using a 2013 Dell Inspiron 15R, experienced frequent freezes when editing documents and loading browser tabs. His 500GB HDD took over 90 seconds to boot Windows 10. He upgraded to a 500GB SATA SSD for $45 and used Macrium Reflect to clone his drive. The entire process took about 45 minutes. Post-upgrade, boot time dropped to 12 seconds, applications launched instantly, and overall system responsiveness improved so much he delayed buying a new laptop by over two years.
Post-Upgrade Optimization Tips
After installing your SSD, take these steps to maximize longevity and performance:
- Disable defragmentation: Windows automatically disables this for SSDs, but verify via Optimize Drives (search in Start menu).
- Enable AHCI mode: In BIOS/UEFI settings, ensure SATA operation is set to AHCI for full SSD performance.
- Update firmware: Check the SSD manufacturer’s website for firmware updates that can improve speed and reliability.
- Maintain free space: Keep at least 10–15% of the SSD capacity free to allow for wear leveling and garbage collection.
Frequently Asked Questions
Can I add an SSD without removing my old HDD?
Yes, if your laptop has an extra drive bay or supports dual drives (common in some 15.6” models). Otherwise, consider replacing the optical drive with a caddy holding a second drive, or use the SSD as your primary boot drive and keep the HDD for storage via external enclosure.
Will upgrading to an SSD void my warranty?
In most cases, no—unless you damage components during installation. However, opening the chassis may void certain manufacturer warranties, especially on sealed devices like MacBooks or ultrabooks. Always check your warranty terms first.
How much SSD storage do I really need?
For basic use (web browsing, office apps), 256GB is sufficient. For photo/video editing or large software suites, opt for 512GB or 1TB. Remember, you can always store large media files externally.
Final Checklist Before You Begin
- ☐ Confirm SSD compatibility with your laptop model
- Use manufacturer specs or compatibility tools.
- ☐ Back up all important data
- Store backups off-device.
- ☐ Prepare cloning or installation tools
- Download software and create bootable media.
- ☐ Gather physical tools
- Screwdriver, anti-static strap, USB adapter.
- ☐ Allocate 30–60 minutes for the full process
- Don’t rush—precision matters.
Take Control of Your Laptop’s Performance
Adding an SSD is more than just a hardware tweak—it’s a transformation. What once felt outdated can become responsive, reliable, and ready for another few years of productive use. The investment is minimal, the risk is low with proper preparation, and the payoff is immediate. Whether you’re a student, remote worker, or casual user, faster load times and seamless operation enhance every digital task. Don’t let slow storage hold you back. With the right tools and this guide, you’re fully equipped to make the upgrade yourself—no technician required.


 浙公网安备
33010002000092号
浙公网安备
33010002000092号 浙B2-20120091-4
Comments
No comments yet. Why don't you start the discussion?