
Creating content for YouTube no longer requires expensive gear or a studio setup. With just a smartphone, you can film, edit, and upload high-quality videos directly from your device. Whether you're starting a vlog, sharing tutorials, or documenting life moments, YouTube makes it easy to go live with minimal effort. The key is knowing the right steps—and avoiding common pitfalls that delay or derail your uploads.
This guide walks you through every stage of publishing a video from your phone to YouTube, using only built-in tools and free apps. From recording tips to optimizing titles and thumbnails, you’ll learn how to streamline the process so you can focus on what matters: creating great content.
1. Prepare Your Phone for Recording
Before hitting record, ensure your phone is ready to capture clean, stable footage. A shaky or poorly lit video can distract viewers—even if your message is strong.
- Clean your lens: Wipe the camera lens with a soft cloth. Smudges reduce clarity and create glare.
- Check storage space: Large video files consume gigabytes quickly. Delete unused apps or offload photos to cloud storage.
- Enable grid lines: In your phone’s camera settings, turn on the rule-of-thirds grid to improve composition.
- Use natural light: Face a window or go outdoors during daylight. Avoid backlighting (e.g., standing in front of a bright window).
- Stabilize your shot: Rest your elbows on a table or use a mini tripod. Even small movements appear exaggerated in video.
2. Record and Review Your Video
Open your phone’s native camera app—no third-party software needed for basic filming. Switch to video mode, frame your shot using the grid, and tap the red button to begin.
Speak clearly and keep sentences concise. If you make a mistake, pause for two seconds and repeat the sentence. This makes editing easier later.
After recording, review the clip in your gallery. Check for:
- Audio clarity (can you hear yourself without straining?)
- Visual focus (is your face or subject sharp?)
- Brightness (are shadows too dark or highlights blown out?)
“Mobile creators who spend five extra minutes reviewing footage cut down on re-shoots and maintain consistency.” — Jordan Lee, Digital Content Strategist
Mini Case Study: From Idea to Upload in Under 30 Minutes
Sophia, a fitness coach, wanted to share a quick morning stretch routine. She recorded a 4-minute video on her iPhone while facing a sunlit window. After playback, she noticed the audio was muffled due to wind noise near an open balcony. She re-recorded indoors, used the Clips app to trim the start and end, added a title card, and uploaded via the YouTube app—all within 25 minutes. Her video gained 2,000 views in 48 hours, largely due to clear visuals and crisp sound.
3. Edit Directly on Your Phone
You don’t need desktop software to edit. Modern smartphones support powerful, user-friendly editing tools.
iOS users: Use iMovie or Apple Clips. Both are free and integrate seamlessly with your photo library.
Android users: Try Google’s YouCut or CapCut. These offer trimming, transitions, text overlays, and music integration.
Basic edits include:
- Trimming the beginning and end to remove dead air.
- Splitting clips to delete mistakes.
- Adding background music (use royalty-free tracks to avoid copyright issues).
- Inserting text overlays for emphasis or context.
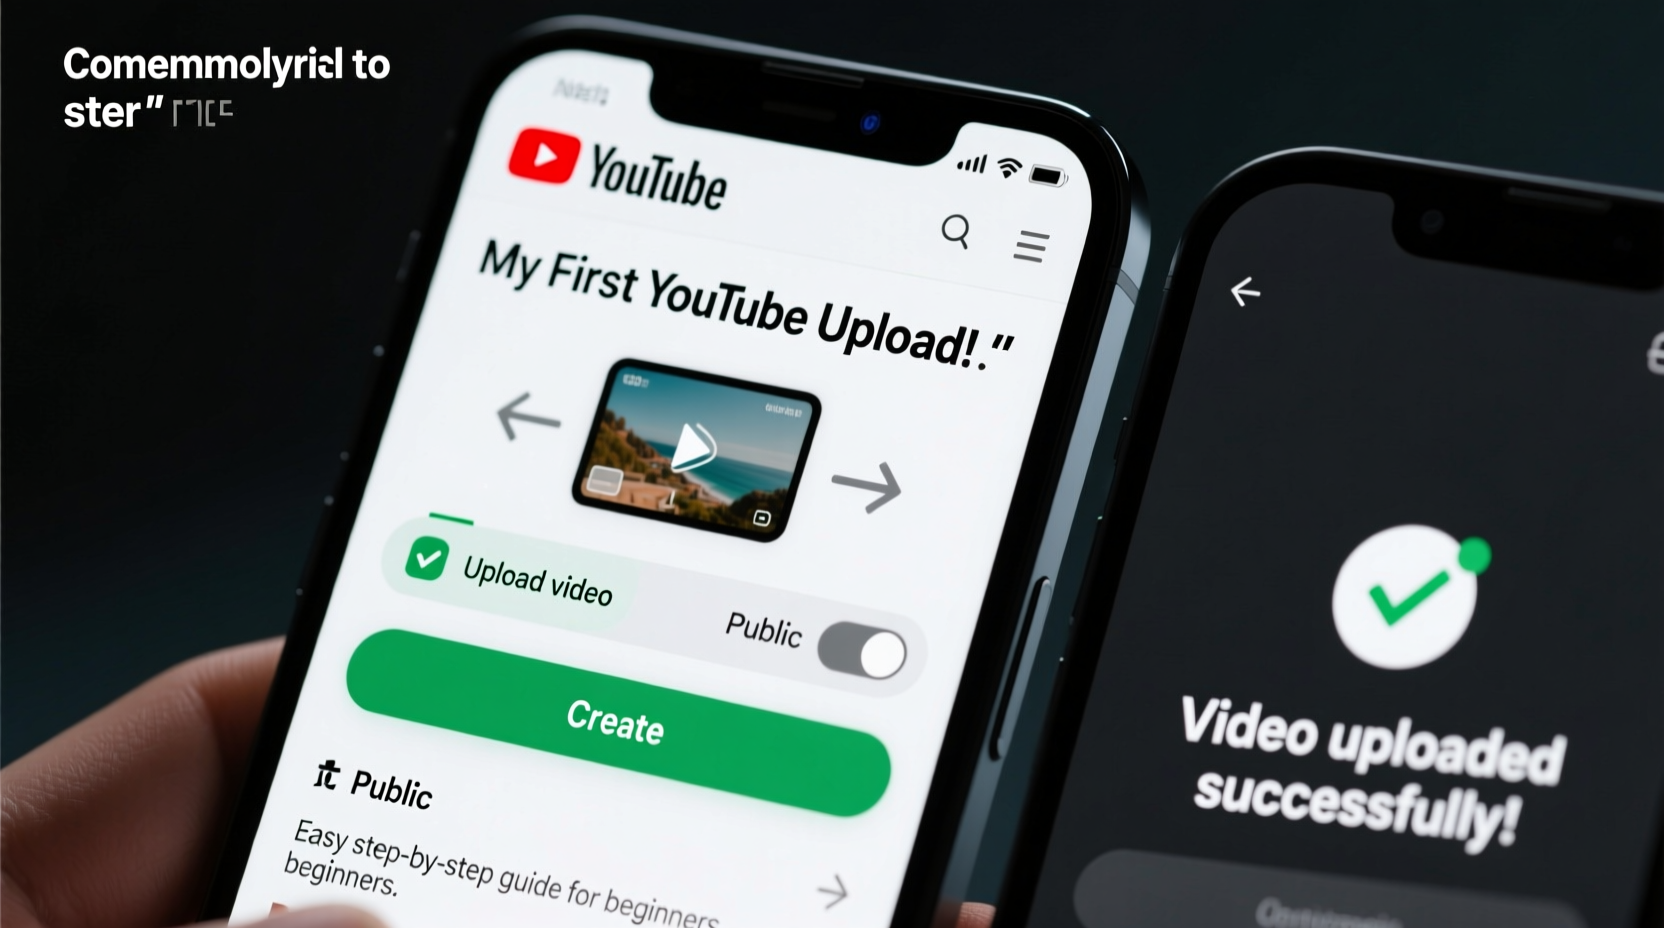
4. Upload to YouTube Using the Mobile App
The YouTube app simplifies publishing. Follow this timeline to go live in under 10 minutes:
Step-by-Step Timeline
- Open the YouTube app and sign in with your Google account.
- Tap the \"+\" icon at the bottom center of the screen.
- Select \"Upload a video\" from the menu.
- Choose your edited file from your gallery or camera roll.
- Wait for processing—this may take 1–5 minutes depending on file size and internet speed.
- Add a title that clearly describes your video (e.g., “5-Minute Morning Stretches for Back Pain” instead of “My Workout”).
- Write a detailed description including keywords, timestamps, and links to related content.
- Select a thumbnail: Choose one of YouTube’s auto-generated options or upload a custom image (recommended).
- Pick a category (e.g., Education, Entertainment, Howto & Style).
- Set visibility: Choose Public, Unlisted, or Private based on your goals.
- Review and publish by tapping the green checkmark.
Do’s and Don’ts During Upload
| Do’s | Don’ts |
|---|---|
| Use Wi-Fi for faster upload speeds | Upload over slow or unstable cellular data |
| Add subtitles or closed captions when possible | Leave descriptions blank or vague |
| Tag relevant keywords (e.g., #yoga, #beginners) | Spam tags like “viral,” “subscribe,” or unrelated topics |
| Enable comments and engagement features | Set all videos to private by default |
5. Optimize for Discovery and Engagement
Uploading is just the first step. To grow your audience, optimize each video for search and viewer interaction.
Tips for better reach:
- Title length: Keep between 50–60 characters for full visibility in search results.
- Description structure: First 2–3 lines should summarize the video and include primary keywords.
- Custom thumbnails: Use bold text, contrasting colors, and expressive faces to stand out.
- Playlists: Group related videos into playlists to increase watch time.
- End screens: Add a call-to-action in the last 20 seconds (e.g., “Watch next” or “Subscribe”).
Checklist: Ready to Publish?
- ✅ Video recorded in good lighting and audio
- ✅ Edited for clarity and pacing
- ✅ Title is specific and searchable
- ✅ Description includes keywords and links
- ✅ Thumbnail is clear and compelling
- ✅ Tags reflect content accurately
- ✅ Visibility setting confirmed
- ✅ Published and shared on social platforms
Frequently Asked Questions
Why is my video taking so long to process after upload?
Processing time depends on video resolution, length, and server load. High-definition (1080p or 4K) videos take longer. Uploading over Wi-Fi and closing other apps can help speed up the process.
Can I edit my video after it’s published?
You can update the title, description, tags, and thumbnail anytime. However, you cannot replace the video file without deleting and re-uploading. Use YouTube Studio to access these settings.
How do I avoid copyright strikes when using music?
Use music from YouTube’s Audio Library or other royalty-free sources like Epidemic Sound or Artlist. Never use commercial songs unless you have explicit permission.
Final Thoughts
Uploading videos from your phone to YouTube has never been simpler. With deliberate preparation, smart editing, and thoughtful optimization, you can publish professional-looking content in less than an hour. The barrier to entry is low—but consistency and attention to detail separate casual posters from growing creators.
Every expert YouTuber started with a single video filmed on a phone. Yours could be next.


 浙公网安备
33010002000092号
浙公网安备
33010002000092号 浙B2-20120091-4
Comments
No comments yet. Why don't you start the discussion?