
Cat eye nails have become a staple in modern manicure trends thanks to their mesmerizing magnetic shimmer that shifts like a feline’s gaze. The effect—achieved through specially formulated gel polishes and a simple magnet—is both elegant and surprisingly easy to master at home. With the right tools, technique, and a bit of patience, you can create professional-looking cat eye designs without stepping into a salon. This guide walks you through every stage, from prep to finish, with practical tips and insights to ensure success.
Understanding the Cat Eye Effect
The cat eye effect relies on a unique type of gel polish infused with metallic micro-particles that respond to a magnetic field. When applied in a thin layer and held near a magnet, these particles align vertically, creating a deep, reflective line down the center of the nail that mimics the glow of a cat’s eye. Unlike regular glitter or shimmer polish, this look is directional and dynamic, changing subtly as light hits it from different angles.
Not all gel polishes produce this effect. Look for labels that specifically say “magnetic,” “cat eye,” or “3D magnetic.” These are formulated with iron-based particles that react to magnets. Standard gel or regular nail polish will not work, even if they appear shimmery.
“Mastering the cat eye technique is about precision and timing. The key is applying the right thickness and holding the magnet steady during curing.” — Lila Nguyen, Nail Art Educator & Salon Owner
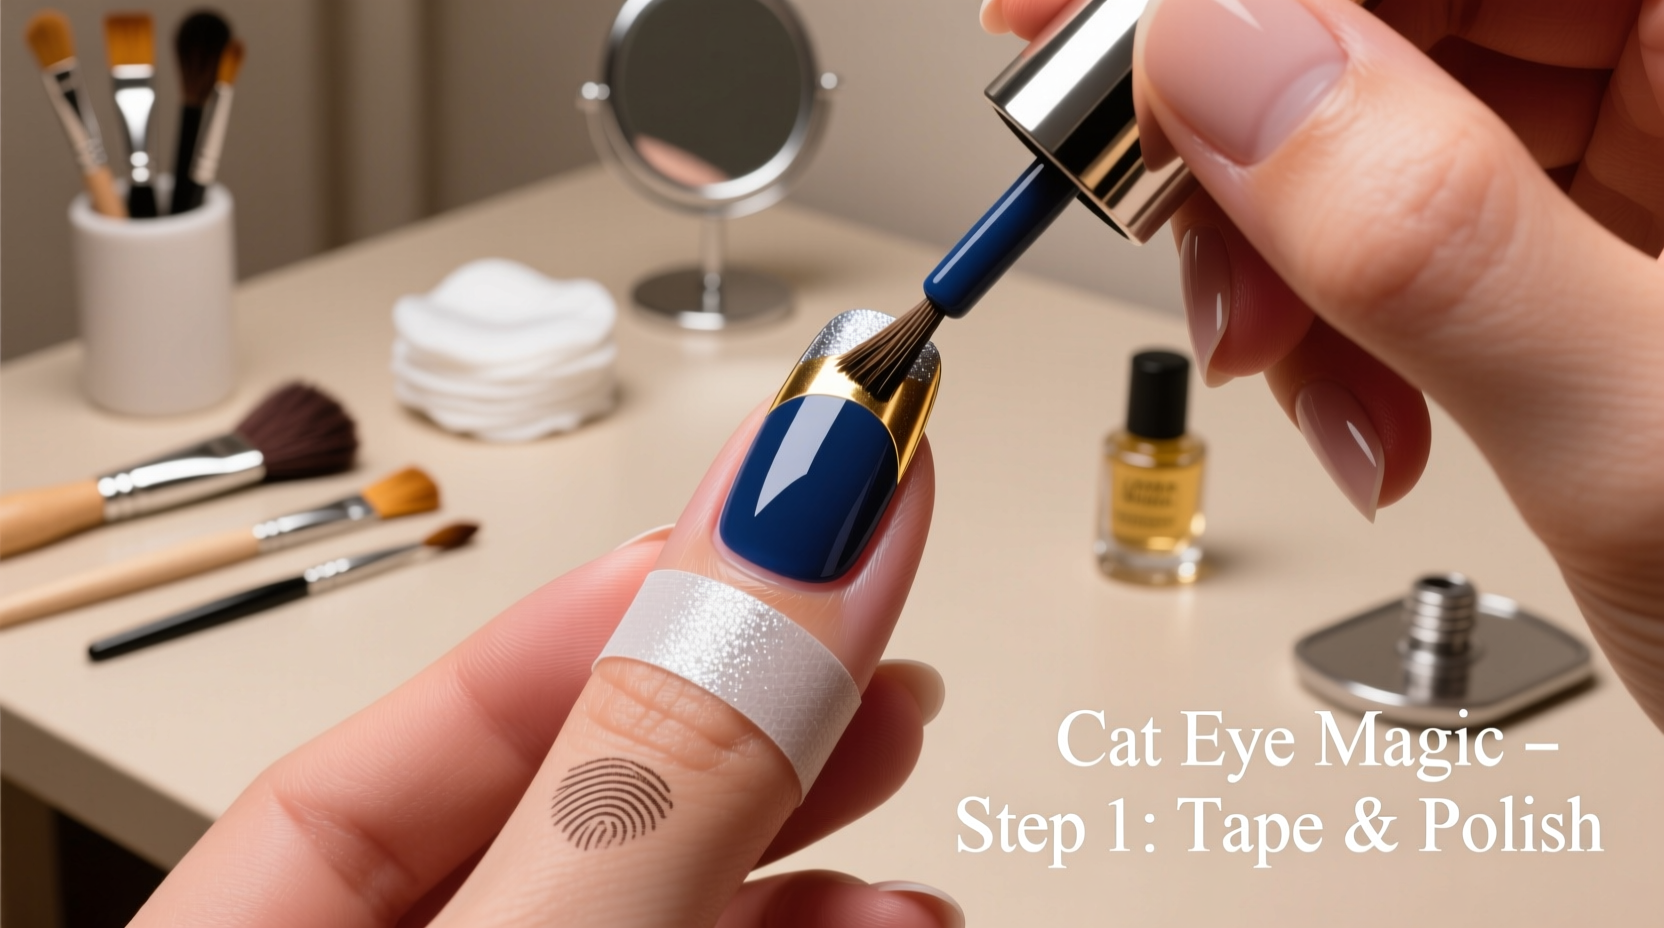
Essential Tools and Materials
Before diving into application, gather everything you’ll need. Having your tools ready prevents interruptions and ensures smooth execution while the polish is still wet and responsive.
- Magnetic cat eye gel polish (base color)
- UV/LED nail lamp (for curing)
- Nail prep kit (buffer, file, cuticle pusher)
- Base coat and top coat (gel-compatible)
- Lint-free wipes and 90%+ alcohol solution
- High-strength magnetic wand or built-in magnet tool
- Nail tape or latex (optional, for clean edges)
Step-by-Step Guide to Perfect Cat Eye Nails
Follow this detailed process to achieve flawless results every time. Precision matters most during the magnetic alignment phase, so take your time.
- Prep your nails: Shape them with a file, gently buff the surface to remove shine, and push back cuticles. Wipe each nail with alcohol to remove oils and debris.
- Apply base coat: Seal the nail with a thin, even layer of base coat and cure under the lamp for 30–60 seconds, depending on your lamp’s wattage.
- First color coat: Apply a thin layer of your chosen cat eye gel polish. Avoid thick application—it reduces magnetic responsiveness. Cure briefly for 10–15 seconds only. This keeps the polish slightly tacky and reactive.
- Activate the magnet: Hold the magnetic wand 1–2 mm above the nail for 10–15 seconds before curing fully. Keep it perfectly centered for a single line, or shift slightly for a double-line effect. Do not move the nail during this time.
- Final cure: After removing the magnet, cure the nail for another 30–60 seconds to lock in the design.
- Top coat: Seal with a glossy or matte gel top coat and cure completely. This protects the design and enhances longevity.
- Clean up: Wipe off the sticky residue with alcohol-soaked wipes. Use a pointed tool wrapped in cloth for precise cleanup around the cuticles.
Common Mistakes and How to Avoid Them
Even experienced DIYers encounter issues when mastering cat eye nails. Below is a table summarizing frequent errors and how to correct them.
| Issue | Possible Cause | Solution |
|---|---|---|
| No visible magnetic line | Polish too thick or over-cured before magnet use | Apply thinner layers; cure only briefly before magnetizing |
| Uneven or broken lines | Magnet moved or held too far away | Hold magnet steady and close (1–2 mm) above nail |
| Streaky or patchy finish | Inconsistent polish application | Use a single stroke per nail; avoid going back over dried areas |
| Chips within days | Poor prep or missing top coat | Always dehydrate nails and seal with top coat |
Pro Tips for Creative Variations
Once you’ve mastered the classic single-line cat eye, experiment with advanced techniques to elevate your look.
- Double cat eye: Use a dual-magnet tool or flip the wand to create two parallel lines.
- Offset effect: Position the magnet toward the side of the nail for an asymmetrical glow.
- Layered colors: Apply a dark base (like navy or black), then a magnetic silver or gold on top for dramatic contrast.
- Accent nails: Try the cat eye on just the ring finger or thumb for a subtle statement.
- Matte finish: Top with a matte gel for a modern, smoky version of the effect.
“I started using cat eye polish at home after my salon visits became less frequent. Once I got the hang of the magnet timing, I was hooked. Now I do my own nails weekly—it saves money and feels like a ritual.” — Sarah M., DIY Beauty Enthusiast (Real Example)
Frequently Asked Questions
Can I use cat eye polish with regular nail polish?
No. Traditional nail polish lacks the metallic particles needed for the magnetic effect, and it dries too quickly for magnet manipulation. For best results, use UV/LED-curable magnetic gel polish with proper curing equipment.
How long do cat eye nails last?
With proper prep and a quality top coat, cat eye gel designs typically last 2–3 weeks without chipping. Avoid prolonged exposure to water, harsh chemicals, and excessive typing to extend wear.
Is the magnet safe for my nails?
Absolutely. The magnet interacts only with the polish particles, not the nail itself. It emits no radiation or harmful energy—just a static magnetic field strong enough to align the polish.
Checklist: Your At-Home Cat Eye Manicure Routine
Print or save this checklist to ensure you don’t miss a step during your next session:
- ✅ Clean and shape nails
- ✅ Buff and dehydrate with alcohol
- ✅ Apply and cure base coat
- ✅ Apply first layer of cat eye polish
- ✅ Partially cure (10–15 sec)
- ✅ Hold magnet steady 1–2 mm above nail for 10–15 sec
- ✅ Fully cure the layer
- ✅ Repeat if desired for intensity
- ✅ Apply top coat and cure
- ✅ Wipe off residue and moisturize
Conclusion: Elevate Your Nail Game at Home
Cat eye nails are more than a trend—they’re a fusion of science and artistry that anyone can learn. With affordable kits available online and growing confidence in DIY beauty, there’s never been a better time to bring the salon experience into your living room. Whether you're prepping for a special occasion or simply treating yourself to a weekly self-care ritual, these step-by-step tips empower you to create stunning, head-turning results with ease.


 浙公网安备
33010002000092号
浙公网安备
33010002000092号 浙B2-20120091-4
Comments
No comments yet. Why don't you start the discussion?