
Creating handmade accessories doesn’t require advanced skills—just a little patience, creativity, and the right guidance. A flower bag purse keychain is a charming blend of functionality and artistry, perfect for personal use or as a thoughtful gift. Compact, colorful, and customizable, this accessory combines delicate floral design with practicality. Whether you're new to crafting or looking for a relaxing weekend project, this guide walks you through every stage of making your own stylish keychain from scratch.
Gathering Your Materials and Tools
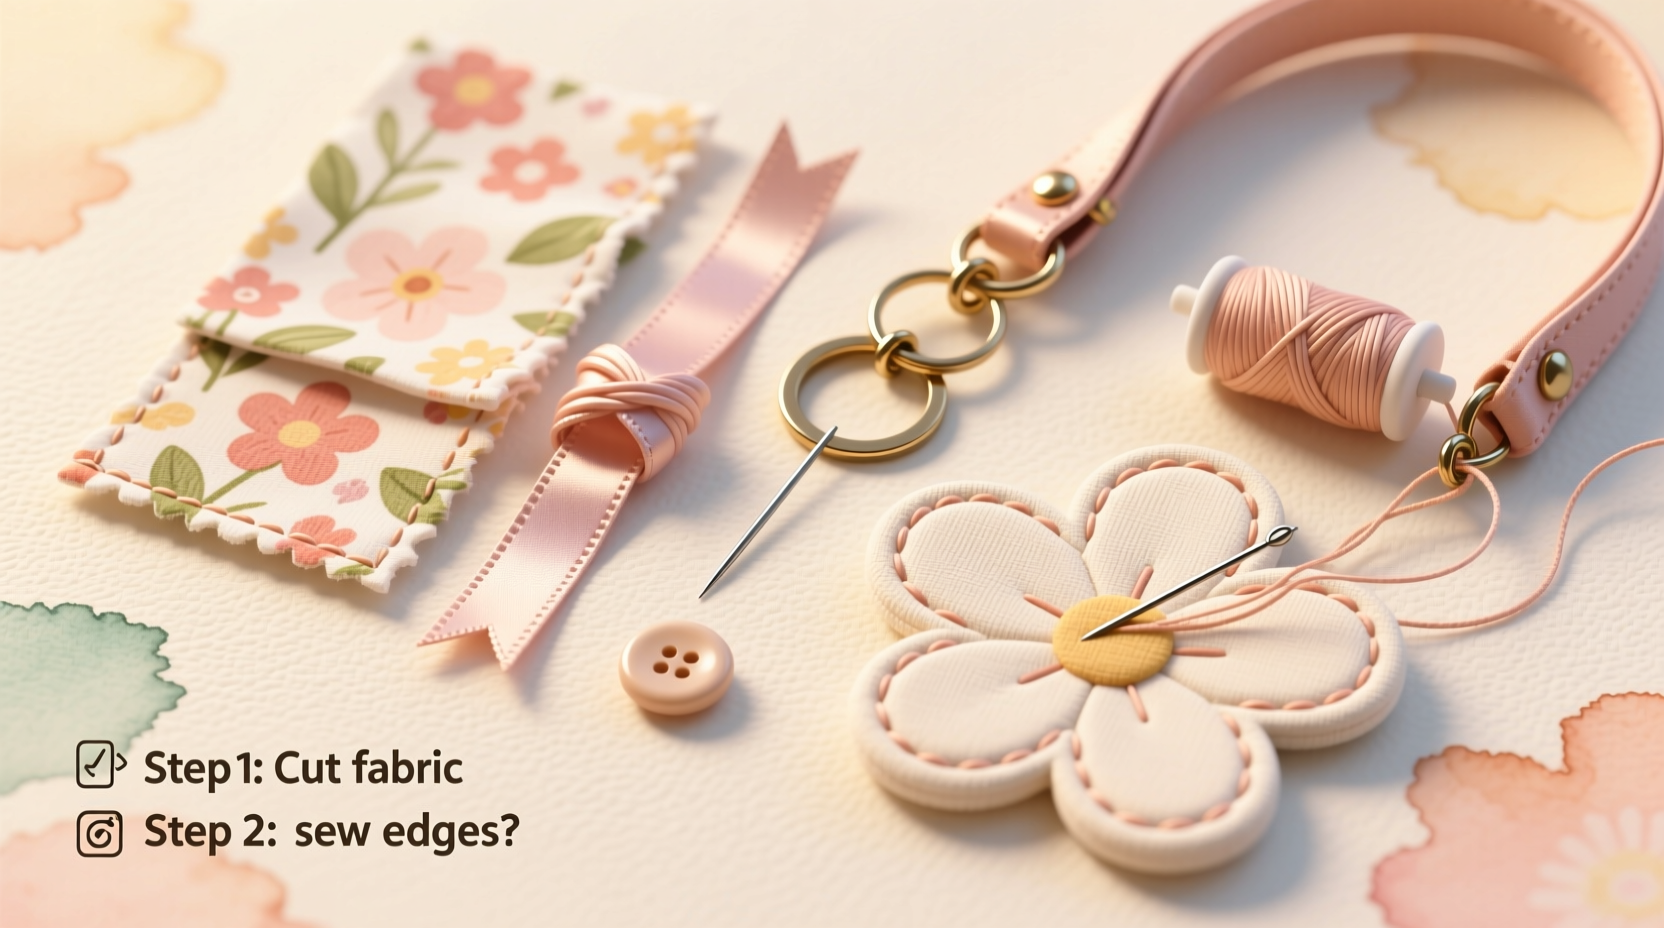
Before beginning any craft, preparation is essential. Having all necessary supplies ready ensures a smooth workflow and minimizes interruptions. For this project, you'll need accessible, affordable items that can be found at most craft stores or online retailers.
| Material/Tool | Purpose | Recommended Type |
|---|---|---|
| Felt fabric (2–3 colors) | Main structure and flower petals | Solid colors with moderate thickness |
| Scissors (fabric or precision) | Cutting fabric cleanly | Sharp, small-tipped for detail work |
| Needle and embroidery thread | Sewing components together | Strong cotton thread in matching colors |
| Hot glue gun or fabric glue | Securing non-sewn elements | Low-temp glue gun for safety |
| Keyring (25–30mm) | Functional attachment | Stainless steel or nickel-plated |
| Button or bead (optional) | Flower center or bag closure accent | 6–8mm diameter |
| Pencil or chalk marker | Tracing shapes onto fabric | Light-colored, erasable |
Designing the Flower and Bag Components
The charm of this keychain lies in its dual-purpose design: a miniature handbag shape topped with a three-dimensional fabric flower. Start by sketching or tracing templates for both parts.
- Bag Base: Draw a rectangle measuring 2.5 inches wide by 1.75 inches tall. This will form the front and back of the tiny purse.
- Flap: Sketch a half-circle with a 1.25-inch radius. This curves over the top of the bag like a clasp cover.
- Flower Petals: Cut five teardrop-shaped petals, each about 1 inch long. Slightly vary their size for a natural look.
- Flower Center: A small circle (0.5 inch) or a button will serve as the focal point.
Transfer these shapes onto felt using a pencil or chalk marker. Cut two identical pieces for the bag body and one flap. Use different colored felt for contrast—such as navy for the bag and pink for the flower—to enhance visual appeal.
Assembling the Mini Purse
Now that all pieces are cut, it’s time to build the foundation. Precision here ensures a neat finish later.
- Lay the two rectangular pieces side by side. Align edges and pin together if needed.
- Using a needle and thread, sew along the left, right, and bottom sides with tight whip stitches. Leave the top open for the flap.
- For durability, reinforce corners with extra stitches.
- Attach the half-circle flap to the top center of the back panel using a few hidden stitches or a small dab of fabric glue.
Once assembled, let the purse structure set. It should stand upright with the flap folding naturally over the opening.
Creating and Attaching the Fabric Flower
The flower brings whimsy and elegance. This version uses layered petals for dimension without complex folding techniques.
- Take the five petal shapes and stack them slightly offset, like shingles on a roof. Pinch the narrow ends together.
- Wrap thread tightly around the base several times to bind them into a cluster.
- Knot securely at the back. Trim excess thread.
- Glue or sew the flat side of the bundle to the top of the purse flap.
- Center the button or bead over the stitched base to conceal it. Sew it in place through the same hole.
The result is a full, realistic bloom that appears to grow from the purse itself. Rotate the petals outward gently to create an organic spread.
“Handmade accessories carry emotional value beyond aesthetics. A simple flower keychain can become a signature piece someone wears daily.” — Lila Monroe, Textile Artist & Craft Educator
Final Touches and Keyring Attachment
With the main components complete, focus shifts to finishing details that elevate professionalism.
- Inspect all seams and glued areas. Reinforce weak points discreetly.
- Add subtle embellishments: a tiny rhinestone in the flower center, or contrasting edge stitching around the bag.
- To attach the keyring, thread a short piece of wire or sturdy thread through the top of the purse flap, just above the flower. Twist the ends tightly and secure with glue inside the fabric layers.
- Slide the keyring onto the loop and close it firmly.
Your completed keychain should feel balanced when held. The flower sits proudly atop the purse, and the ring moves freely.
Checklist: Crafting Your Flower Bag Keychain
- Choose color scheme and gather all materials
- Prepare workspace with good lighting and clean surface
- Test glue or thread on scrap felt to avoid staining
- Cut shapes precisely and label pieces if needed
- Sew with consistent stitch length
- Let glue dry fully between steps
- Ensure no loose threads or sharp glue blobs
- Confirm keyring is secure and functional
- Photograph your creation for sharing or portfolio
Real Example: Maya’s First Craft Fair Success
Maya, a college student with no prior crafting experience, followed this exact method during winter break. She made six variations using pastel felt and vintage buttons. Encouraged by compliments from friends, she sold her entire batch at a local artisan market for $8 each. One customer returned the next week to buy three more as birthday gifts. “I didn’t think something so small could bring so much joy,” Maya said. “Now I’m planning a spring collection with seasonal florals.” Her story shows how beginner-friendly projects can lead to meaningful creative ventures.
Frequently Asked Questions
Can I wash the keychain if it gets dirty?
Spot clean only. Dampen a cloth with mild soapy water and gently wipe the surface. Avoid soaking, as felt can shrink or lose shape. Let air dry completely before use.
What if I don’t have a sewing kit?
You can complete this project using only fabric glue. Apply thin layers and allow 15–20 minutes of drying time between steps. While less durable than stitching, glued versions still last months with light use.
How long does it take to make one keychain?
Beginners typically finish in 45 to 60 minutes. With practice, assembly drops to under 30 minutes. Cutting templates ahead of time speeds up future builds.
Bring Creativity Into Everyday Life
A flower bag purse keychain may seem small, but it represents something larger: the power of handmade expression. In a world of mass-produced items, creating something unique—even tiny—adds personality to your everyday routine. Once you master this design, experiment with bolder colors, metallic threads, or even miniature charms dangling from the keyring. Each variation becomes a reflection of your evolving style.


 浙公网安备
33010002000092号
浙公网安备
33010002000092号 浙B2-20120091-4
Comments
No comments yet. Why don't you start the discussion?