
In an era where sustainability meets style, repurposing everyday household items has become both a necessity and a creative outlet. One often-overlooked object that holds surprising potential is the humble tissue box. Instead of hiding it in a corner or tossing the empty container, consider transforming it into a functional and eye-catching piece of home decor. With minimal effort and a touch of imagination, a tissue box can be elevated from utilitarian to artistic—blending seamlessly with your interior aesthetic while reducing waste.
This guide explores innovative, stylish, and practical methods to reinvent the tissue box as a statement piece. From modern minimalist designs to whimsical themed covers, these projects are accessible to crafters of all skill levels and budgets. Whether you're decorating a living room, bathroom, child’s bedroom, or office space, these transformations offer both form and function.
Why Upcycle a Tissue Box?
Tissue boxes are typically made from lightweight cardboard, making them easy to cut, paint, and decorate. While they serve a necessary purpose, their plain packaging rarely complements home interiors. Rather than purchasing expensive decorative boxes, upcycling allows for customization at nearly zero cost. It also reduces single-use waste—a small but meaningful step toward eco-conscious living.
Interior designer Mia Thompson notes:
“Small details define a space. A thoughtfully decorated tissue box can unify a color scheme or add personality without overwhelming the room.” — Mia Thompson, Interior Stylist & Sustainable Design Advocate
Step-by-Step Guide: Transforming a Tissue Box into Decor
Follow this simple five-step process to create a custom tissue box cover that reflects your taste and enhances your space.
- Choose Your Base: Use a standard rectangular tissue box. Remove tissues and set aside. If reusing an old box, reinforce weak corners with tape.
- Select a Theme or Style: Decide on a design direction—modern, rustic, playful, seasonal, or minimalist. This will guide material choices.
- Gather Materials: Common supplies include wrapping paper, fabric scraps, paint, washi tape, stickers, glue, scissors, and decorative trims.
- Wrap or Cover the Box: Measure each side and apply your chosen material neatly. Overlap edges slightly for clean seams. Use double-sided tape for invisible adhesion.
- Add Embellishments: Personalize with stenciled letters, ribbon bows, pressed flowers under mod podge, or even small mirrors for a glam effect.
Creative Ideas for Every Room
The versatility of tissue box makeovers lies in their adaptability. Here are distinct approaches tailored to different spaces in your home.
Living Room: Modern Geometric Accent
Use black-and-white patterned paper or painter’s tape to create bold lines and shapes. Pair with metallic spray-painted edges for a contemporary look. Place on a coffee table or sideboard as a subtle focal point.
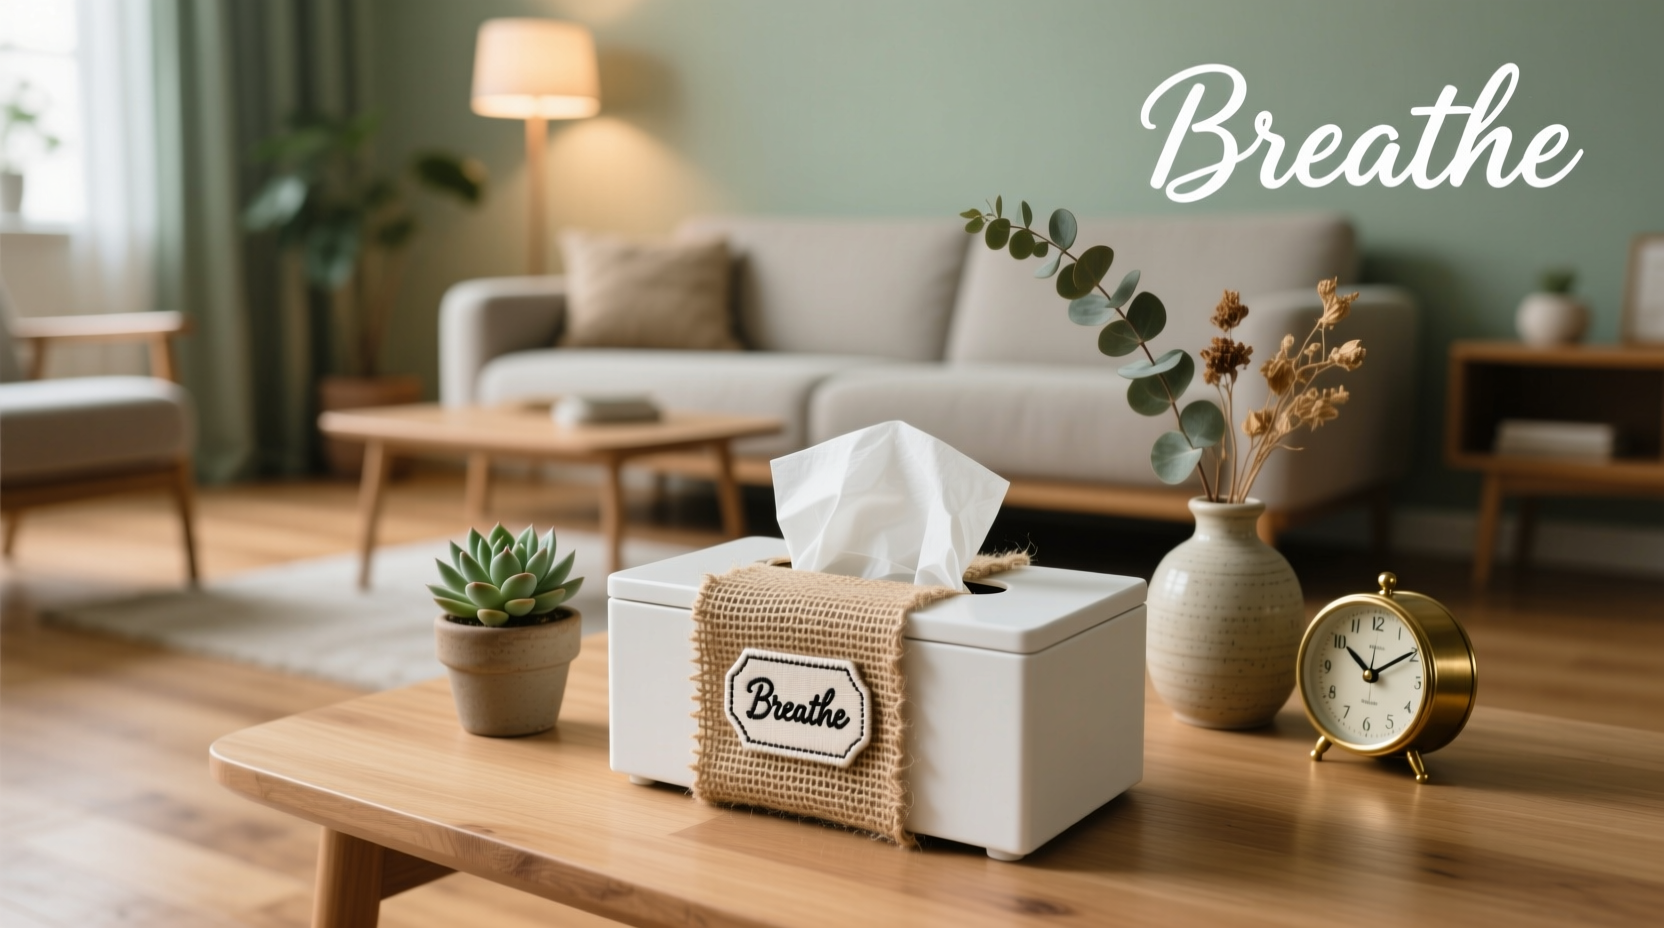
Bathroom: Spa-Inspired Serenity
Wrap the box in soft linen fabric or sea-toned paper. Add a small wooden tag labeled “Pamper Mode” or “Breathe.” This creates a calming ambiance and keeps essentials within reach.
Child’s Room: Themed Playful Covers
Turn the box into a castle, race car, or animal house using construction paper, googly eyes, and pipe cleaners. Kids love participating—and may even remember to use a tissue when needed.
Office Desk: Minimalist Organizer Upgrade
Cover the box in neutral kraft paper or cork sheet. Label the top with a leather patch and gold foil lettering: “Inspiration Station.” Use it not only for tissues but also for holding pens or sticky notes.
Seasonal Rotations: Holiday Cheer on Display
Create interchangeable sleeves for holidays—red and green plaid for Christmas, pastel prints for Easter, or spooky motifs for Halloween. Store off-season covers flat for reuse year after year.
Material Comparison: What Works Best
Different materials offer varying durability, ease of use, and visual impact. Choose based on your desired outcome and environment.
| Material | Pros | Cons | Best For |
|---|---|---|---|
| Wrapping Paper | Vibrant colors, wide selection | Fragile, not moisture-resistant | Short-term displays, kids’ rooms |
| Fabric + Mod Podge | Durable, washable options, textured | Requires drying time, messier | High-use areas like bathrooms |
| Washi Tape | No glue, repositionable, trendy | Not long-term durable | Quick updates, renters |
| Chalkboard Paint | Writable surface, customizable daily | Needs sealing, messy application | Kitchens, family command centers |
| Contact Paper | Water-resistant, peel-and-stick | Can bubble if not applied carefully | Bathrooms, kitchens, high-moisture zones |
Mini Case Study: The Boho Bathroom Makeover
Sophie, a freelance graphic designer in Portland, wanted to refresh her shared bathroom without spending much. She used leftover bohemian-patterned fabric from a sewing project to cover her tissue box. After applying fabric with fabric glue and adding tassels to each corner, she placed it beside handmade soap dishes and potted succulents. Roommates began commenting on how “intentional” the space felt. Within weeks, others followed suit, creating coordinated decor using upcycled containers. What started as a small project sparked a household trend in mindful decoration.
Checklist: DIY Tissue Box Transformation
- ☐ Remove tissues and clean the box
- ☐ Choose a design theme (e.g., coastal, retro, kid-friendly)
- ☐ Select and prep covering material
- ☐ Measure and cut pieces accurately
- ☐ Apply adhesive and wrap the box smoothly
- ☐ Add personalized touches (ribbons, labels, paint)
- ☐ Let dry completely before refilling
- ☐ Style in a visible spot and enjoy!
Common Pitfalls to Avoid
Even simple crafts can go awry without attention to detail. Steer clear of these common mistakes:
- Using too much glue: Can warp cardboard or create visible residue.
- Ignoring the dispensing slot: Ensure the top opening remains unobstructed and cleanly edged.
- Choosing non-durable materials for high-traffic areas: Delicate papers won’t last in humid bathrooms.
- Skipping reinforcement: Old boxes may need internal cardboard braces to prevent sagging.
FAQ
Can I wash a fabric-covered tissue box?
It’s best to avoid submerging it. If lightly soiled, spot-clean with a damp cloth. For longevity, consider removable fabric sleeves secured with Velcro.
How do I keep the tissues from getting stuck?
After decorating, test the pull mechanism. Trim excess material around the opening and ensure no glue blocks the exit. A light sanding of rough paper edges can improve glide.
Are there eco-friendly adhesives I should use?
Yes. Opt for water-based glues like white school glue or eco-mod podge. Avoid aerosol sprays with volatile organic compounds (VOCs).
Conclusion: Turn Waste into Wonder
A tissue box doesn’t have to be hidden behind a curtain or shoved into a drawer. With creativity and a few basic supplies, it becomes an opportunity—an invitation to express individuality, reduce clutter, and celebrate sustainable design. These transformations prove that beauty and utility aren’t mutually exclusive, especially when found in the most unexpected places.
Start today with a box you already have. Experiment with textures, colors, and themes. Share your creation with friends or inspire your children to join in. In doing so, you’re not just decorating—you’re redefining what it means to live thoughtfully at home.


 浙公网安备
33010002000092号
浙公网安备
33010002000092号 浙B2-20120091-4
Comments
No comments yet. Why don't you start the discussion?