
Whether you're assembling furniture, repairing machinery, or working on automotive components, selecting the correct bolt is essential for safety, durability, and performance. Using the wrong size can lead to stripped threads, structural failure, or unnecessary delays. Yet, many people struggle with identifying bolt dimensions due to inconsistent labeling, worn markings, or lack of proper tools. This guide provides a comprehensive breakdown of how to measure bolts accurately—covering diameter, length, thread pitch, head type, and material compatibility—so you can confidently match bolts to your specific needs.
Understanding Bolt Anatomy: The Parts That Matter
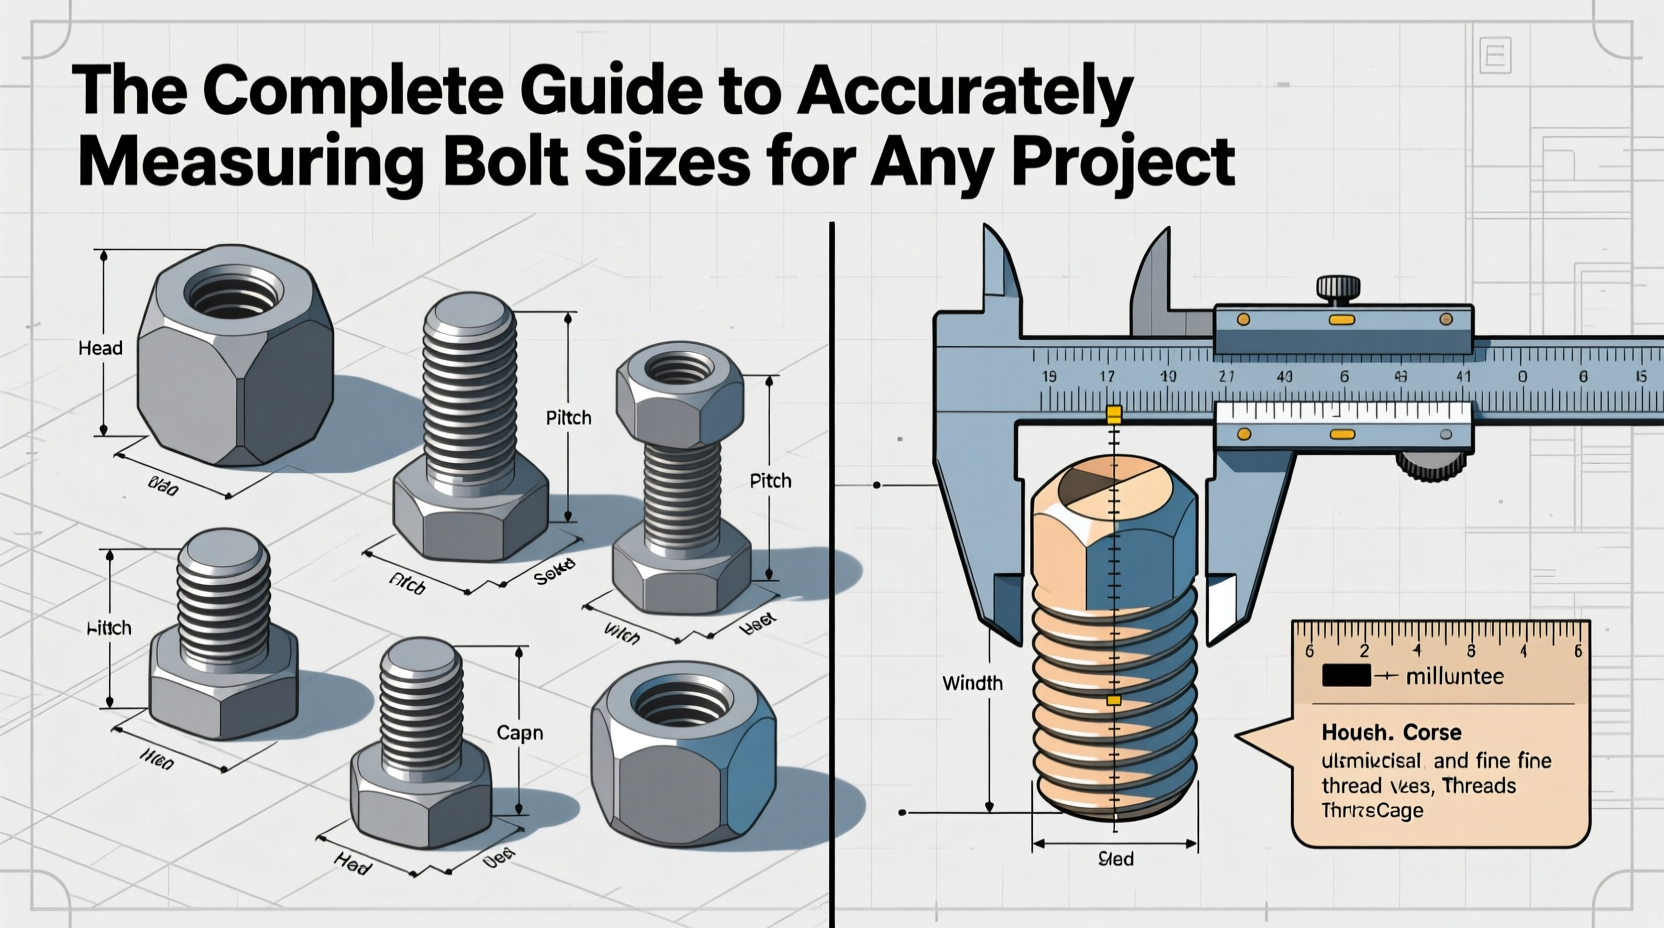
Before measuring, it's important to understand the key parts of a bolt. Each component plays a role in determining fit and function:
- Head: The top portion that you turn with a wrench or socket. Common types include hex, flat (slotted), Phillips, and socket cap.
- Shank: The smooth section beneath the head, before threading begins. Some bolts have fully threaded shanks.
- Threaded Section: The grooved portion that engages with a nut or tapped hole.
- Diameter: Measured across the shank or threaded part, typically at the major (outer) thread diameter.
- Length: Measured from just under the head to the end of the bolt for most standard fasteners.
- Thread Pitch: The distance between adjacent threads, critical for compatibility.
Knowing these elements ensures precise measurement and prevents mismatched hardware.
Step-by-Step Guide to Measuring Bolt Dimensions
Accurate bolt measurement requires attention to detail and the right tools. Follow this sequence to get reliable results every time.
- Gather Tools: Digital calipers are ideal, but a ruler or tape measure works for rough estimates. A thread pitch gauge helps determine thread count.
- Measure Diameter: Use calipers to measure the bolt’s shank or threaded portion across its widest point. For imperial bolts, this is usually expressed in fractions of an inch (e.g., 1/4\", 5/16\"). Metric bolts use millimeters (e.g., M6, M8).
- Determine Length: Measure from the bottom of the head to the tip for hex, flat, or pan heads. For flat-head bolts designed to sit flush, measure from the top of the head to the end.
- Check Thread Pitch: Count the number of threads per inch (TPI) for imperial bolts. For metric, measure the distance in millimeters between two thread peaks (pitch). Use a thread pitch gauge for accuracy.
- Identify Head Type and Drive Style: Note whether the head is hex, round, oval, or socket, and if it uses a slotted, Phillips, Torx, or Allen drive.
- Assess Material and Grade: Look for markings on the head. SAE grade 5 bolts have three radial lines; grade 8 has six. Metric strength classes like 8.8 or 10.9 are stamped numerically.
Common Measurement Pitfalls to Avoid
| Mistake | Why It Matters | How to Avoid |
|---|---|---|
| Measuring total length including the head | Leads to oversizing; bolt may interfere with surrounding components | Always start measurement just below the head |
| Confusing nominal vs. actual diameter | A 1/4\" bolt isn’t exactly 0.25\"; slight variations affect fit | Use calipers for precise outer diameter reading |
| Ignoring thread pitch | Even with correct diameter, mismatched pitch prevents tightening | Test with known nut or use pitch gauge |
| Assuming all M8 bolts are identical | Different lengths and pitches exist within same diameter | Verify all three specs: diameter, length, pitch |
Bolt Sizing Standards: Imperial vs. Metric
Bolts follow standardized systems depending on region and application. In North America, imperial (inch-based) measurements dominate industrial and automotive sectors, while metric is standard in Europe, Asia, and modern manufacturing.
Imperial Bolts: Expressed as diameter (e.g., 1/4\"), number of threads per inch (e.g., -20), and length (e.g., 2\"). Example: 1/4\"-20 x 2\".
Metric Bolts: Labeled with 'M' followed by diameter in mm, pitch, and length. Example: M6 x 1.0 x 50mm.
Adapters exist, but mixing systems risks misalignment and stress points. When replacing bolts, stick to the original standard unless upgrading with compatible alternatives.
“Never assume a bolt fits just because it screws in a few turns. Proper thread engagement requires matching pitch and diameter exactly.” — Daniel Reyes, Industrial Maintenance Supervisor
Practical Tips for Real-World Applications
In workshops and garages, bolts often lose their labels or come without packaging. Here’s how professionals handle identification in the field.
Mini Case Study: Replacing Trailer Hitch Bolts
A DIYer attempted to replace corroded bolts on a trailer hitch using hardware store replacements labeled \"1/2 inch.\" The new bolts tightened initially but failed after 50 miles. Upon inspection, the original bolts were Grade 8 (high-strength), while the replacements were lower-grade zinc-coated bolts with a slightly different thread pitch. The mismatch caused gradual loosening under vibration. After measuring diameter (0.498\"), pitch (13 TPI), and confirming Grade 8 markings, the correct replacement was sourced. The fix lasted over two years without issue.
This example underscores the importance of verifying not just size, but also strength and thread compatibility—even when dimensions appear close.
Essential Bolt Measurement Checklist
Use this checklist whenever identifying or sourcing bolts:
- ✅ Clean the bolt thoroughly before measuring
- ✅ Measure diameter with calipers (do not rely on visual estimation)
- ✅ Confirm length from base of head to tip (adjust for countersunk styles)
- ✅ Determine thread system: imperial or metric
- ✅ Measure thread pitch using a gauge or ruler method
- ✅ Identify head type and drive style for tool compatibility
- ✅ Check for strength grade markings on the head
- ✅ Match all specs to manufacturer recommendations or engineering standards
Frequently Asked Questions
Can I use a metric bolt in place of an imperial one?
Sometimes, but only if the diameter, pitch, and length closely match and the application doesn’t require high precision. For example, an M8 x 1.25 bolt is close to a 5/16\"-18, but they are not interchangeable in high-stress environments. Always verify torque specs and material strength.
What if I don’t have a caliper?
You can use a ruler with fine increments for basic measurements. Wrap a piece of paper around the bolt, mark where it overlaps, then measure the circumference and divide by π (3.14) to estimate diameter. For thread count, align the bolt against a ruler and count how many threads fit in one inch. This method is less accurate but useful in a pinch.
How tight should a bolt be?
Torque matters as much as size. Under-tightening leads to loosening; over-tightening can strip threads or break the bolt. Refer to torque specifications for your application—automotive manuals, equipment guides, or engineering charts provide safe ranges based on bolt grade and diameter.
Final Thoughts: Precision Builds Confidence
Measuring bolt sizes accurately isn’t just about avoiding frustration—it’s about ensuring safety, reliability, and long-term performance. Whether you're securing a child’s swing set or rebuilding an engine, taking a few extra minutes to confirm diameter, length, thread pitch, and grade pays off in peace of mind. With the right tools and knowledge, anyone can become proficient at identifying and selecting the correct fasteners.


 浙公网安备
33010002000092号
浙公网安备
33010002000092号 浙B2-20120091-4
Comments
No comments yet. Why don't you start the discussion?