
Double layer ear cuffs have emerged as a defining accessory in modern jewelry design—offering an edgy, elegant alternative to traditional earrings. Unlike studs or hoops, ear cuffs wrap around the outer cartilage without requiring a piercing, making them both versatile and inclusive. However, their unique structure demands precision when it comes to fitting. A poorly adjusted cuff can slip, pinch, or fail to sit flush against the ear, undermining both comfort and aesthetic appeal. Achieving that seamless, custom-like fit requires understanding your ear anatomy, selecting the right materials, and mastering subtle adjustments. This guide walks you through every step, ensuring your double layer ear cuffs enhance your look with confidence and grace.
Understanding Double Layer Ear Cuffs
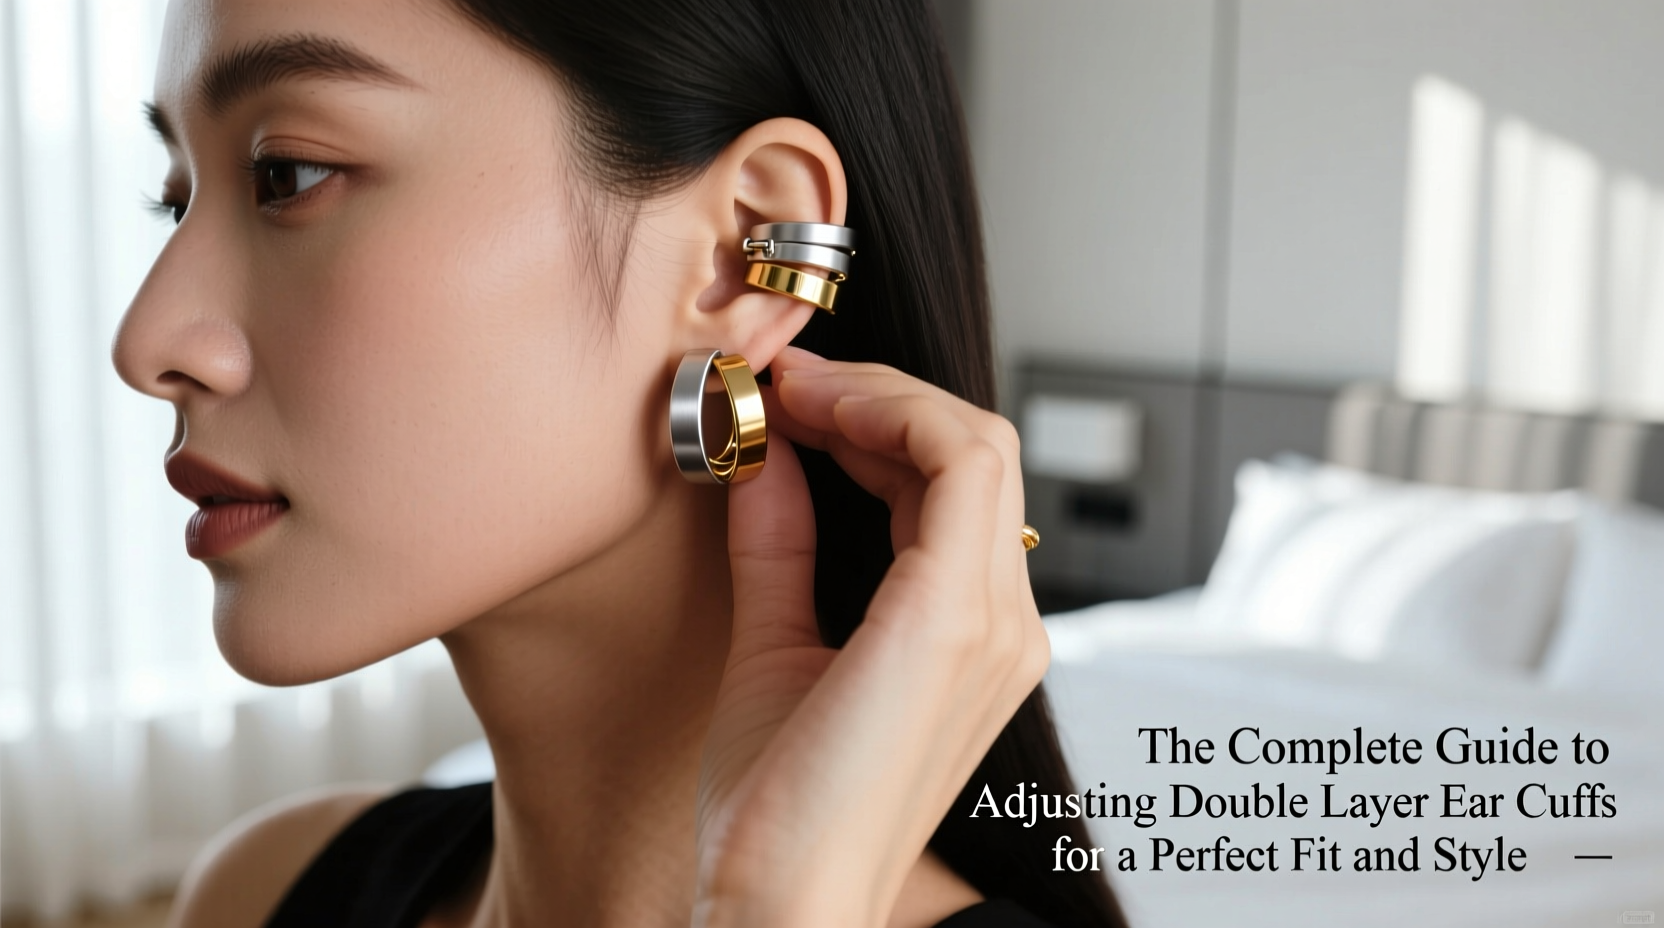
Double layer ear cuffs consist of two interconnected bands designed to encircle different parts of the ear’s cartilage. Typically, one band wraps higher along the ridge, while the second sits lower, often near the helix or anti-helix. The dual-layer construction creates depth and dimension, drawing attention to the ear's natural curves. These cuffs are usually made from metals like sterling silver, gold-plated brass, or titanium, chosen for their malleability and durability.
The key advantage of this design is its adaptability. Unlike single-band cuffs, double layer versions distribute pressure more evenly, reducing discomfort during extended wear. However, because no two ears are identical, off-the-shelf cuffs rarely fit perfectly out of the box. That’s where manual adjustment becomes essential—not to force the piece into place, but to gently shape it to match your ear’s unique topography.
The Anatomy of a Proper Fit
A well-fitted double layer ear cuff should feel secure without being tight. It shouldn’t slide down or rotate easily, nor should it cause redness or indentations after removal. The upper and lower bands must align with the natural folds of your ear, hugging the cartilage without pressing into sensitive areas.
Finding this balance starts with identifying key landmarks on your ear:
- Helix: The outer rim of the ear.
- Anti-helix: The inner ridge that branches upward from the ear canal.
- Scapha: The groove between the helix and anti-helix—this is where most cuffs rest.
The ideal position for a double layer cuff places the upper band along the upper scapha or anti-helix, while the lower band follows the curve just below. When properly seated, the piece should remain stable even during movement, such as turning your head or brushing your hair.
“Precision in fit transforms an ear cuff from mere ornamentation into a statement of craftsmanship.” — Lena Torres, Contemporary Jewelry Designer
Step-by-Step Guide to Adjusting Your Ear Cuff
Adjusting a double layer ear cuff doesn’t require tools—just patience and gentle manipulation. Follow this timeline to achieve a personalized fit:
- Test the initial placement: Hold the cuff near your ear to observe how the layers align with your cartilage. Note any gaps or areas where the metal appears too wide or narrow.
- Apply light pressure to widen or narrow: Using your thumbs and index fingers, gently squeeze the ends of each band inward to tighten the diameter, or pull them outward to expand it. Work slowly—one millimeter at a time—to avoid over-bending.
- Adjust layer spacing: If the two bands don’t align with separate ridges on your ear, slightly twist one relative to the other. Most cuffs allow minor rotational flexibility at the joint point.
- Dry-fit before full wear: Place the cuff on your ear for 5–10 minutes without fully securing it. Check for stability and comfort. Re-adjust if necessary.
- Finalize and polish: Once satisfied, wipe the metal with a soft cloth to remove fingerprints and restore shine.
Remember: Metal fatigue is real. Avoid repeated bending in the same spot, as this can weaken the structure over time. If a cuff feels brittle or develops cracks, discontinue use.
Do’s and Don’ts of Ear Cuff Adjustment
| Do’s | Don’ts |
|---|---|
| Adjust in small increments | Bend aggressively or use pliers |
| Wear for short periods initially | Force the cuff onto thin or sensitive cartilage |
| Clean regularly with a polishing cloth | Expose to chlorine, perfume, or harsh chemicals |
| Store flat in a soft pouch | Toss into a drawer with other jewelry |
| Rotate wear between ears to prevent strain | Wear overnight unless specifically designed for sleep |
Real-Life Example: From Loose to Locked In
Sophie, a freelance photographer based in Portland, purchased a sleek double layer ear cuff online for a wedding shoot. Upon arrival, she found the upper band sat loosely on her anti-helix, shifting whenever she turned her camera. Frustrated, she nearly returned it—until she watched a quick tutorial on micro-adjustments. Using only her fingertips, she compressed the upper loop by about 1.5 millimeters and subtly angled the lower band downward. After five minutes of careful tweaking, the cuff stayed firmly in place throughout a 12-hour event. “It felt like it was made for my ear,” she said. “Now I wear it weekly—it’s become part of my signature look.”
Style Tips for Maximum Impact
Once your cuff fits perfectly, consider how to style it for maximum effect:
- Pair with asymmetry: Wear the cuff on one ear with a delicate stud on the other to create visual interest.
- Layer with chains: Some double layer cuffs include attachment points for ear jackets or drop chains, adding movement and sophistication.
- Mix metals thoughtfully: Combine rose gold cuffs with copper-toned makeup or accessories for a warm, cohesive palette.
- Match to occasion: Opt for minimalist designs during work hours and bolder, textured cuffs for evenings out.
FAQ
Can I adjust my ear cuff permanently?
Yes, but cautiously. Most metal cuffs retain their new shape after adjustment, especially if bent gradually. However, excessive manipulation may lead to breakage. Once you achieve the desired fit, avoid further changes unless absolutely necessary.
Are double layer cuffs suitable for all ear types?
While highly adaptable, some ear shapes—particularly those with very flat or tightly curved cartilage—may struggle to hold certain designs. Look for cuffs labeled “universal fit” or “flexible design” if you’ve had trouble with others slipping.
How do I clean and maintain my ear cuff?
Use a microfiber polishing cloth after each wear to remove oils and prevent tarnish. For deeper cleaning, soak in warm water with mild dish soap for 2–3 minutes, then dry thoroughly. Avoid ultrasonic cleaners unless specified safe by the manufacturer.
Conclusion
Perfecting the fit of a double layer ear cuff is a small act with significant payoff. It bridges the gap between mass-produced jewelry and bespoke elegance, allowing you to wear each piece as though it were crafted just for you. With the right technique, even the simplest cuff becomes a sculptural extension of your personal style. Take the time to understand your ear’s contours, adjust mindfully, and care for your pieces diligently. When done right, a well-fitted ear cuff doesn’t just accessorize—it elevates.


 浙公网安备
33010002000092号
浙公网安备
33010002000092号 浙B2-20120091-4
Comments
No comments yet. Why don't you start the discussion?