
Attaching metal buttons to a jacket might seem like a simple task, but when done poorly, it can compromise both function and appearance. A loose button after a few wears, misaligned placement, or fabric damage from improper technique are common issues that undermine professionalism. Whether you're a tailor, fashion student, or DIY enthusiast restoring a vintage piece, mastering this skill ensures longevity and polish. This guide covers everything from selecting the right tools to executing a secure, invisible shank method—delivering results that withstand daily wear while maintaining elegance.
Selecting the Right Materials and Tools
The foundation of a durable button attachment lies in using appropriate materials. Metal buttons vary in weight, thickness, and backing type. Heavier metals require stronger thread and reinforcement; lighter alloys may need less support but still demand precision.
Essential tools include:
- Heavy-duty polyester or silk thread (size 40–60)
- Sharpened hand-sewing needles (betweens or sharps, size 7–9)
- Buttonhole scissors or small snips
- Ruler or measuring gauge
- Chalk or fabric marker
- Fabric awl or stiletto
- Beeswax (for thread strengthening)
- Small pliers (optional, for flattening knots)
Understanding Button Types and Shank Options
Metal buttons come in two primary configurations: those with a shank (a loop on the back) and those with holes (typically two or four). Each requires a different approach.
Shank buttons are ideal for heavier fabrics like wool or denim because they create space between the button and fabric, allowing the garment layer to sit neatly when fastened. Hole-style buttons work well on thinner materials but must be stitched with a \"thread shank\" to avoid pulling when the jacket closes.
“On tailored garments, a properly formed thread shank is non-negotiable. It allows movement without stress on the fabric.” — Marcus Reed, Master Tailor, Savile Row Atelier
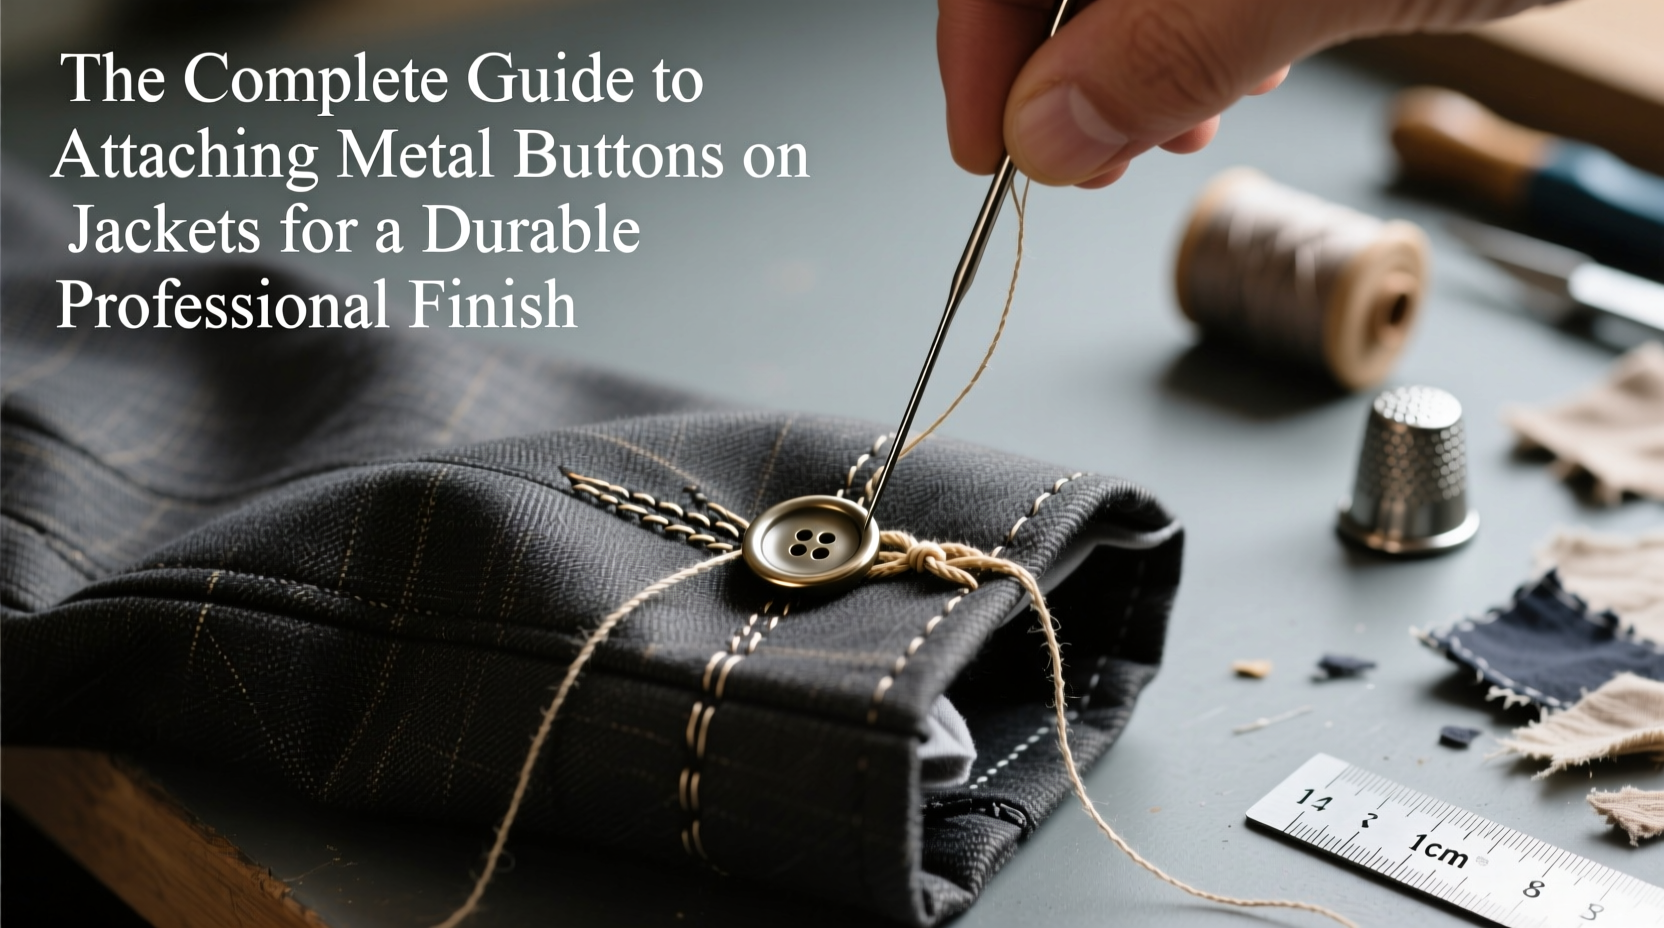
Step-by-Step Guide to Attaching a Metal Button with a Thread Shank
This method applies to hole-style metal buttons where no built-in shank exists. The goal is to build a small column of thread beneath the button to mimic a shank, ensuring flexibility and durability.
- Mark the Position: Use a ruler and chalk to mark the exact spot. Align with existing buttonholes or follow pattern guidelines. Double-check symmetry across the front panels.
- Reinforce the Backing (Optional): For thin or stretch-prone fabrics, apply a small square of interfacing or stay tape behind the button area.
- Thread the Needle: Cut about 18 inches of waxed thread. Thread double strands through the eye and tie a knot at the end, combining both tails.
- Anchor the Thread: From the inside of the jacket, bring the needle up through the fabric just beside the marked point. Pull through until the knot catches.
- Position the Button: Place the button over the mark. Insert a pin or toothpick across the holes to create space for the shank.
- Stitch Securely: Sew through each hole 6–8 times in a cross or parallel pattern, depending on hole count. Keep tension even but not tight.
- Create the Shank: Before finalizing, remove the pin. Wrap the thread tightly around the base of the stitches 4–5 times to form a sturdy column.
- Secure the Knot: Push the needle down into the fabric near the base and make several small backstitches on the underside. Finish with a quilter’s knot and trim excess.
Dos and Don’ts of Metal Button Attachment
| Do | Don't |
|---|---|
| Use doubled, waxed thread for strength | Use single, lightweight thread like cotton |
| Align buttons precisely with buttonholes | Estimate placement by eye alone |
| Create a thread shank for hole-style buttons | Sew buttons flat against the fabric |
| Reinforce high-stress areas with interfacing | Attach heavy buttons to flimsy fabric without backing |
| Knot securely on the underside of the fabric | Leave long thread tails vulnerable to snagging |
Real Example: Restoring a Vintage Wool Blazer
A client brought in a 1960s Italian wool blazer missing two corozo-and-metal toggle buttons. The original buttons had broken shanks due to repeated strain. Replacements were sourced with matching dimensions, but instead of direct sewing, a hybrid method was used: a hidden washer secured beneath the fabric acted as an anchor point, distributing pressure. The new buttons were attached using waxed polyester thread with a 3mm thread shank. After six months of regular use, the buttons remain intact, and the jacket maintains its structured drape—proof that thoughtful execution outlasts shortcuts.
Checklist for Professional Button Attachment
Follow this checklist before starting any button application:
- ☑ Confirm button size and style match the garment’s weight and design
- ☑ Choose thread color that blends or intentionally contrasts (if stylistic)
- ☑ Mark all positions with precision using a ruler and temporary marker
- ☑ Reinforce the fabric if necessary with interfacing or stay tape
- ☑ Use waxed, heavy-duty thread and a sharp needle
- ☑ Build a thread shank for hole-style buttons to allow fabric movement
- ☑ Test fit by closing the jacket to ensure alignment with buttonholes
- ☑ Secure knots cleanly on the underside and trim neatly
Frequently Asked Questions
How tight should I pull the thread when sewing on a metal button?
Apply firm, consistent tension without distorting the fabric. The button should sit flush but not compress the material. If the surrounding fabric puckers, you’re pulling too hard.
Can I machine-sew metal buttons onto a jacket?
While possible, hand-sewing is strongly recommended for metal buttons on jackets. Machines lack the control needed for creating thread shanks and risk damaging dense metal with high-speed needles. Handwork allows better tension management and durability.
What if my button comes off frequently despite proper stitching?
Recurrent failure often points to inadequate reinforcement or mismatched button weight. Consider adding a fabric washer underneath or switching to a lighter button. Also, inspect whether the buttonhole is too tight, causing excessive strain during closure.
Final Touches and Long-Term Care
Once attached, test each button by fastening and unfastening five times. Look for signs of thread stress or fabric distortion. Trim any stray threads carefully. For long-term care, periodically inspect buttons—especially on high-use outerwear—and reinforce loose stitching immediately. Avoid aggressive dry-cleaning chemicals that degrade thread over time.
“A well-attached button isn’t just functional—it’s a signature of craftsmanship.” — Lila Nguyen, Textile Conservator, London College of Fashion
Conclusion
Attaching metal buttons with a durable, professional finish is more than a repair task—it’s an act of preservation and attention to detail. With the right materials, precise technique, and respect for fabric behavior, you elevate the integrity of any jacket. These skills compound over time, turning casual mending into refined tailoring practice. Whether you're working on a bespoke coat or reviving a favorite piece, take pride in every stitch.


 浙公网安备
33010002000092号
浙公网安备
33010002000092号 浙B2-20120091-4
Comments
No comments yet. Why don't you start the discussion?