
Box jumps are a staple in functional fitness routines, offering explosive power development, cardiovascular intensity, and lower-body strength gains. However, using unstable or poorly constructed platforms can lead to serious injury. Commercial plyometric boxes are often expensive and may not suit your preferred height or space constraints. Building your own allows customization, cost savings, and peace of mind knowing the structure is solid and reliable. This guide walks through every step—from design and materials to assembly and safety testing—to ensure your DIY box jump performs safely under intense use.
Selecting the Right Materials and Dimensions
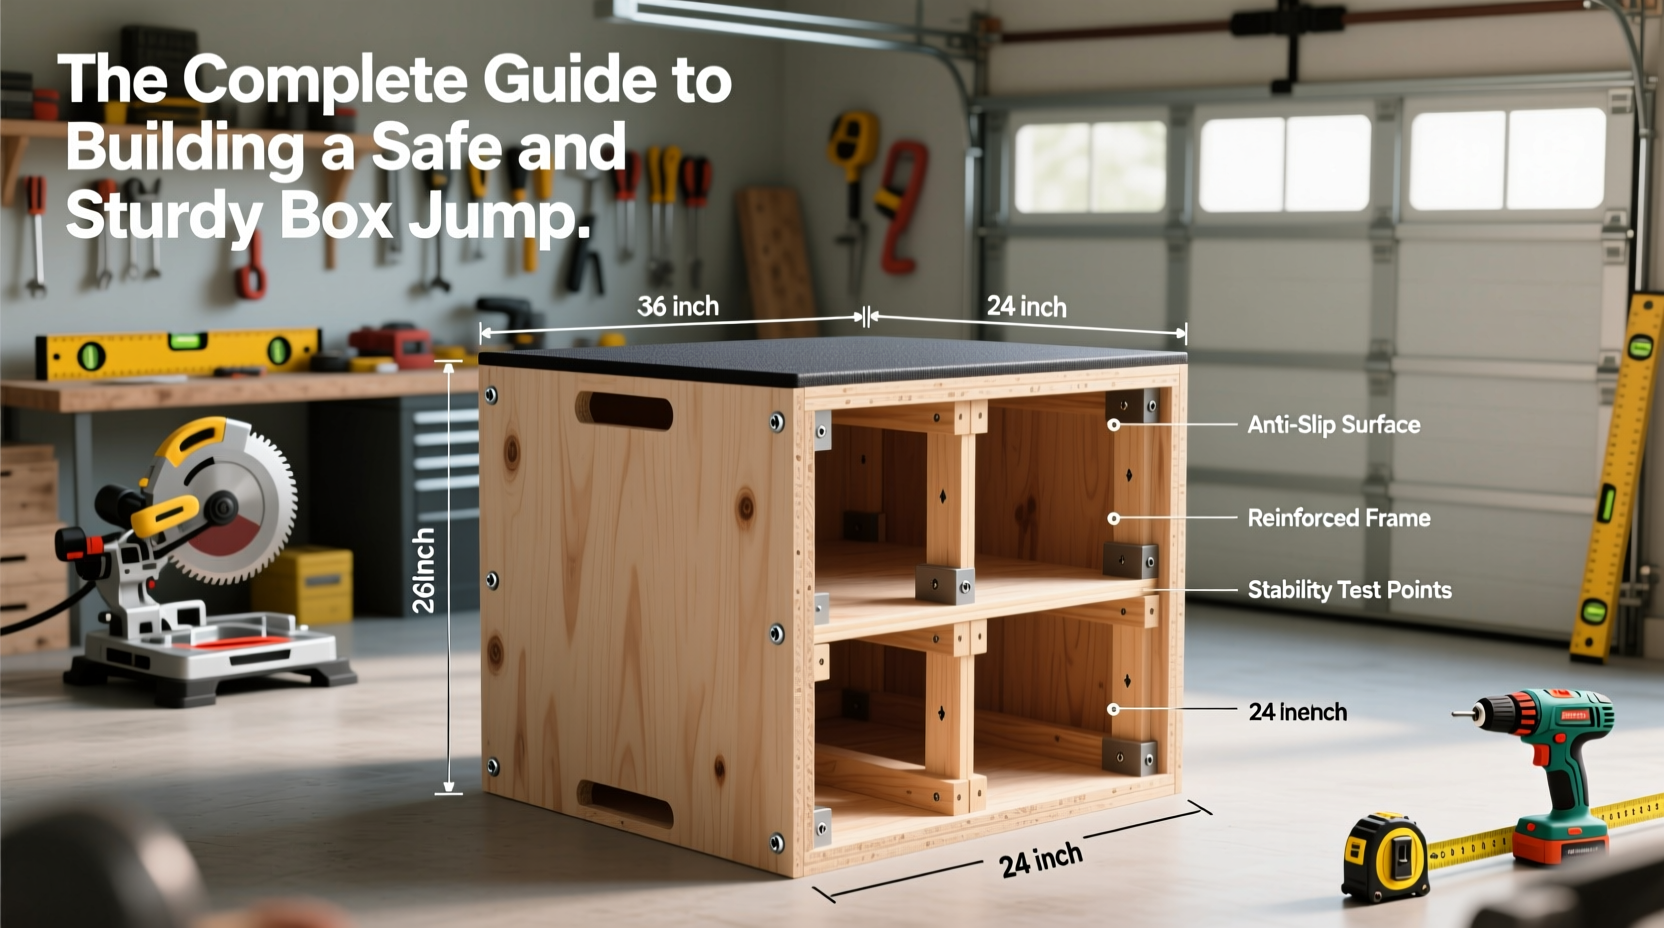
The foundation of a safe box jump lies in material quality and structural integrity. Plywood is the most common choice due to its strength, availability, and ease of cutting. Use exterior-grade or B/C grade plywood at a minimum thickness of ¾ inch (19 mm) to prevent flexing or splitting under impact. Avoid particleboard or MDF—they lack durability and degrade quickly with repeated stress.
Standard box jump heights range from 12 to 30 inches, typically increasing in 6-inch increments. Choose one or more target heights based on your fitness level:
- Beginner: 12–18 inches
- Intermediate: 20–24 inches
- Advanced: 26–30 inches
A standard footprint is 20 x 20 inches, providing ample landing surface while remaining compact enough for home gyms. Larger athletes may prefer 24 x 24 inches for added stability and comfort.
Step-by-Step Construction Process
Building a three-sided box with internal bracing ensures rigidity and long-term safety. Follow these steps carefully:
- Cut all panels to size: For a 20” x 20” x 24” box, cut:
- One 20” x 20” top panel
- Two 20” x 24” side panels
- One 20” x 24” back panel
- One 20” x 20” internal support frame (optional but recommended)
- Sand all edges smooth: Eliminate splinters and sharp corners, especially on the top surface where feet land.
- Assemble the base frame: Attach the side and back panels to the bottom edges of the top panel using wood screws (2.5 inches long). Pre-drill holes to prevent splitting.
- Add internal bracing: Install a horizontal shelf 6–8 inches below the top inside the box. This reinforces the structure and prevents sidewall bowing.
- Secure all joints: Use wood glue in addition to screws for maximum bond strength. Wipe excess glue immediately.
- Finish the surface: Apply a non-slip coating such as textured paint, rubberized deck finish, or grip tape to the top surface.
Allow 24 hours for glue to cure fully before use. Test stability by applying firm lateral pressure on all sides.
Safety Features and Design Considerations
A well-built box must remain stable during dynamic movement. Consider these critical safety enhancements:
- Weighted base: Fill the interior with sandbags or concrete blocks if the box feels light or shifts during use.
- Non-slip footing: Rubber mats or interlocking foam tiles underneath prevent sliding on smooth floors.
- Beveled front edge: A slight inward angle on the front face makes it easier to step off safely after failed attempts.
- Visible height markings: Paint or stencil the height on the side for quick identification during workouts.
“Improperly built plyo boxes are among the most common sources of home gym injuries. Structural failure during landing can lead to ankle fractures or knee trauma.” — Dr. Marcus Lin, Sports Medicine Specialist
| Feature | Do | Don't |
|---|---|---|
| Material | ¾” exterior plywood | Particleboard or thin MDF |
| Fasteners | Wood screws + wood glue | Nails only |
| Surface | Grip tape or textured paint | Bare wood or glossy finish |
| Placement | On rubber flooring with clearance | Near walls or fragile objects |
Real-World Example: Home Gym Build Case Study
Jamal, a CrossFit enthusiast in Denver, wanted a multi-height solution for his garage gym. He built three stackable boxes: 16”, 20”, and 24”. Each was constructed from birch plywood with reinforced internal frames. He used stainless steel screws and applied outdoor-grade polyurethane to protect against humidity fluctuations. The boxes were painted in contrasting colors and labeled clearly.
To enhance safety, he attached Velcro straps to secure the boxes when stacked and placed them on a 3’ x 3’ rubber mat. After six months of daily use—including double-unders, step-ups, and full box jumps—the structures showed no signs of wear or instability. “Knowing I built them right means I can train hard without hesitation,” Jamal said.
Essential Safety Checklist Before First Use
Before attempting your first jump, verify the following:
- ✅ All screws are tightened and flush; no protruding hardware
- ✅ No wobbling when pushed laterally or forward
- ✅ Top surface has non-slip treatment and no splinters
- ✅ Box sits flat on the floor with even contact across the base
- ✅ At least 3 feet of clear space on all sides
- ✅ Proper footwear is worn (cross-trainers with good grip)
- ✅ You’ve practiced step-ups and depth jumps before attempting full jumps
Frequently Asked Questions
Can I use this box for drop jumps or depth training?
Yes, but only if it’s specifically reinforced. Depth jumps generate significantly higher impact forces. Ensure internal bracing extends to the bottom and consider doubling the plywood thickness at stress points.
How do I make a multi-height adjustable box?
Build two boxes—one smaller that fits securely inside a larger one. Design alignment pins or locking tabs to prevent shifting. Alternatively, create modular boxes that stack and interlock via dowels or recessed connectors.
Is it safe to paint the box? What kind of paint should I use?
Yes, painting protects the wood and improves appearance. Use water-resistant, matte-finish paint with added grit (such as anti-slip deck paint) for traction. Avoid glossy finishes that become slippery when sweaty.
Final Thoughts and Next Steps
A homemade box jump doesn’t have to be risky—it can be safer and more personalized than store-bought alternatives when built correctly. By choosing high-quality materials, reinforcing critical joints, and prioritizing slip resistance and stability, you create a training tool that supports progress without compromising safety. Whether you're training for athletic performance or general fitness, a reliable plyometric platform empowers confident, high-intensity workouts.
Start small, test rigorously, and maintain your equipment regularly. Share your build experience, modifications, or questions with others—your insights could help someone avoid a costly or dangerous mistake. Build smart, train strong, and stay safe.


 浙公网安备
33010002000092号
浙公网安备
33010002000092号 浙B2-20120091-4
Comments
No comments yet. Why don't you start the discussion?