
Printing at home or in the office should be a seamless process, but one misstep during ink cartridge installation can lead to smudged pages, error messages, or even permanent damage to your printer. Despite their compact size, ink cartridges are precision-engineered components that must be handled and installed with care. Whether you're replacing a depleted cartridge or setting up a new printer, knowing how to insert ink cartridges correctly is essential for optimal performance and longevity of your device.
This comprehensive guide walks through every step of the process, highlights common mistakes, and provides expert-backed tips to help you get it right—every time.
Understanding Your Printer and Ink Type
Before handling any cartridge, it's crucial to understand the type of printer you own and the compatible ink it requires. Printers fall into two main categories: inkjet and laser. This guide focuses on inkjet printers, which rely on liquid ink cartridges.
Inkjet printers use either individual color cartridges (separate black, cyan, magenta, yellow) or combined multi-color cartridges. Some models require specific brands or chip-enabled cartridges, while others support third-party or refillable options. Using the wrong cartridge not only risks poor print quality but may also void your warranty.
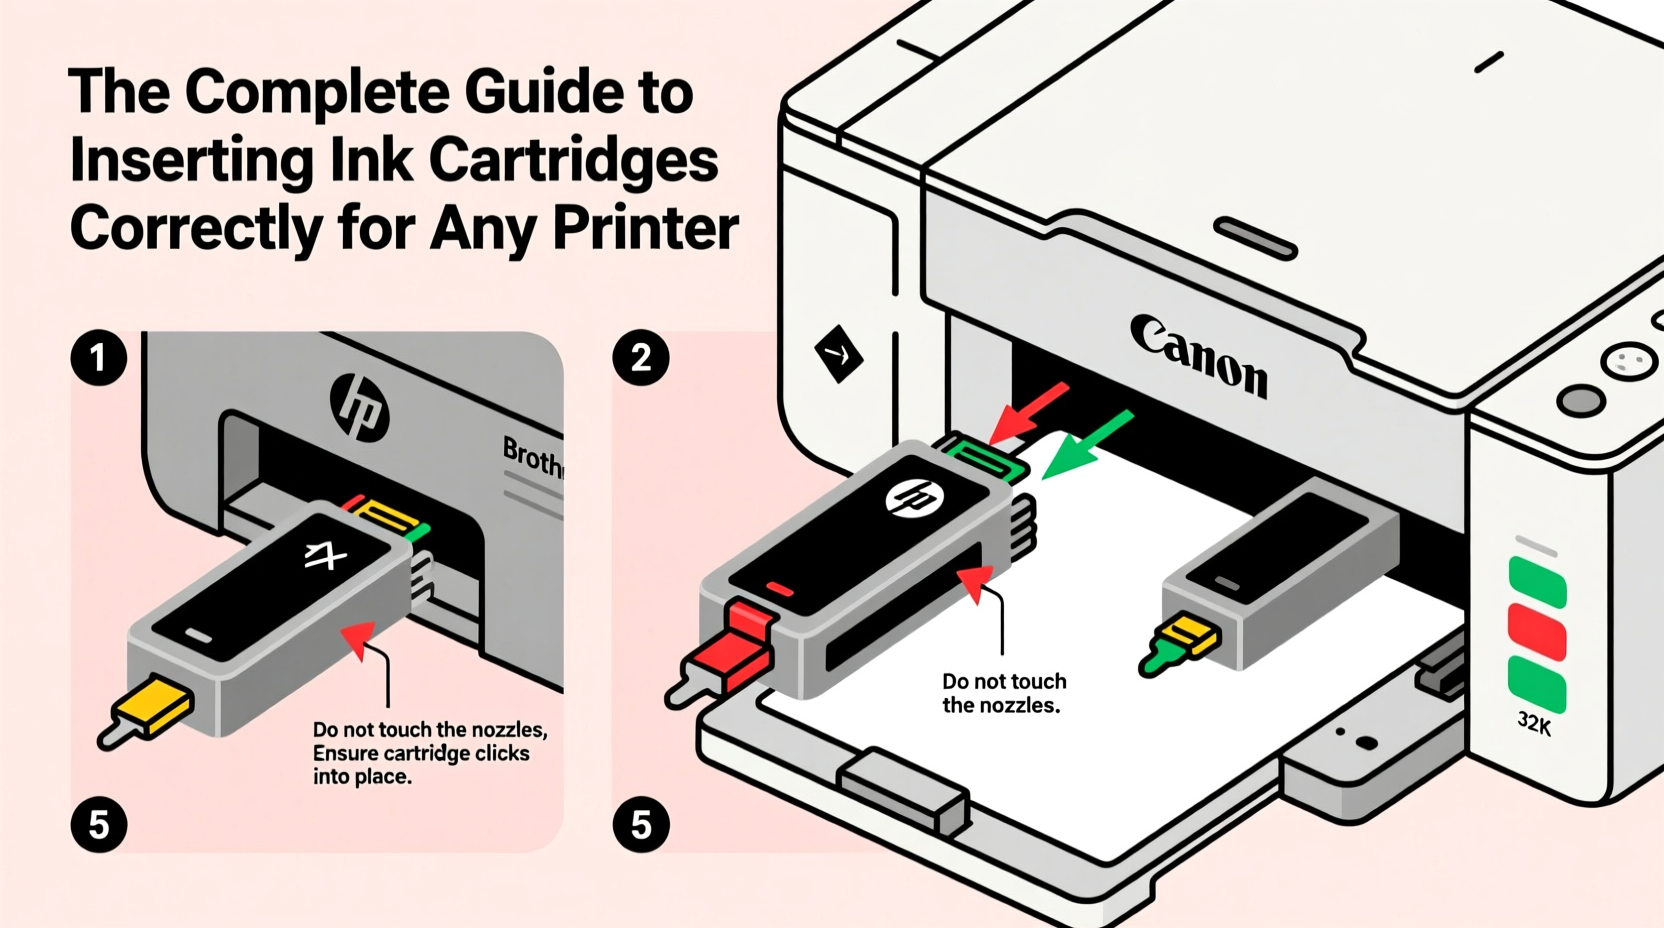
Step-by-Step Guide to Inserting Ink Cartridges
Follow this universal procedure to install ink cartridges safely and effectively across most major brands including HP, Canon, Epson, and Brother.
- Power on the printer. Ensure the device is turned on so the internal carriage moves to the replacement position.
- Open the cartridge access door. This is usually located on the front or top of the printer. The print head will automatically shift to the center.
- Wait for the carriage to stop moving. Never touch internal components while the carriage is in motion—this could damage motors or alignment sensors.
- Remove the old cartridge. Press down gently on the top of the cartridge to release it, then pull it straight out.
- Unbox the new cartridge. Remove all protective tape and plastic covers. Do not touch the copper contacts or ink nozzles.
- Insert the new cartridge. Align it with the correct slot (color-coded guides help), then push gently until it clicks into place.
- Close the access door. Wait for the printer to initialize and recognize the new cartridge.
- Run an alignment or calibration test. Most printers prompt this automatically; if not, initiate it via settings.
After installation, print a test page to verify color accuracy and alignment. If streaks, missing colors, or error messages appear, reseat the cartridge or clean the contacts with a dry lint-free cloth.
Do’s and Don’ts of Cartridge Installation
| Do’s | Don’ts |
|---|---|
| Wash and dry hands before handling cartridges | Touch the ink nozzles or electrical contacts |
| Install cartridges immediately after unboxing | Leave cartridges exposed to air for long periods |
| Use color-coded slots as guides | Force a cartridge into the wrong slot |
| Store unused cartridges sealed and upright | Shake or tilt full cartridges unnecessarily |
| Check expiration dates on packaging | Use expired or dried-out cartridges |
Real Example: A Home Office Fix
Sarah, a freelance graphic designer in Portland, started noticing faint lines and inconsistent color in her client proofs. Her HP Envy printer displayed “Ink Error” despite showing full levels. After checking connections and restarting, she decided to reseat the cartridges. Upon removal, she noticed a small piece of protective tape still clinging to the cyan cartridge’s nozzle. Once removed and properly reinserted, the error vanished and print quality returned to normal.
This case illustrates how a seemingly minor oversight—a forgotten strip of tape—can disrupt an entire workflow. Taking a few extra seconds to inspect each cartridge before insertion can prevent hours of troubleshooting.
Expert Insight: What Manufacturers Recommend
“Proper cartridge installation isn't just about clicking it into place—it's about ensuring electronic communication between the chip and printer. Even slight misalignment can interrupt data flow and halt printing.” — David Lin, Senior Technician at PrinterCare Labs
Modern cartridges contain microchips that communicate ink levels and authenticity to the printer. These chips are sensitive. Scratching them or exposing them to static electricity can render the cartridge unreadable. Experts emphasize gentle handling and strict adherence to manufacturer guidelines.
Troubleshooting Common Post-Installation Issues
Even with correct insertion, problems may arise. Here’s how to address them:
- Printer doesn’t recognize the cartridge: Reseat it firmly. If the issue persists, clean the copper contacts with a dry cotton swab.
- Color appears faded or missing: Run a printhead cleaning cycle from the printer software.
- Error message persists: Check for firmware updates—some printers require updated software to accept newer cartridge versions.
- Cartridge leaks: This often occurs if the cartridge was shaken or stored upside down. Wipe excess ink carefully and reinstall only if undamaged.
Frequently Asked Questions
Can I mix brand-name and third-party ink cartridges?
Yes, but with caution. Mixing types may work initially, but differences in ink chemistry and chip programming can lead to inconsistent performance or long-term printhead clogging. For best results, use the same type across all slots.
Why does my printer say 'cartridge not recognized' even after proper installation?
This can result from a dirty contact point, incompatible cartridge, or outdated printer firmware. Try cleaning the contacts, verifying model compatibility, or updating your printer’s software through the manufacturer’s website.
How often should I replace ink cartridges?
Replace them when print quality declines or the printer indicates low ink. Avoid waiting until the cartridge is completely empty—running a printer dry can damage the printhead due to overheating.
Final Checklist Before You Print
- ✅ Verified correct cartridge model number
- ✅ Removed all protective coverings
- ✅ Aligned cartridge with matching color slot
- ✅ Inserted smoothly until it clicked into place
- ✅ Closed access door securely
- ✅ Printed a test page
- ✅ Ran alignment or cleaning cycle if needed
Conclusion: Confidence in Every Print
Inserting ink cartridges correctly is more than a mechanical task—it's the foundation of reliable, high-quality printing. By understanding your printer’s requirements, following precise steps, and avoiding common pitfalls, you protect your investment and maintain consistent output. Whether you're printing school projects, business reports, or creative designs, proper cartridge handling ensures every document reflects professionalism and care.


 浙公网安备
33010002000092号
浙公网安备
33010002000092号 浙B2-20120091-4
Comments
No comments yet. Why don't you start the discussion?