
Installing a motherboard is one of the most critical steps in building a custom PC. Done correctly, it ensures stable performance, proper airflow, and long-term reliability. Done incorrectly, it can lead to short circuits, damaged components, or even permanent failure. Whether you're assembling your first system or upgrading an existing build, precision and attention to detail are non-negotiable. This guide walks you through every phase—from preparation to final verification—with actionable advice and real-world insights to help you install your motherboard safely and efficiently.
1. Prepare Your Workspace and Tools
Before touching any hardware, set up a clean, well-lit workspace free from static electricity and clutter. Static discharge can damage sensitive motherboard components, so grounding yourself is essential. Work on a hard, non-conductive surface such as a wooden table, and avoid carpeted areas.
Gather the following tools and materials:
- Anti-static wrist strap (recommended)
- Phillips-head screwdriver (magnetic tip helps)
- Standoffs and screws (usually included with the case or motherboard)
- Thermal paste (if installing CPU separately)
- Flashlight (for visibility in tight spaces)
- Zip ties or Velcro straps for cable management
2. Understand Motherboard Form Factors and Case Compatibility
Motherboards come in standardized sizes known as form factors—most commonly ATX, microATX, and mini-ITX. Your PC case must support the motherboard’s form factor. Installing an incompatible board leads to misaligned screw holes or blocked ports.
Check your case manual or manufacturer’s website for supported motherboard sizes. Most mid-tower cases support ATX, while compact builds may require microATX or mini-ITX.
| Form Factor | Dimensions (inches) | Typical Use Case | I/O Shield Fit |
|---|---|---|---|
| ATX | 12 x 9.6 | Full-sized desktops, gaming, workstations | Standard rear panel cutout |
| microATX | 9.6 x 9.6 | Budget builds, compact systems | Fits ATX cutout |
| mini-ITX | 6.7 x 6.7 | HTPCs, ultra-compact PCs | Fits ATX cutout with adapter |
“Matching the motherboard form factor to the case isn’t just about fit—it affects cooling, expansion options, and long-term upgrade paths.” — David Lin, Senior Hardware Engineer at PCBuild Labs
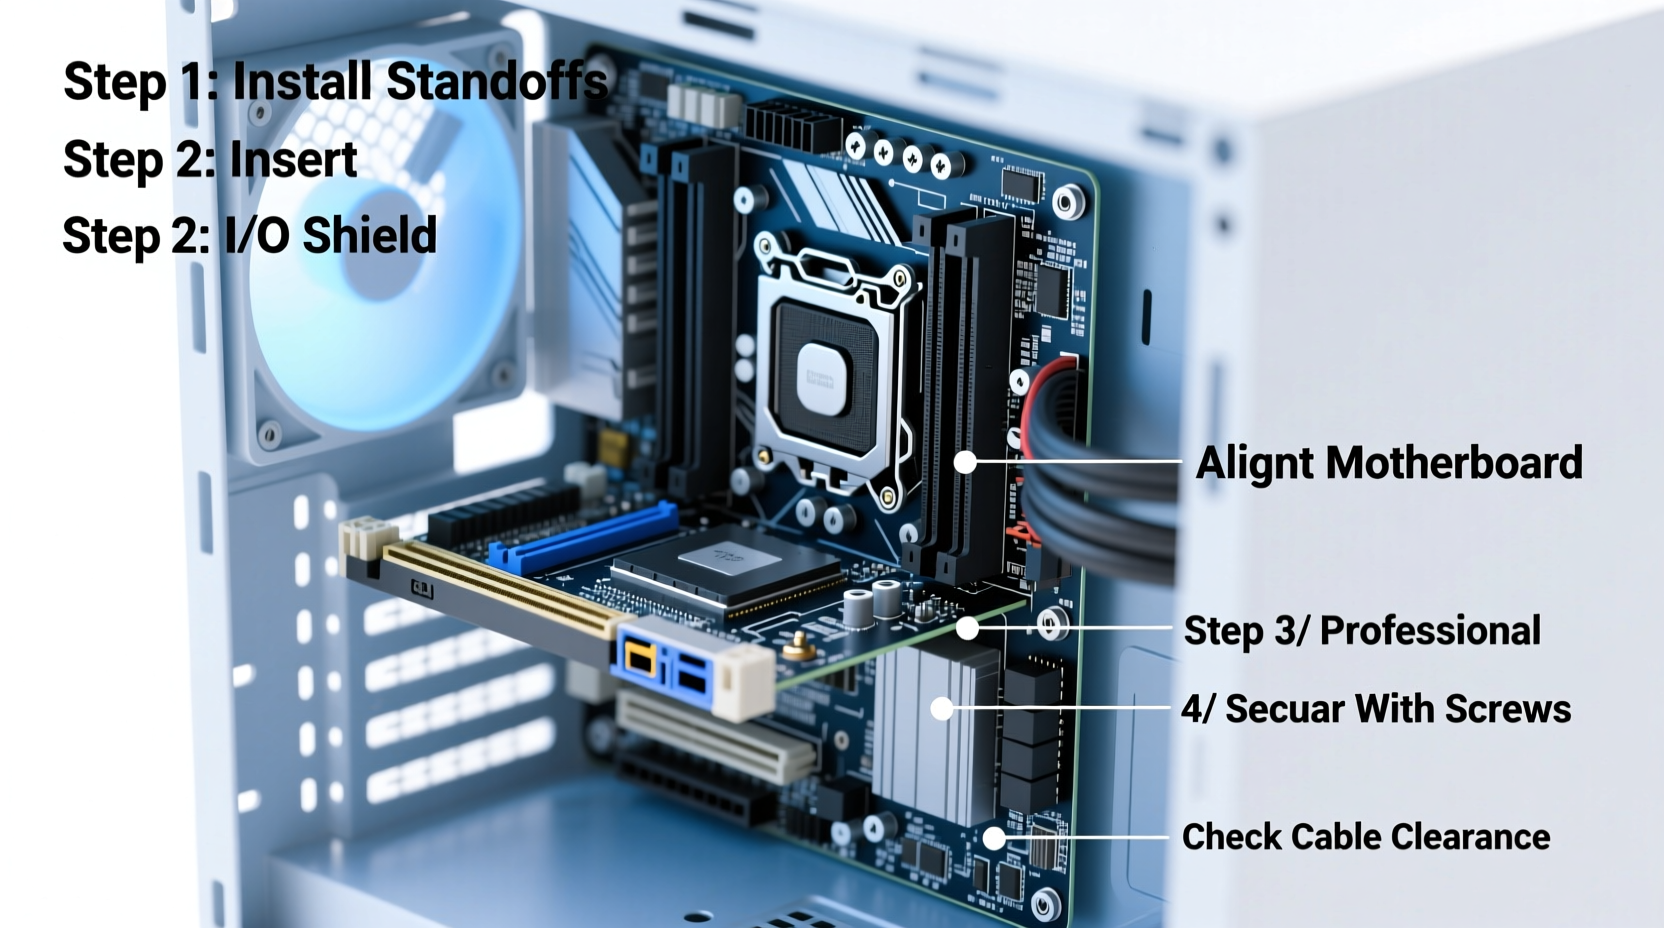
3. Install Standoffs and Align the Motherboard Correctly
Standoffs are threaded metal spacers that elevate the motherboard above the case, preventing electrical shorts. They screw into pre-drilled holes on the case’s motherboard tray. Never skip this step—direct contact between the board and metal chassis can destroy components.
Follow these steps:
- Refer to your motherboard manual to identify the correct standoff positions based on its mounting holes.
- Screw brass standoffs into the case tray at matching locations. Hand-tighten only—over-tightening can strip threads.
- Double-check alignment by placing the motherboard over the standoffs without securing it yet. All screw holes should line up.
- Ensure no extra standoffs are present, as they may contact circuits beneath the board.
4. Mount the Motherboard and Connect Essential Cables
With standoffs properly installed, carefully place the motherboard onto them. Align the rear I/O shield (pre-installed on the board) with the opening in the case. Gently press down until the board sits flush against the standoffs.
Secure the motherboard using the provided screws. Use a light touch—a snug fit is sufficient. Over-tightening can crack the PCB or damage solder points.
Next, connect front-panel headers and power cables:
- Power switch (PWR_SW), reset (RESET), HDD_LED, and power LED (PWR_LED): Refer to your motherboard manual for pin layout. These are typically labeled clearly.
- USB 2.0/3.0 and audio headers: Match connectors from the case to corresponding pins on the board.
- 24-pin ATX power and 8-pin EPS CPU power: Route these from the PSU and plug them into the motherboard before closing up the case.
Mini Case Study: Avoiding a Costly Short Circuit
A hobbyist builder once skipped standoffs, assuming the motherboard would be safe resting directly on the tray. After powering on, the system failed to POST. Upon inspection, a single standoff had been left in a position not aligned with the board, causing a short across a voltage regulator. The motherboard required replacement. Taking five minutes to verify standoff placement would have prevented $200 in losses.
5. Final Verification and Safety Checklist
Before closing the case and powering on, perform a final inspection. Use the checklist below to ensure everything is secure and correctly connected.
- ✅ All standoffs match motherboard screw holes
- ✅ No loose screws or metal debris inside the case
- ✅ I/O shield fully seated and aligned
- ✅ Front-panel connectors plugged in correctly
- ✅ 24-pin ATX and 8-pin CPU power cables firmly attached
- ✅ RAM and CPU installed before final closure
- ✅ Case fans and GPU power connections routed and secured
Frequently Asked Questions
Can I install a motherboard without standoffs?
No. Without standoffs, the motherboard makes direct contact with the metal case, which risks short circuits. Even if the system appears to work initially, long-term damage is likely due to electrical grounding issues.
What if my case came with too many standoffs?
Only use the standoffs that align with your motherboard’s screw holes. Remove any extras—even if they don’t currently touch the board, vibrations or thermal expansion could cause contact later.
Do all motherboards come with an I/O shield?
Yes, modern motherboards include a pre-installed I/O shield. Ensure it’s properly seated in the case’s rear opening. Some third-party shields are available for custom builds, but the OEM version usually fits best.
Conclusion
Installing a motherboard correctly lays the foundation for a reliable, high-performing PC. From selecting compatible components to verifying electrical isolation and precise cable routing, each step contributes to the stability and longevity of your system. Rushing through installation might save minutes now but can cost hours—or dollars—later. Take your time, follow best practices, and double-check your work. A well-installed motherboard doesn’t just power on—it powers on consistently, year after year.


 浙公网安备
33010002000092号
浙公网安备
33010002000092号 浙B2-20120091-4
Comments
No comments yet. Why don't you start the discussion?