
Par baking, or blind baking, is a crucial technique that separates a soggy-bottomed disappointment from a crisp, golden pie crust. Whether you're preparing a custard-based filling like pumpkin or lemon meringue, or simply want a sturdier base for fruit pies, par baking ensures your pastry holds its shape and texture. This guide walks you through everything you need to know—from choosing the right tools to avoiding common pitfalls—so you can achieve flawless results every time.
Why Par Bake a Pie Crust?
Not all pies require par baking, but when they do, it’s non-negotiable. A raw crust filled with wet ingredients often fails to cook through before the filling sets, resulting in a doughy layer at the bottom. Par baking seals the surface, creates structure, and allows the crust to finish baking evenly alongside the filling.
This method is essential for:
- Custard or cream pies (e.g., pumpkin, chess, or banana cream)
- Pies with fillings that don’t require long baking times
- Recipes calling for a fully baked shell with no additional oven time
“Blind baking is the foundation of professional-quality pies. It gives home bakers control over texture and prevents one of the most common pie failures: the dreaded soggy bottom.” — Chef Lila Nguyen, Pastry Instructor at The Artful Oven
Essential Tools and Ingredients
Success starts with preparation. Gather these items before beginning:
| Tool/Ingredient | Purpose | Alternatives |
|---|---|---|
| Pie dish (glass or ceramic) | Even heat distribution | Metal pie plate (adjust baking time) |
| Parchment paper or aluminum foil | Lining for weights | Butcher paper (if parchment unavailable) |
| Baking beans or pie weights | Prevent puffing and shrinkage | Dried beans, rice, or sugar |
| Sharp fork or docking tool | Pricking dough for steam release | Tip of a knife |
| Chilled butter & ice water | Flakiness and tenderness | Shortening or lard for extended shelf life |
Step-by-Step Guide to Par Baking a Pie Crust
Follow this timeline for consistent, reliable results. Total time: ~75 minutes (including chilling).
- Prepare the dough: Mix flour, salt, cold cubed butter, and ice water until the dough just comes together. Flatten into a disk, wrap in plastic, and refrigerate for 30–60 minutes.
- Roll and transfer: On a floured surface, roll the dough into a 12-inch circle. Gently place it into a 9-inch pie dish. Trim and crimp edges as desired.
- Chill again (optional but recommended): Return the shaped crust to the fridge for 15 minutes. This reduces shrinkage during baking.
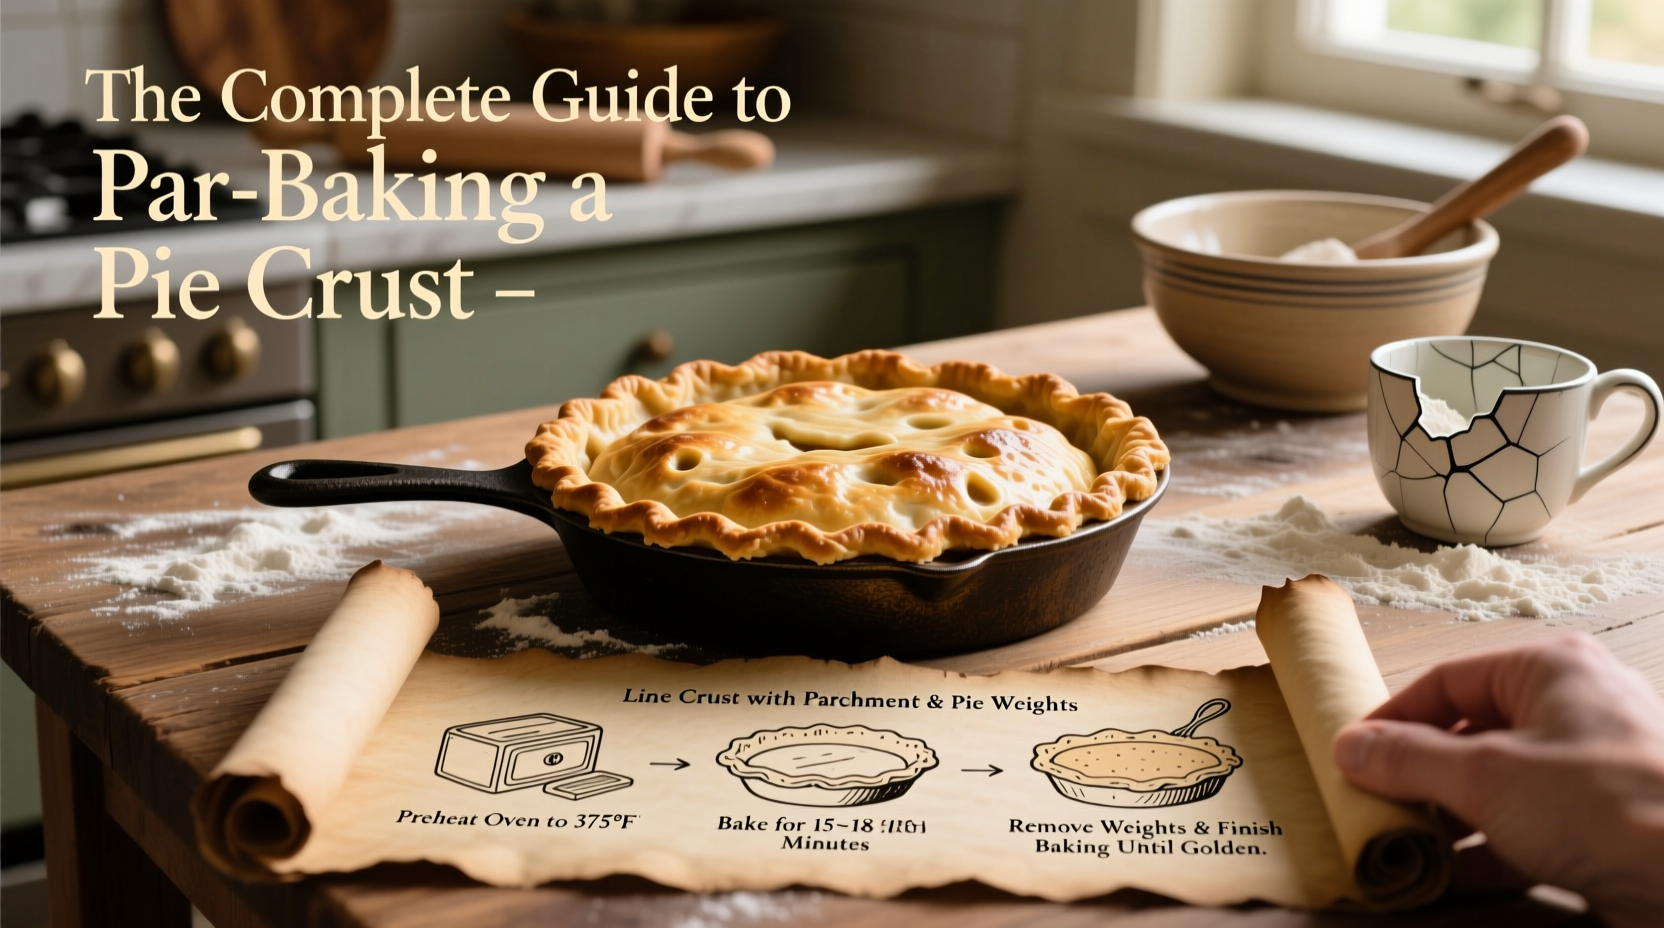
- Preheat oven: Set to 375°F (190°C). A hot oven ensures quick set and minimal puffing.
- Prick the crust: Use a fork to dock the bottom and sides. This allows steam to escape and prevents air pockets.
- Add liner and weights: Line the chilled crust with parchment or foil, then fill with pie weights, covering the entire surface.
- First bake (weighted): Bake for 18–20 minutes. The crust should hold its shape and begin to dry out.
- Remove weights: Carefully lift out the parchment with the weights. Return the crust to the oven.
- Second bake (unweighted): Bake for another 10–12 minutes, or until the crust is light golden and dry to the touch.
- Cool completely: Let the crust cool on a wire rack before adding no-bake fillings. For pies requiring further baking, proceed immediately.
For Fully Baked Shells
If your recipe calls for a fully baked crust (e.g., for a cream pie), extend the unweighted bake by 3–5 minutes until the color deepens to a rich gold. Cool completely before filling.
For Partially Baked Crusts
Some recipes require only a partially baked crust. In that case, reduce the unweighted bake to 5–7 minutes. The crust should be set but pale. Proceed directly to filling and continue baking as directed.
Avoiding Common Mistakes
Even experienced bakers encounter issues. Here’s how to sidestep the most frequent problems:
- Shrinking crust: Caused by overworking the dough or skipping the chill step. Handle gently and always rest the dough before baking.
- Soggy bottom: Often due to underbaking or moisture seeping in. Ensure adequate bake time and consider brushing the warm crust with beaten egg white after removing weights—this creates a moisture barrier.
- Puffing or bubbling: Results from inadequate docking or uneven weight distribution. Prick thoroughly and use enough weights to cover the entire surface.
- Burnt edges: The rim can brown faster than the base. Use a pie shield or create a foil collar to protect the edges during baking.
“I once served a lemon meringue pie with a raw bottom crust at a dinner party. Never again. Now I par bake every single custard pie—and my guests never know the difference between mine and a bakery’s.” — Rebecca Torres, Home Baker & Food Blogger
Tips for Flaky, Golden Success
Frequently Asked Questions
Can I par bake a crust ahead of time?
Yes. Fully baked crusts can be stored at room temperature for up to 2 days. Cover loosely with foil or place in an airtight container. Refresh in a 350°F oven for 5 minutes if needed.
Do I need special pie weights?
No. While ceramic pie weights are ideal, dried beans, uncooked rice, or even granulated sugar work well. Sugar has the added benefit of melting slightly, creating a subtle caramelized seal on the crust.
What if I don’t have parchment paper?
Aluminum foil works perfectly as a liner. Just make sure it’s heavy-duty to avoid tearing when lifting out the weights.
Conclusion: Elevate Your Pie Game
Par baking may seem like an extra step, but it’s the secret behind bakery-quality pies with crisp, flaky layers from edge to center. With the right tools, a little patience, and attention to detail, you can master this foundational skill and apply it across sweet and savory recipes alike. From quiches to pecan pies, a properly par baked crust transforms your baking from good to exceptional.


 浙公网安备
33010002000092号
浙公网安备
33010002000092号 浙B2-20120091-4
Comments
No comments yet. Why don't you start the discussion?