
Flashing your phone—installing a new operating system or firmware—can breathe new life into aging hardware, fix persistent bugs, or unlock features no longer supported by the manufacturer. When done correctly, it can improve speed, battery efficiency, and overall user experience. However, improper flashing risks bricking your device, voiding warranties, or compromising security. This guide walks you through every essential step, from preparation to post-flash optimization, ensuring you maintain control and safety throughout the process.
Understanding Phone Flashing: What It Means and Why You’d Do It
Flashing refers to rewriting the software on your phone’s internal storage. This includes replacing the stock Android (or iOS) firmware with a custom ROM, updating to a newer official version not available through over-the-air updates, or restoring a corrupted system. Unlike simple app installations, flashing alters core system files, making it powerful but potentially dangerous if mismanaged.
Common reasons people flash their phones include:
- Reviving outdated devices that no longer receive official updates
- Removing bloatware bundled by manufacturers
- Gaining access to newer Android versions or experimental features
- Fixing boot loops, freezes, or unresponsive systems
- Improving performance through lightweight custom ROMs like LineageOS
“Flashing isn’t just for tech enthusiasts—it’s a legitimate tool for extending device longevity in an era of planned obsolescence.” — Rajiv Mehta, Mobile Firmware Engineer at Lineage Foundation
Pre-Flash Checklist: Preparing Your Device and Environment
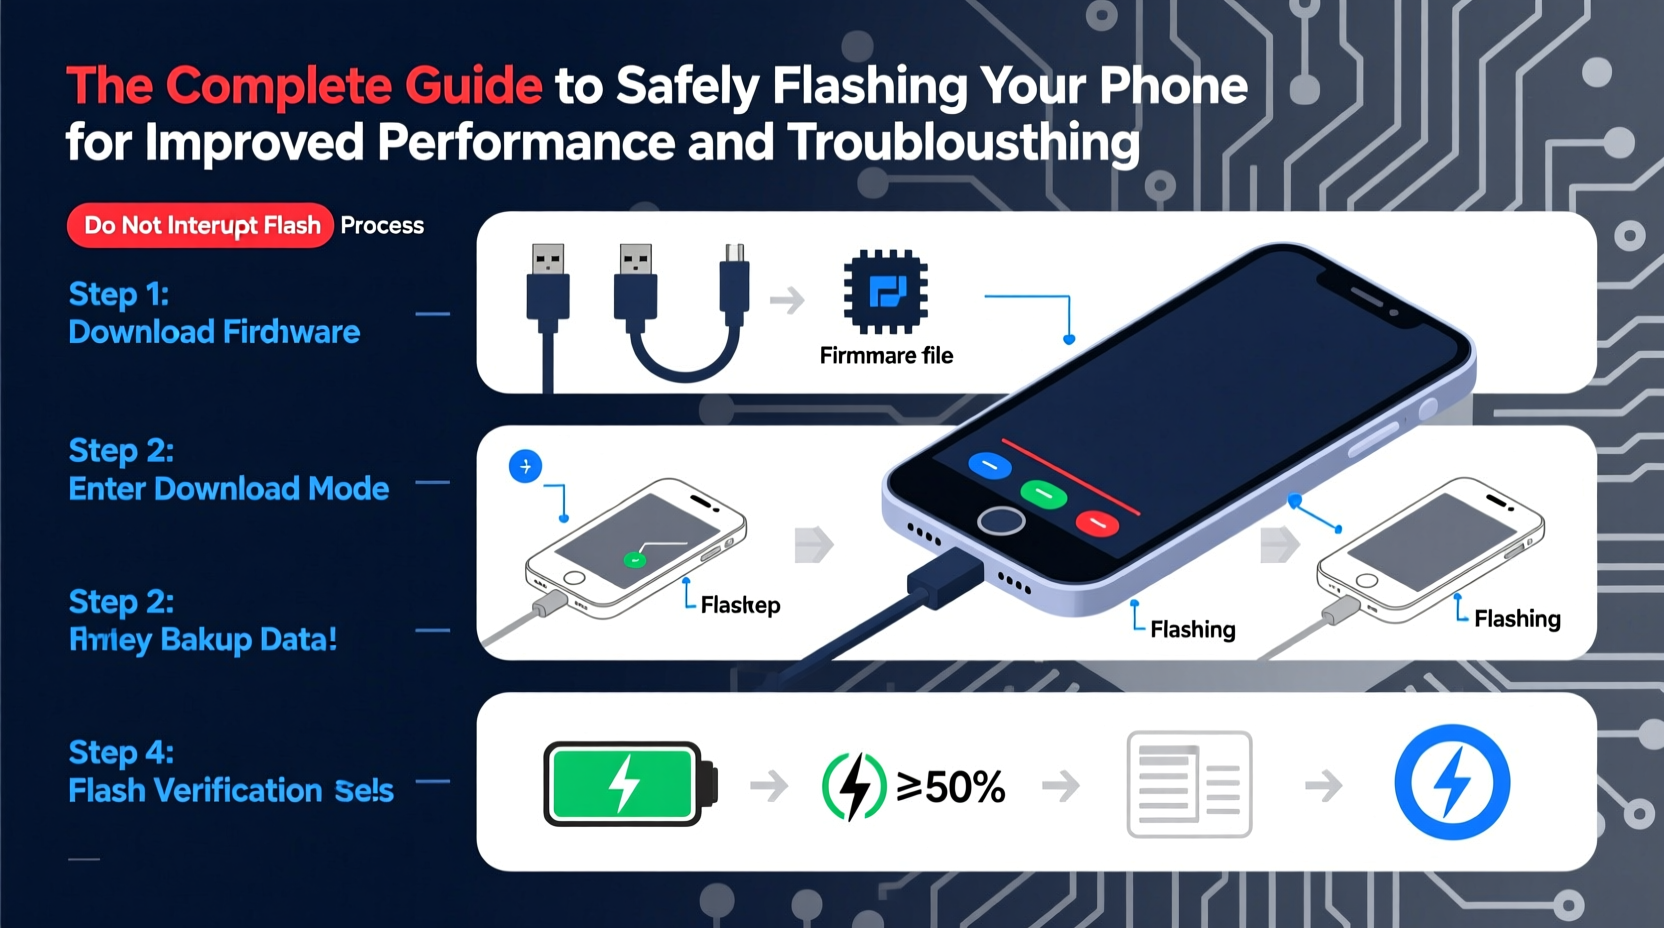
Safety begins long before the first file is transferred. Rushing into flashing without proper preparation is the leading cause of failed attempts and bricked devices. Follow this checklist to ensure readiness:
✅ Essential Pre-Flash Actions
- Back up all data – Use Google Sync, local backups, or third-party tools to save contacts, messages, photos, and app data.
- Charge your phone to at least 70% – A sudden power loss during flashing can permanently damage the system.
- Enable USB debugging and OEM unlocking – Found in Developer Options under Settings.
- Download correct drivers – Install ADB and Fastboot tools on your computer; ensure they match your OS (Windows, macOS, Linux).
- Identify your exact device model – Check settings or the back panel (e.g., SM-G975F vs. SM-G975U).
- Obtain the correct firmware or ROM – Only download from trusted sources like XDA Developers, official LineageOS builds, or manufacturer portals.
- Verify file integrity – Use MD5 or SHA-256 checksums provided by developers to confirm downloads aren’t corrupted or tampered with.
Step-by-Step Guide to Safely Flash Your Phone
Once prepared, follow these steps carefully. The exact method varies slightly depending on whether you're flashing official firmware or a custom ROM, but the general workflow remains consistent.
Phase 1: Unlock Bootloader
The bootloader controls what software can run on startup. Most manufacturers lock it by default to prevent unauthorized changes.
- Connect your phone to your PC via USB.
- Open a command prompt or terminal window in your ADB/Fastboot directory.
- Reboot into bootloader mode:
adb reboot bootloader - Unlock using:
fastboot oem unlock(Samsung)
orfastboot flashing unlock(Pixel and others) - Confirm on-device prompt. This will erase all data.
Phase 2: Install Custom Recovery (For Custom ROMs)
A custom recovery like TWRP allows installation of unsigned ZIP files (custom ROMs, mods).
- Download the correct TWRP image (.img file) for your model.
- In fastboot mode, flash recovery:
fastboot flash recovery twrp.img - Boot into recovery: Hold Power + Volume Up after flashing.
Phase 3: Flash New Firmware or ROM
If using official firmware (e.g., Samsung Odin), load files into the appropriate tool and start. For custom ROMs:
- Transfer the ROM ZIP and GApps (if needed) to your phone.
- In TWRP, go to “Install” and select the ROM ZIP.
- Swipe to confirm flash. Wait for completion.
- Wipe cache and Dalvik (optional but recommended).
- Reboot system.
Do’s and Don’ts of Phone Flashing
| Do’s | Don’ts |
|---|---|
| Use only verified, community-supported ROMs | Flash ROMs designed for different device models |
| Keep a copy of stock firmware as a fallback | Ignore error messages during flashing |
| Test basic functions (calls, Wi-Fi, camera) post-flash | Root or install Magisk immediately after first boot without verifying stability |
| Join forums or Discord groups for your device | Assume all features will work out-of-the-box (e.g., carrier VoLTE, fingerprint sensors) |
Real Example: Reviving a Lagging Galaxy S9
Mark, a freelance photographer, relied on his Galaxy S9 for client previews but found it sluggish after years of updates. Official support ended in 2021, and the phone frequently froze when switching apps. After researching, he decided to flash LineageOS 20 (Android 13).
He backed up his gallery to cloud storage, unlocked the bootloader via Odin, installed TWRP, then flashed the ROM and microG for Google services. On first boot, the setup took nearly 10 minutes—but once complete, the interface was fluid, boot time halved, and background app retention improved dramatically. He reinstalled essential apps and restored key data manually. Two months later, the phone remains stable and responsive, effectively extending its usable life by several years.
Frequently Asked Questions
Will flashing my phone void the warranty?
Yes, unlocking the bootloader typically voids the warranty. Some manufacturers (like Samsung) can detect this even after reverting to stock firmware. If your device is still under warranty and has performance issues, contact support first.
Can I revert to the original operating system after flashing?
Yes, as long as you have the correct stock firmware file. Reflashing the original OS using tools like ODIN (Samsung), Fastboot (Pixel), or SP Flash Tool (Mediatek) will restore factory software and often remove the unlock flag, though detection may persist.
Is flashing safe for beginners?
With careful research and adherence to instructions, even beginners can succeed. Start with well-documented devices like Google Pixel or OnePlus models, which have large developer communities and straightforward processes. Avoid obscure brands or unsupported models until you gain experience.
Final Thoughts: Take Control of Your Device’s Lifespan
Flashing your phone is more than a technical trick—it’s an act of digital self-reliance. In a world where software support often ends long before hardware fails, taking charge of your firmware empowers you to maintain performance, security, and usability on your terms. While the process demands respect for risk and precision, the rewards are tangible: faster response times, cleaner interfaces, and freedom from forced obsolescence.
Start small. Choose a stable, widely-used ROM. Document each step. Engage with communities. And remember: every expert was once a beginner who pressed “flash” for the first time with a full backup and steady hands.


 浙公网安备
33010002000092号
浙公网安备
33010002000092号 浙B2-20120091-4
Comments
No comments yet. Why don't you start the discussion?