
Growing an avocado tree from a seed is more than just a fun kitchen experiment—it’s a rewarding journey that connects you with nature in your own home. While store-bought avocados offer instant gratification, planting the pit opens the door to years of potential harvests, lush greenery, and the satisfaction of nurturing life from something typically discarded. With patience and proper technique, anyone can transform a leftover seed into a thriving houseplant—and possibly even a fruit-bearing tree.
The process is simple in concept but requires attention to detail, consistency, and a basic understanding of plant biology. Whether you're a seasoned gardener or a curious beginner, this guide walks you through every phase of avocado germination, offering practical advice, proven methods, and insights from horticultural experts.
Choosing the Right Avocado Seed
Not all avocado seeds are created equal. The success of your germination effort starts with selecting a healthy, mature seed from a ripe fruit. Avoid seeds from overly soft or spoiled avocados, as they may be compromised by mold or bacterial contamination.
Look for a plump, firm seed with a smooth brown outer shell. If the skin is cracked or has dark spots, it could indicate damage or decay. Ideally, use the seed immediately after eating the fruit—drying out reduces viability. Seeds stored for more than a few days should be kept in a cool, dry place, but never refrigerated unless you plan to delay planting for several weeks.
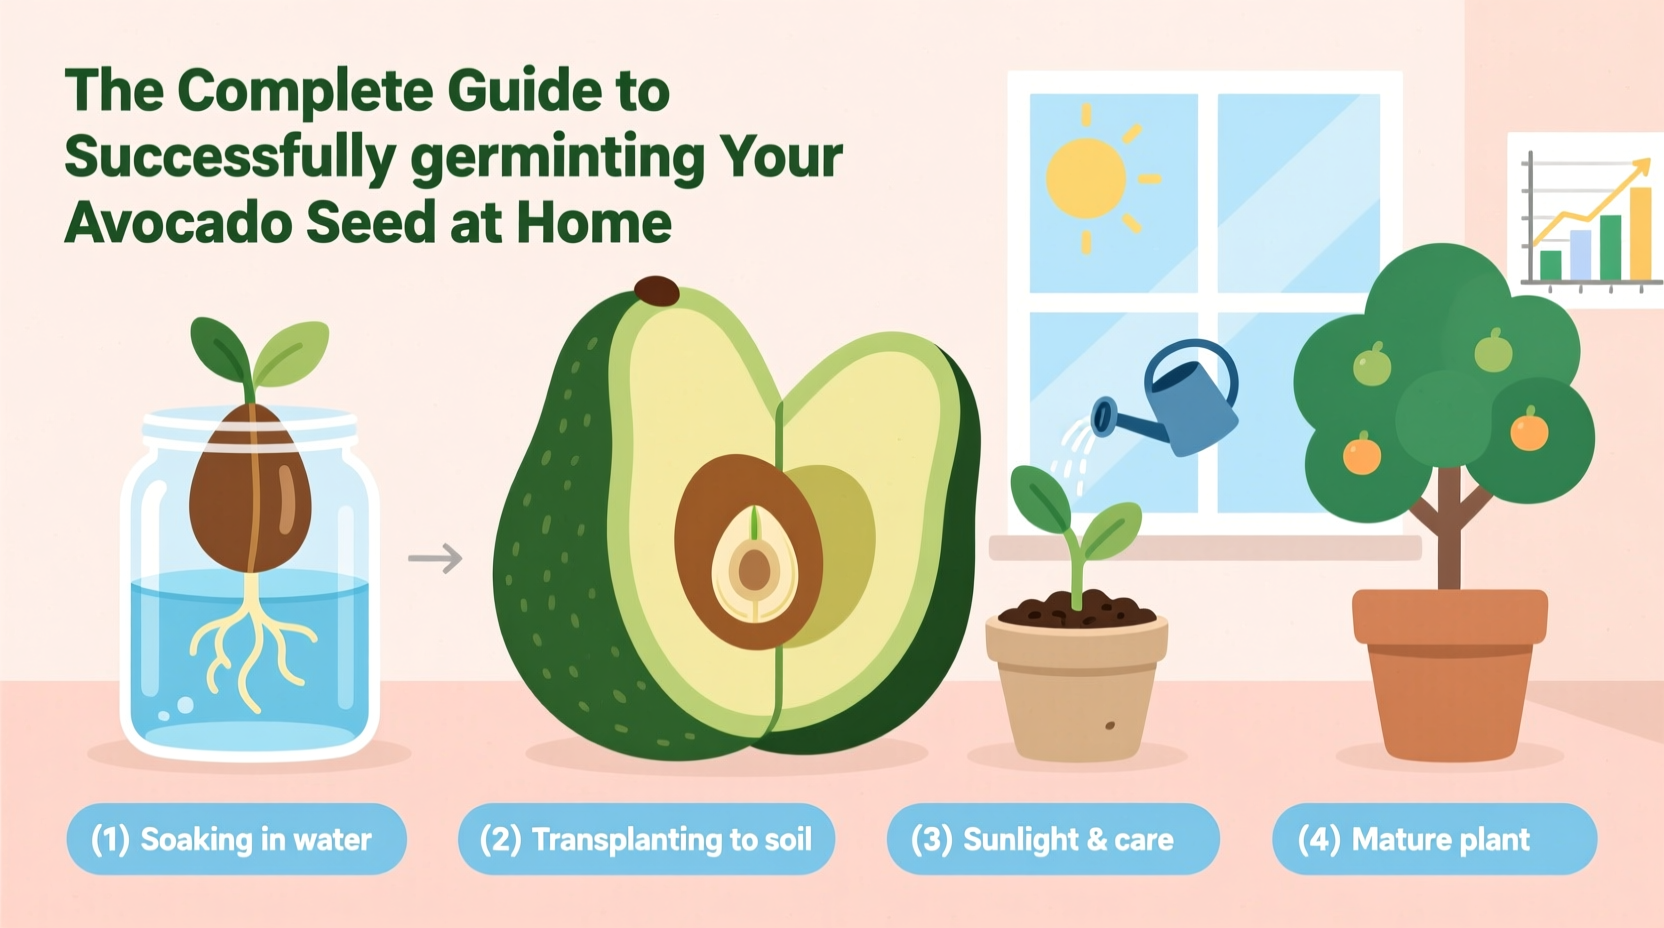
The Water Suspension Method: A Step-by-Step Timeline
One of the most popular and effective ways to germinate an avocado seed is the water suspension method. This allows you to observe root development in real time and ensures consistent moisture without over-saturation.
- Remove and clean the seed – Gently rinse off any remaining fruit pulp. Residual flesh can promote mold growth.
- Identify the top and bottom – The slightly pointed end is the top (where the sprout will emerge); the flat or rounded end is the bottom (root side).
- Insert toothpicks – Stick three or four toothpicks into the middle section of the seed at a slight downward angle.
- Suspend over water – Place the seed, bottom-down, in a glass or jar filled with water. The water should cover about one inch of the seed’s base.
- Find a warm, bright spot – Keep the container in indirect sunlight, such as near a south-facing window. Avoid direct sun, which can overheat the water.
- Maintain water levels – Refill the glass weekly to prevent stagnation and ensure the root zone remains submerged.
Germination typically takes between 3 to 6 weeks. During this time, the outer brown shell will crack, and roots will begin to emerge from the bottom. Soon after, a pale green shoot will push upward from the top.
“Watching the first roots form gives people a tangible connection to plant life—they realize growth isn’t magic, it’s science in motion.” — Dr. Lena Reyes, Urban Horticulturist
Soil vs. Water: Which Method Works Best?
While water germination offers visibility and simplicity, planting directly in soil provides a more natural environment and reduces transplant shock later on. Each approach has advantages and drawbacks.
| Method | Pros | Cons |
|---|---|---|
| Water Suspension | Easy monitoring of root development; high success rate; educational | Roots may become waterlogged; requires transplanting later; higher risk of mold |
| Direct Soil Planting | No transplant stress; mimics natural conditions; stronger initial root establishment | No visual progress tracking; slower emergence; harder to correct mistakes |
If using soil, choose a well-draining potting mix and plant the seed with the pointed end just above the surface. Keep the soil consistently moist but not soggy. A small greenhouse effect can be achieved by covering the pot with a plastic bag, removing it daily for airflow.
Common Mistakes That Halt Germination
Many attempts fail not because the seed was bad, but due to easily avoidable errors. Awareness of these pitfalls dramatically increases your chances of success.
- Drying out the seed – Even brief exposure to air can desiccate the embryo. Always start the process within 24 hours of removal.
- Using cold water – Cold inhibits metabolic activity. Room-temperature or slightly warm water encourages faster sprouting.
- Impatience – Some seeds take up to eight weeks to show signs. Premature disposal is the most common reason for failure.
- Overlooking mold – Surface mold on the seed or in water doesn’t always mean failure. Gently wipe the seed and change the water if needed.
- Planting too deep – Burying the entire seed in soil suffocates the emerging shoot. Only half should be covered.
A Real-Life Example: From Kitchen Scrap to Living Tree
Sophie Nguyen, a teacher in Portland, started her avocado project with skepticism. “I’d tried twice before and gave up after two weeks,” she recalls. This time, she followed a strict routine: cleaned the seed thoroughly, used filtered water, placed the jar in a warm corner of her kitchen, and changed the water every five days. After 27 days, tiny white roots appeared. By week seven, a sturdy stem had emerged.
She transplanted it into a pot with sandy loam soil and began rotating it weekly for even growth. Today, her avocado plant stands over four feet tall and has survived multiple relocations. Though it hasn’t fruited yet, Sophie says the experience taught her patience and the value of consistent care. “It’s like raising a child who grows leaves instead of talking,” she jokes.
Caring for Your Sprouted Avocado Seedling
Once your seed has sprouted and developed several inches of stem and its first set of true leaves, it’s ready for the next stage. Transplant it carefully into a six-inch pot with drainage holes, using a mix designed for cacti or palms to ensure good aeration.
Place the pot in bright, indirect light. Rotate it every few days to encourage symmetrical growth. Water when the top inch of soil feels dry—overwatering is the leading cause of seedling death.
When the stem reaches about 12 inches, pinch off the top few leaves to promote bushier growth. This prevents legginess and strengthens the central trunk. Fertilize monthly during spring and summer with a balanced liquid fertilizer diluted to half strength.
Frequently Asked Questions
Can all avocado seeds germinate?
Most can, provided they’re fresh and intact. However, seeds from commercially grown fruit may have lower viability due to hybridization or storage conditions. Hass avocados tend to germinate reliably.
How long does it take for an avocado tree to bear fruit?
Indoor-grown trees rarely fruit, and when they do, it can take 5 to 13 years. Fruit production requires cross-pollination, ample sunlight, and ideal climate conditions—difficult to replicate indoors. Most home growers enjoy the plant as an ornamental specimen.
Why did my avocado seed stop growing after sprouting?
This often happens due to insufficient light or inconsistent watering. Sudden temperature drops or drafts can also stall growth. Ensure stable warmth (65–75°F) and steady moisture.
Final Checklist for Success
- Preparation:
- ✓ Use a fresh, undamaged seed
- ✓ Clean off all fruit residue
- ✓ Identify the correct orientation (pointed = top)
- Germination:
- ✓ Suspend in room-temperature water or plant in well-draining soil
- ✓ Provide bright, indirect light
- ✓ Change water weekly or keep soil evenly moist
- After Sprouting:
- ✓ Transplant gently once roots are 2–3 inches long
- ✓ Pinch top leaves to encourage branching
- ✓ Maintain consistent care and rotation
Start Growing Today
Germinating an avocado seed is a simple act with profound rewards. It teaches mindfulness, introduces you to the rhythms of plant life, and transforms waste into beauty. Thousands of households have turned their avocado scraps into living decor—now it’s your turn.


 浙公网安备
33010002000092号
浙公网安备
33010002000092号 浙B2-20120091-4
Comments
No comments yet. Why don't you start the discussion?