
Finding the right clothing size is more than a matter of comfort—it affects how you look, how confident you feel, and even how long your clothes last. Yet, many people rely on inconsistent brand labels or outdated measurements, leading to frustration with online shopping and poor fits in everyday wear. The solution lies not in guessing, but in measuring—accurately and consistently. With the right tools and technique, you can determine your true size from the comfort of your home, saving time, money, and stress.
Why Standardized Sizing Doesn’t Work
Clothing sizes are notoriously inconsistent across brands and regions. A medium in one brand may fit like a small in another. This phenomenon, known as “size inflation” or “vanity sizing,” means that numerical or lettered labels—like S, M, L, or 8, 10, 12—are unreliable indicators of actual body dimensions. Retailers often adjust their sizing to make customers feel better about wearing larger sizes, which distorts expectations.
For example, a woman who wears a size 10 in jeans from Brand A might need a size 14 in the same style from Brand B. These inconsistencies make it nearly impossible to shop confidently without trying garments on—or having precise body measurements on hand.
“Relying on size tags is like navigating without a map. Your measurements are your true coordinates.” — Lydia Chen, Fit Consultant & Apparel Designer
What You’ll Need: Tools for Accurate Measurement
To measure yourself correctly, gather the following items:
- A flexible, non-stretch sewing tape measure (not a rigid ruler or retractable metal tape)
- A full-length mirror
- Tight-fitting undergarments or form-fitting clothing (to avoid bulk)
- A friend (optional but helpful for back measurements)
- Paper and pen to record results
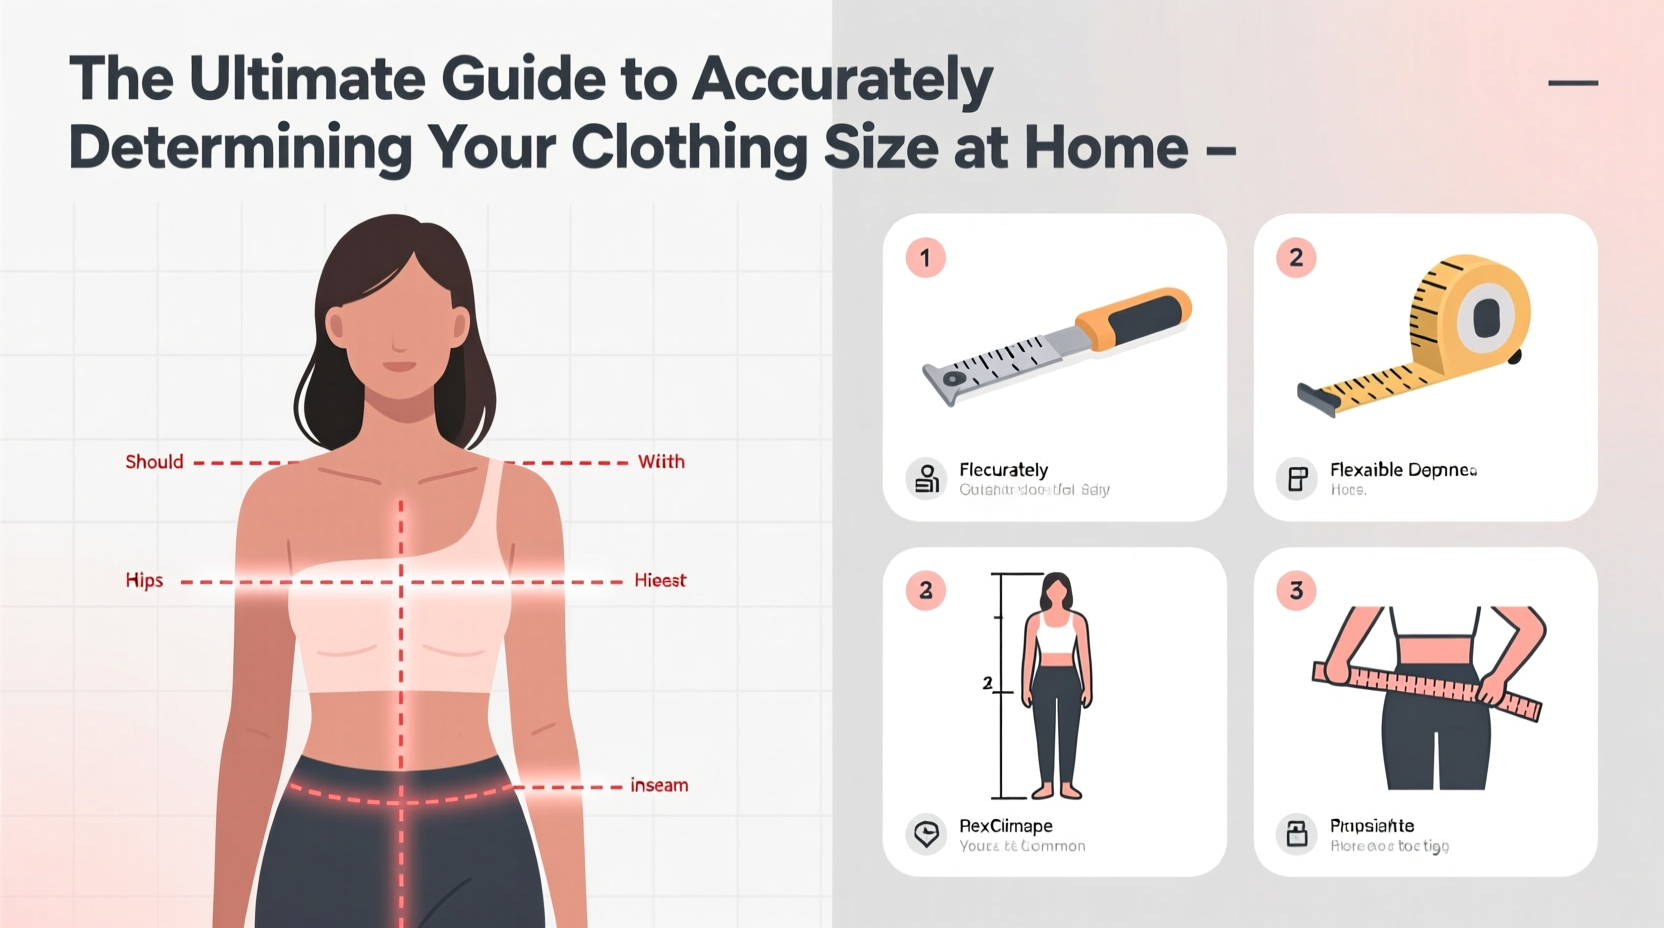
Step-by-Step Guide to Measuring Your Body
Follow this sequence to ensure accuracy. Measure in inches or centimeters, but stick to one system throughout. Take each measurement two times to confirm consistency.
- Bust/Chest: Wrap the tape around the fullest part of your bust (for women) or chest (for men). Keep the tape parallel to the floor and under the arms. Don’t pull too tight—allow light tension.
- Waist: Measure around your natural waistline, typically just above the hip bones and below the ribcage. This is usually the narrowest part of your torso. Exhale normally—don’t suck in.
- Hips: Stand with feet together and measure around the fullest part of your hips and buttocks. Ensure the tape passes over both hip bones and the seat.
- Inseam: For pants, measure from the crotch down to the desired pant length. Alternatively, use a well-fitting pair of pants: lay flat and measure from the crotch seam to the hem.
- Shoulders (for tops and jackets): Measure from the edge of one shoulder, across the back, to the other shoulder’s edge. This ensures proper sleeve and jacket fit.
- Sleeve Length: From the shoulder edge, bend your arm slightly, and measure down to the wrist bone.
- Upper Arm: Measure around the fullest part of your bicep—important for tailored shirts and sleeves.
Using Your Measurements: Matching to Size Charts
Once you’ve recorded your numbers, consult the size chart of the specific brand and garment you're purchasing. Never assume your usual size applies. Instead, compare your actual measurements to the brand’s garment dimensions.
| Your Body Measurement | Garment Measurement (Laid Flat) | How to Compare |
|---|---|---|
| Bust: 38 inches | Chest (flat): 20 inches x 2 = 40 inches | Choose this size—allows 2 inches of ease |
| Waist: 32 inches | Waist (flat): 17 inches x 2 = 34 inches | Good fit for standard stretch or tailored waistband |
| Hips: 42 inches | Hip (flat): 22 inches x 2 = 44 inches | Ideal for movement and layering |
Note: Garment measurements are often listed “laid flat”—meaning half the total circumference. Double the number to get the full size. Also, consider the fabric: stretchy materials allow for less ease, while structured fabrics require more room.
Common Measurement Mistakes to Avoid
- Measuring over bulky clothing: Thick sweaters or padded bras add false volume.
- Using an old tape measure: Stretchy or worn tapes lose accuracy.
- Standing incorrectly: Slouching or twisting skews results. Stand straight, breathe naturally.
- Ignoring updates: Bodies change. Re-measure every 3–6 months, especially after weight shifts or lifestyle changes.
- Assuming symmetry: One hip or shoulder may be slightly larger—measure both sides if tailoring is needed.
Real-Life Example: Sarah’s Online Shopping Transformation
Sarah, a 34-year-old teacher, had given up on buying clothes online. She’d ordered from five different retailers and returned every item due to poor fit. After learning how to measure herself properly, she recorded her bust (37\"), waist (29\"), and hips (39\"). She then cross-referenced these with detailed size charts from a sustainable fashion brand. This time, the dress arrived and fit perfectly. Within weeks, she saved over $60 in return shipping and gained confidence in her virtual wardrobe choices.
Her breakthrough wasn’t luck—it was precision.
Printable Measurement Checklist
- Wear form-fitting clothing or undergarments
- Gather tools: soft tape, mirror, paper, pen
- Measure bust/chest
- Measure natural waist
- Measure hips
- Measure inseam or use existing pants
- Record all values clearly
- Compare to brand-specific size chart
- Repeat every few months or after body changes
Frequently Asked Questions
Can I measure myself alone?
Yes, with care. Use a mirror to ensure the tape is level, especially around the back. For hard-to-reach areas like shoulder width, consider taking a photo or asking for brief help.
Why do my measurements differ from store fitting rooms?
Fitting rooms vary by lighting, mirror angle, and staff guidance. Some salespeople encourage smaller sizes to boost sales. Your measurements are objective—trust them over subjective feedback.
Do plus-size and petite brands measure differently?
The method remains the same, but proportions differ. Petite lines shorten torso and leg lengths; plus sizes accommodate broader hips and waists. Always check the brand’s unique chart, especially for inseam and sleeve length.
Final Tips for Long-Term Success
Accurate sizing isn’t a one-time task—it’s part of ongoing self-awareness and smart shopping. Keep a dedicated notebook or digital file with your current measurements and notes on past fits (e.g., “Brand X runs small—size up”). Share your data when ordering custom clothing or alterations.
If you shop for others—gifts, uniforms, or family members—ask for their measurements in advance. It shows thoughtfulness and avoids returns.
“Your body isn’t the problem—ill-fitting clothes are. When you know your numbers, you reclaim control.” — Marcus Reed, Tailor & Fit Analyst
Take Action Today
You don’t need a fitting room or a stylist to wear clothes that fit well. All you need is a tape measure and ten focused minutes. Start today: step in front of the mirror, take your measurements, and record them. Then, test the system—order one item using only your numbers and the brand’s chart. When it fits, you’ll realize how much time, money, and frustration you’ve been wasting.


 浙公网安备
33010002000092号
浙公网安备
33010002000092号 浙B2-20120091-4
Comments
No comments yet. Why don't you start the discussion?