
Placing artwork on a wall seems simple—hang it and step back. Yet many people end up with pieces that feel off-center, too large, or oddly spaced. The difference between amateur and professional-looking displays lies not in the art itself, but in precision. Accurate measurement of wall space ensures your art enhances the room’s balance, scale, and visual flow. This guide walks through every phase—from tools and techniques to spacing strategies and common pitfalls—so you can install art with confidence and style.
Why Accurate Measurement Matters
A well-placed piece of art draws the eye, anchors furniture, and adds personality. But misjudged dimensions lead to overcrowding, awkward gaps, or floating frames that look lost. The human eye detects imbalance quickly. A painting just a few inches too high or too far from a sofa disrupts harmony. Proper measurement isn’t about rigid rules—it’s about understanding spatial relationships.
Interior designers emphasize proportion as a cornerstone of visual comfort. According to Sarah Linhart, an interior architect with over 15 years of experience:
“Art should relate to its surroundings. Measuring isn’t just numbers—it’s about context: ceiling height, furniture layout, and sightlines. Get this right, and the room feels intentional.” — Sarah Linhart, Interior Architect
Essential Tools for Precision
You don’t need advanced equipment, but having the right tools eliminates guesswork. Gather these before starting:
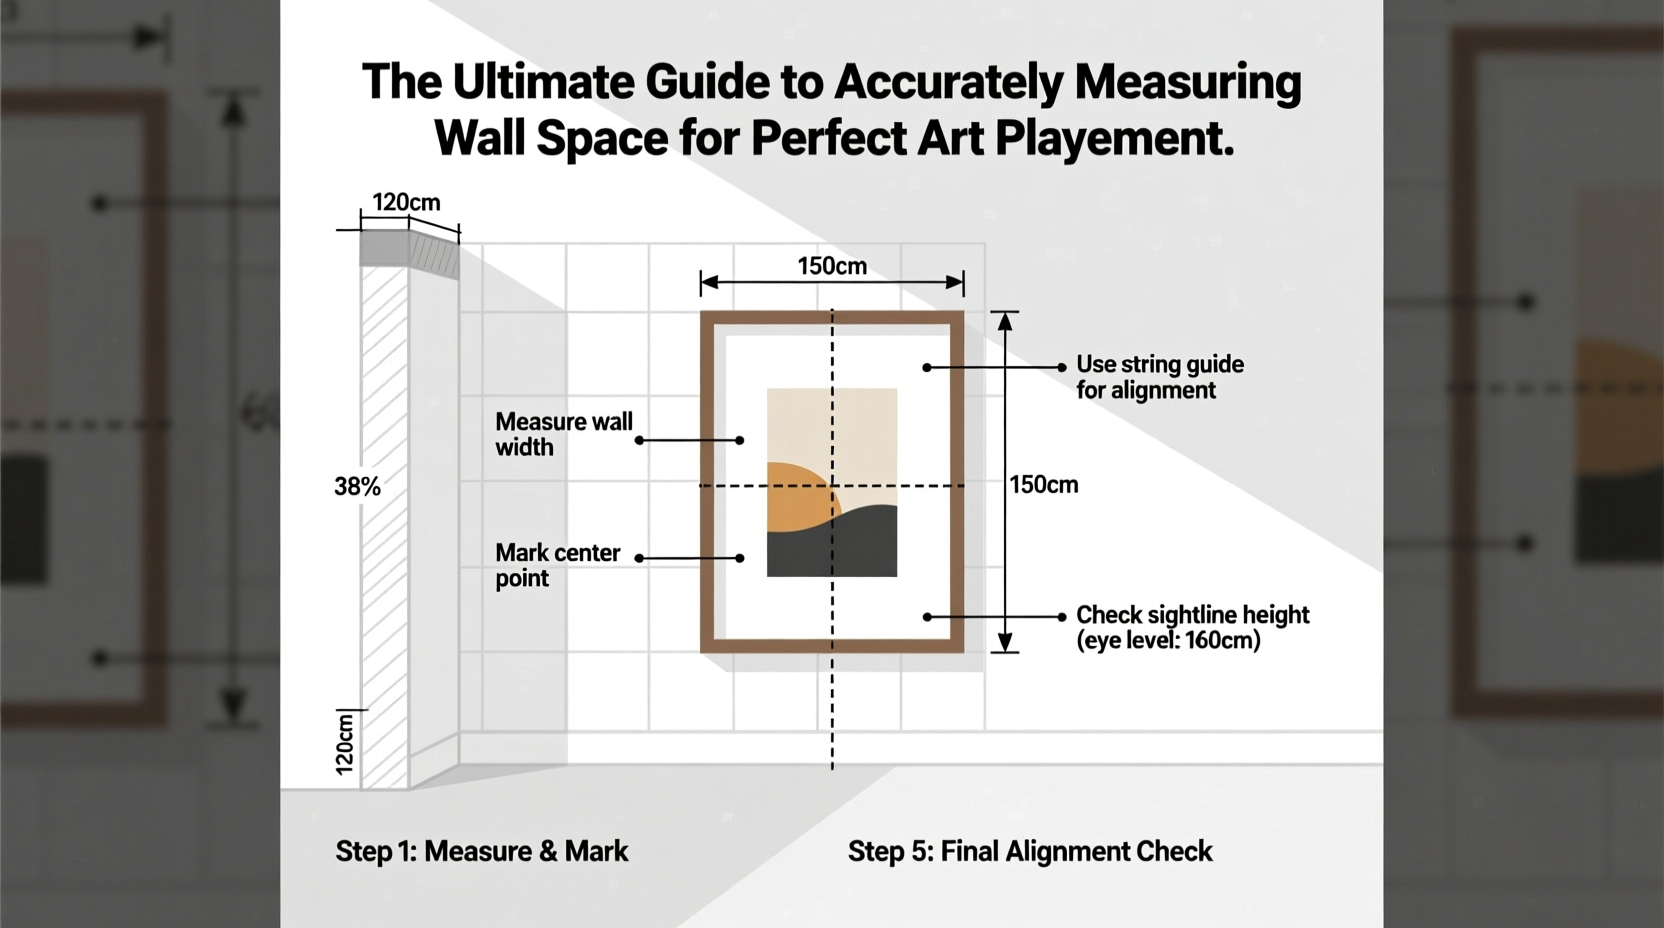
- Tape measure (preferably 25 feet, with both inch and centimeter markings)
- Laser level or bubble level (for straight alignment)
- Pencil and notepad (or digital sketch app)
- Painter’s tape (to mock up frame outlines)
- Measuring app (optional; use smartphone AR tools like Measure on iOS or Google Measure)
Step-by-Step Guide to Measuring Wall Space
Follow this sequence to map out your wall with accuracy and intention.
- Determine the focal point. Identify where the viewer’s eye naturally lands—above a sofa, across from the entryway, or centered on a blank wall.
- Measure wall dimensions. Record total width and height. Note architectural features: windows, doors, molding, or outlets.
- Establish viewing height. Hang art so the center is at eye level (approximately 57–60 inches from the floor). Adjust slightly higher in rooms with taller ceilings.
- Account for furniture. If placing art above furniture, leave 6–8 inches between the top of the piece and the furniture below.
- Mark key points lightly in pencil. Mark the center of the wall and desired hanging height. Use a level to draw a faint horizontal reference line.
- Calculate frame spacing. For multiple pieces, decide on layout (grid, salon wall, diptych), then calculate spacing based on frame size and wall width.
Calculating Spacing Between Multiple Frames
When arranging several artworks, consistent spacing creates rhythm. A standard gap of 2–3 inches between frames works in most homes. Use this formula:
Available wall space – (total width of all frames) = remaining space
Remaining space ÷ (number of gaps + 1) = gap size per side
For example: A 96-inch wall holds three 24-inch wide frames. Total frame width = 72 inches. Remaining space = 24 inches. With four edge gaps (left, between 1–2, 2–3, right), divide 24 by 4 = 6 inches per gap.
Common Layouts and Their Measurement Rules
| Layout Type | Recommended Spacing | Best For | Measurement Tip |
|---|---|---|---|
| Single Statement Piece | N/A | Focal walls, above mantels | Width should be 50–75% of furniture beneath |
| Horizontal Gallery | 2–3 inches between frames | Long walls, hallways | Align bottom edges for cohesion |
| Vertical Stack | 4–6 inches vertically | Narrow spaces, beside windows | Center stack on wall midpoint |
| Salon Wall (Mixed Sizes) | Consistent 2-inch gap | Living rooms, stairwells | Use painter’s tape to test layout first |
| Grid Layout | Equal spacing on all sides | Modern interiors, offices | Start from center and work outward |
Real Example: Transforming a Living Room Wall
Emily, a homeowner in Portland, struggled with a 12-foot-wide living room wall above her sectional sofa. Her initial attempt—a single oversized print—felt unbalanced. She measured the sofa (90 inches wide) and realized the art (48 inches) was too narrow. Following the 50–75% rule, she needed something 45–67 inches wide.
Instead of one piece, she opted for a triptych of matching abstract prints, each 24 inches wide. Using the spacing formula, she calculated 6-inch gaps on the sides and between frames, totaling 84 inches. Centered on the wall and hung 6 inches above the sofa, the arrangement created symmetry and depth. By measuring first, she avoided costly mistakes and achieved a designer look.
Do’s and Don’ts of Art Placement
- Do:
- • Measure the entire wall and surrounding furniture.
- • Use painter’s tape to outline frames before drilling.
- • Hang at eye level unless intentionally creating drama.
- • Consider ceiling height—taller rooms allow higher placement.
- Don’t:
- • Cluster small frames without breathing room.
- • Hang art too high to “prevent hitting heads.”
- • Mix frame styles haphazardly without a unifying theme.
- • Ignore lighting—position art where natural or accent light enhances it.
FAQ: Common Questions About Measuring for Art
How high should I hang artwork?
The center of the artwork should generally be 57–60 inches from the floor—the average eye level. Adjust slightly higher in rooms with tall ceilings or when placing above furniture, maintaining a 6–8 inch gap.
What if my wall has outlets or switches?
Work around them. Avoid covering electrical fixtures. If necessary, shift the composition slightly or choose a layout that frames the outlet rather than obscuring it. Never cut drywall or move wiring without a licensed electrician.
Can I use an app instead of a tape measure?
Yes, AR-based apps like Google Measure or Apple’s Measure can provide quick estimates, especially for large or hard-to-reach areas. However, for final decisions, verify with a physical tape measure—digital tools can have a margin of error up to half an inch.
Checklist: Pre-Hanging Preparation
- ❏ Measure wall width and height
- ❏ Note locations of furniture, doors, and windows
- ❏ Determine ideal eye-level height (57–60 inches)
- ❏ Calculate frame spacing using the gap formula
- ❏ Use painter’s tape to simulate the layout
- ❏ Confirm hardware strength based on artwork weight
- ❏ Locate wall studs for heavy pieces
- ❏ Double-check alignment with a level
Final Thoughts: Confidence Through Calculation
Great art deserves great placement. The time spent measuring may seem tedious, but it transforms uncertainty into assurance. Whether you’re styling a cozy bedroom or a spacious gallery wall, precision turns decoration into design. You don’t need innate talent—just attention to detail and a willingness to plan.


 浙公网安备
33010002000092号
浙公网安备
33010002000092号 浙B2-20120091-4
Comments
No comments yet. Why don't you start the discussion?