
Selecting the perfect ring—whether for an engagement, wedding, or a meaningful gift—requires one crucial detail: the correct ring size. A poorly fitting ring can slip off, cause discomfort, or require costly resizing. While visiting a jeweler is an option, you can achieve accurate results from the comfort of your home using basic household items. This guide walks you through scientifically sound, practical methods to measure your ring size precisely, avoid common mistakes, and ensure a flawless fit every time.
Why Accurate Ring Sizing Matters
A ring that fits well enhances both comfort and aesthetics. Too tight, and it restricts circulation; too loose, and it risks being lost. Finger size can fluctuate due to temperature, activity, and even time of day. That’s why precision matters—not just in measurement, but in understanding when and how to take it.
Jewelers use standardized sizing systems (such as US, UK, or European scales), so matching your measurement to these charts correctly ensures compatibility across brands and countries. Whether you're shopping online or preparing a surprise gift, getting the size right the first time saves time, money, and heartache.
Best Time of Day to Measure Your Ring Size
Finger size changes throughout the day. Blood flow increases with heat and activity, causing fingers to swell slightly. For the most accurate reading:
- Measure in the evening, when fingers are at their largest due to natural fluid retention.
- Avoid measuring immediately after exercise, hot showers, or exposure to cold weather.
- Ensure hands are at room temperature and relaxed.
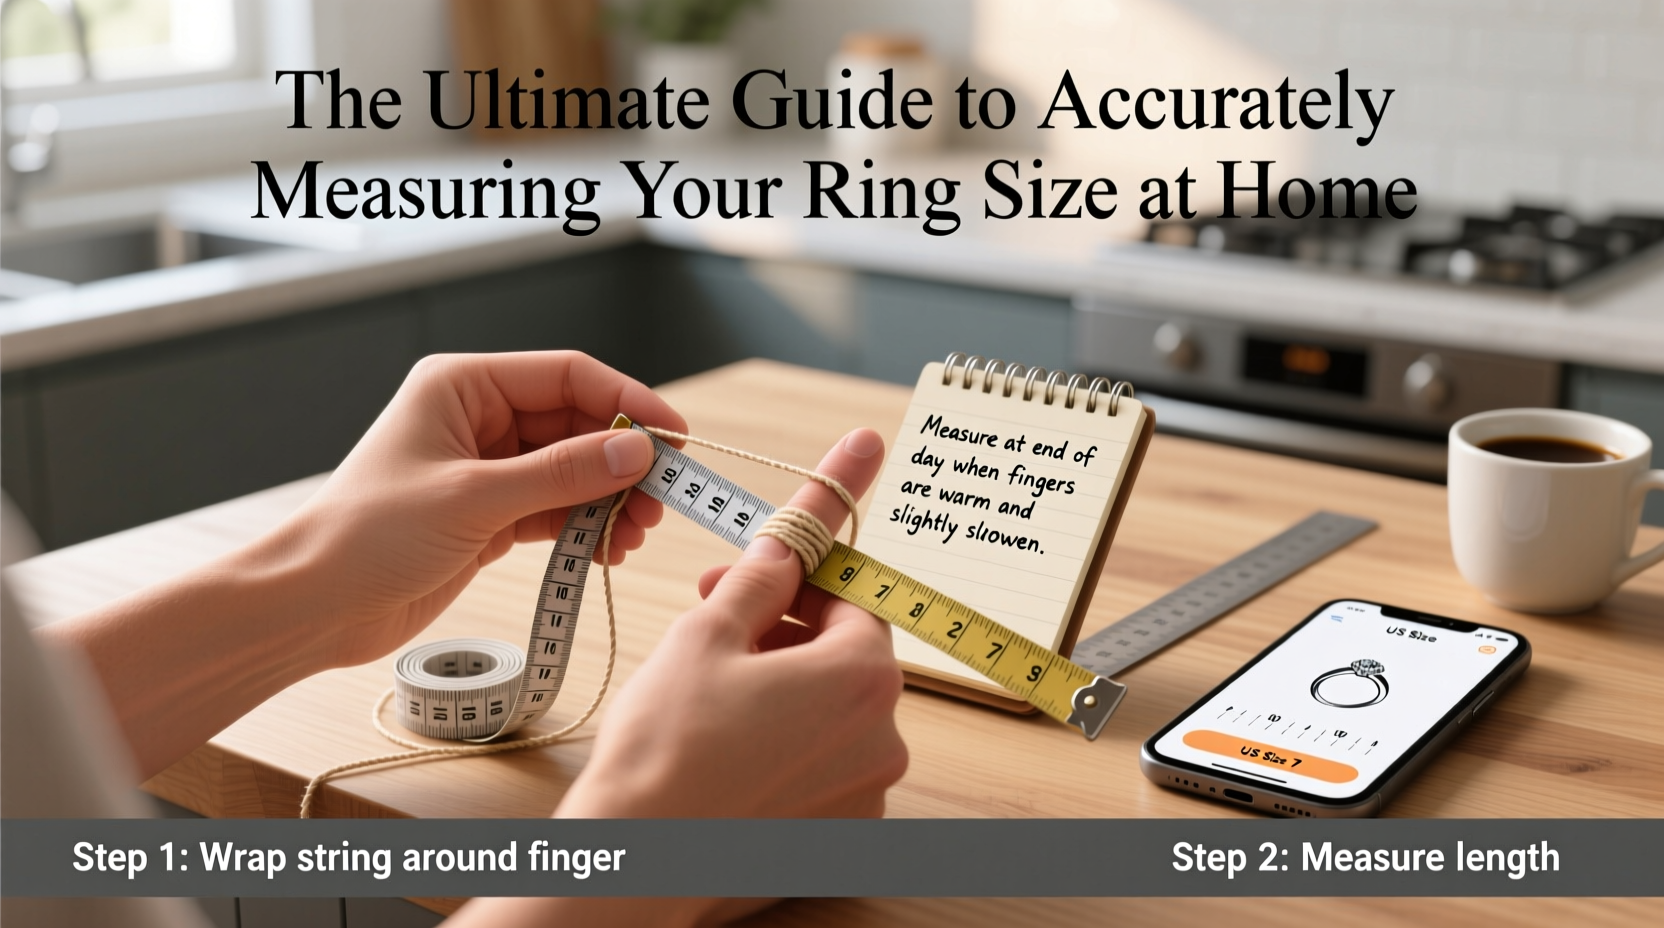
Method 1: The String or Paper Strip Method
This widely trusted technique uses a non-stretchable material to trace the circumference of your finger. Follow this step-by-step process:
- Cut a thin strip of paper or use a piece of thread about 15 cm long.
- Wrap it snugly around the base of your finger—the same spot where the ring will sit.
- Ensure the wrap is flat and not twisted. It should be tight enough to stay in place but loose enough to slide over the knuckle easily.
- Mark the point where the ends overlap with a pen.
- Lay the strip flat on a ruler and measure the length from the start to the mark in millimeters.
- Compare this number to a standard ring size chart (see table below).
“Even a 0.5 mm difference can shift you to the next size. Precision in measuring circumference is key.” — Daniel Reyes, Master Jeweler & GIA Graduate
Method 2: Using a Known Ring You Already Own
If you have a ring that fits perfectly, use it to determine your size. This method is especially useful when buying a replacement or matching band.
- Take the well-fitting ring to a flat surface.
- Use a ruler to measure the internal diameter in millimeters—from inner edge to inner edge, passing through the center.
- Match the diameter to a ring size conversion chart.
This approach eliminates variability caused by finger swelling and provides a direct reference.
Ring Size Conversion Table
| US Size | Inside Diameter (mm) | Circumference (mm) | UK / Australia | Europe |
|---|---|---|---|---|
| 4 | 14.86 | 46.7 | H | 47 |
| 5 | 15.70 | 49.3 | J | 50 |
| 6 | 16.51 | 51.9 | M | 52 |
| 7 | 17.35 | 54.5 | O | 54 |
| 8 | 18.19 | 57.2 | Q | 57 |
| 9 | 18.86 | 59.2 | S | 59 |
| 10 | 19.84 | 62.3 | U | 62 |
Note: Sizes vary slightly between manufacturers. When in doubt, opt for the larger size if purchasing a wide band (over 6 mm), as wider rings feel tighter than narrow ones.
Common Mistakes to Avoid
Even small errors can lead to incorrect sizing. Be mindful of these frequent pitfalls:
- Using stretchy string: Yarn or elastic thread expands, leading to oversized measurements.
- Measuring a cold finger: Cold causes shrinkage, resulting in a ring that’s too tight once warmed.
- Ignoring the knuckle: Ensure the ring can slide over your knuckle comfortably. Measure both the base and the knuckle if there's a significant difference.
- Relying on memory: “I think I’m a size 7” isn’t reliable. Always verify with physical measurement.
Mini Case Study: Getting It Right for a Surprise Proposal
Sarah wanted to propose to her partner, Jordan, with a custom-made ring. Jordan had never mentioned their ring size, and Sarah didn’t want to risk a resized ring delaying the moment. She borrowed one of Jordan’s existing rings under the guise of complimenting it. Using the diameter method, she measured it at 17.35 mm—exactly a US size 7. She double-checked by wrapping a paper strip around her own finger, adjusted for slight differences in hand size, and confirmed the result. The ring fit perfectly on the big day, and the proposal went off without a hitch.
This example shows how discreet, accurate home measurement can preserve surprises while ensuring success.
Do’s and Don’ts of Home Ring Sizing
| Do’s | Don’ts |
|---|---|
| Measure at room temperature in the evening | Measure right after swimming or exercising |
| Use a non-stretchable material like paper or thread | Use rubber bands or yarn |
| Check against a reliable international size chart | Assume US sizes match UK sizes directly |
| Test the fit with a temporary ring sizer or 3D-printed model | Purchase a non-resizable ring without verification |
When to Seek Professional Confirmation
While home methods are highly effective, certain situations call for professional input:
- You’re purchasing a ring made from non-resizable materials (e.g., wood, ceramic, or eternity bands).
- There’s a large difference between your finger’s base and knuckle size.
- You experience medical conditions affecting swelling (e.g., arthritis or diabetes).
In such cases, a local jeweler can provide a precise measurement using calibrated ring mandrels and sizers—often free of charge.
Checklist: How to Accurately Measure Ring Size at Home
- Choose a time when your fingers are warm and relaxed (late afternoon or evening).
- Gather tools: ruler, non-stretchable string or paper strip, pen, and a ring size chart.
- Wrap the string or paper snugly around the base of the finger.
- Mark the overlap point and measure the length in millimeters.
- Convert the circumference to ring size using the table provided.
- Double-check using a known-fitting ring’s inner diameter, if available.
- Account for band width—wider bands may require a half-size larger.
- Repeat the process on a second day to confirm consistency.
FAQ
Can I measure my ring size using a phone app?
Some apps claim to measure ring size using augmented reality, but their accuracy varies widely due to camera calibration issues and screen scaling. Physical methods remain more reliable.
What if my ring size falls between two sizes?
Always round up, especially for metals that cannot be resized easily. Comfort is prioritized over a slightly looser fit.
Do men and women use different sizing standards?
No. Ring sizes follow the same standardized scales globally, regardless of gender. The average female ring size ranges from 5 to 7, while males typically range from 8 to 10.
Conclusion
Accurately measuring your ring size at home is simple, cost-effective, and surprisingly precise when done correctly. By using everyday tools and following best practices—like measuring at the right time of day, avoiding stretchable materials, and cross-verifying with known rings—you can confidently purchase or gift a ring that fits perfectly. Whether it’s a symbol of love, commitment, or personal style, the right fit makes all the difference.


 浙公网安备
33010002000092号
浙公网安备
33010002000092号 浙B2-20120091-4
Comments
No comments yet. Why don't you start the discussion?