
Creating a personal golf simulator is no longer reserved for pros or the ultra-wealthy. With today’s technology, nearly any room in your home—a basement, garage, or even a spare bedroom—can be transformed into a full-functioning golf training and entertainment environment. Whether you're looking to refine your swing year-round, play virtual rounds at world-class courses, or simply enjoy a fun activity with family and friends, a custom-built simulator offers unmatched flexibility. This guide walks through every critical aspect of designing, equipping, and optimizing a golf simulator tailored to your available space and goals.
Assess Your Space and Set Realistic Expectations
The first step in building a golf simulator is evaluating your available area. While ideal setups require 10 feet of depth, 9 feet of width, and 9 feet of ceiling height, many configurations work well in tighter spaces. Measure your room carefully, accounting for net clearance, screen positioning, and sensor placement. Low ceilings can limit ball flight data accuracy, while narrow rooms may restrict swing arc, especially for taller players.
Consider these key dimensions:
- Back-to-screen distance: Minimum 8–10 feet recommended for launch monitor accuracy.
- Ceiling height: At least 8.5 feet to allow natural follow-through without interference.
- Floor space: A 9x10-foot footprint accommodates most right-handed swings and projector setups.
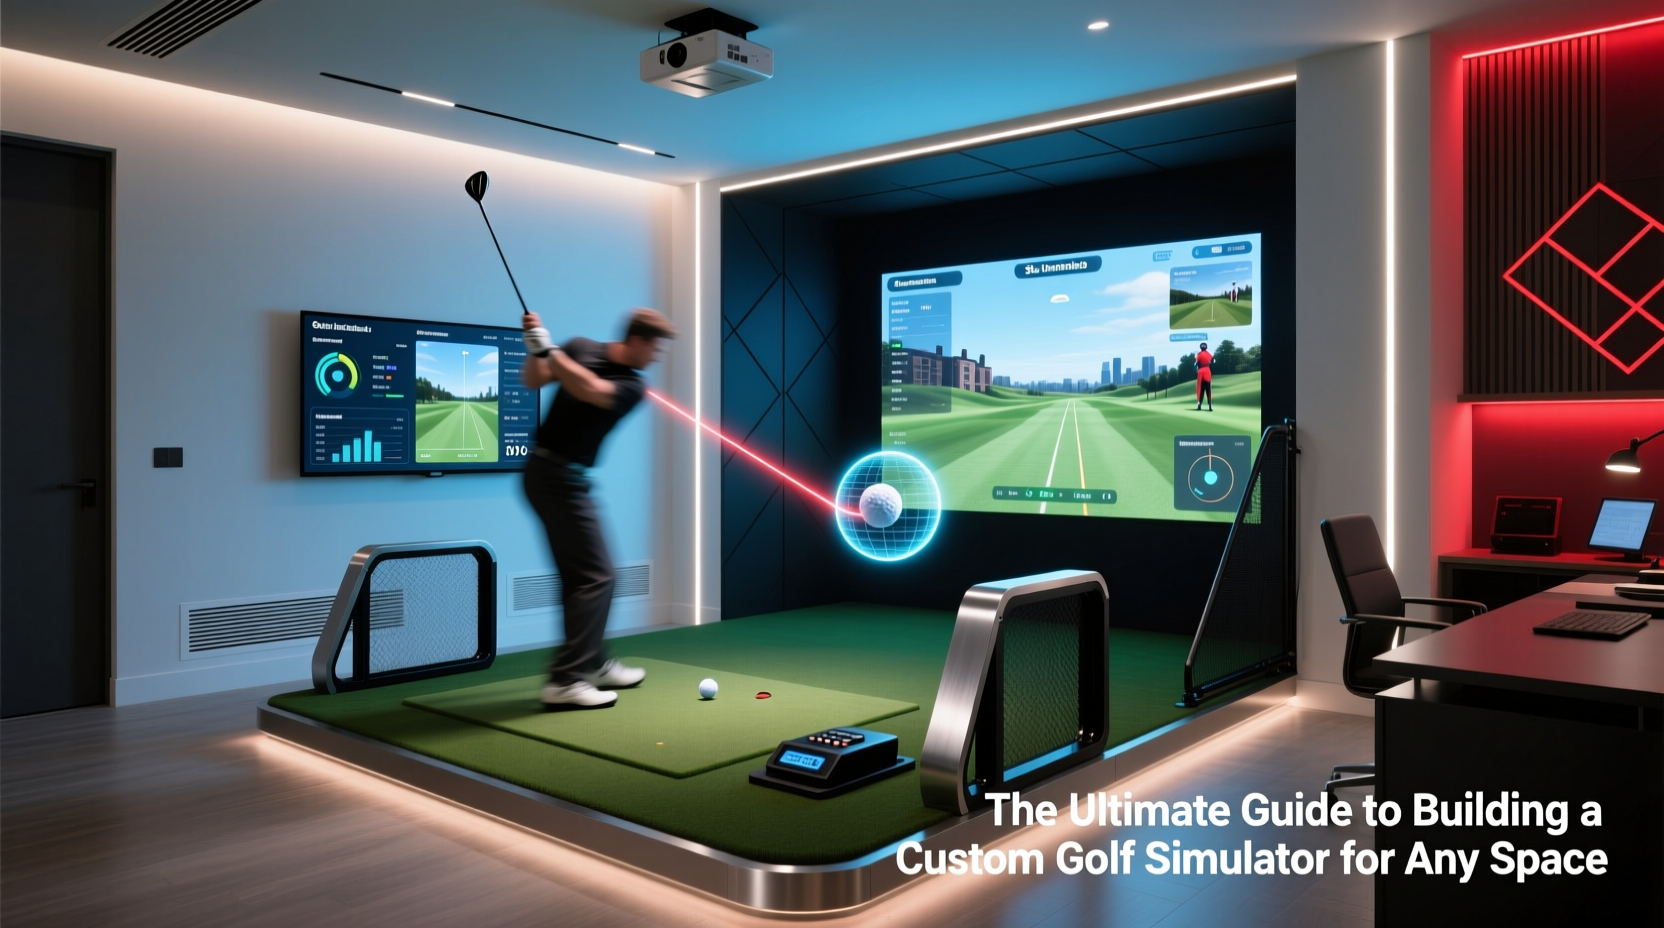
Selecting the Right Hardware Components
A high-performing golf simulator relies on four core components: launch monitor, hitting screen, projector, and enclosure/net system. Each plays a crucial role in performance, immersion, and durability.
Launch Monitor: The Brain of Your System
This device captures ball speed, spin rate, launch angle, and club path. Options range from camera-based systems like SkyTrak and Mevo+ to radar-based units such as TrackMan and Foresight Sports. For home use, SkyTrak and Flightscope X3 offer excellent accuracy at mid-tier prices.
Hitting Screen and Projector Setup
A high-gain, durable screen ensures bright, clear visuals. Dual-layer screens resist wear from repeated impact. Pair it with a short-throw projector (minimum 1080p resolution) mounted behind the user to minimize shadows and maximize image size. Ensure ambient light control—blackout curtains or dimmable lighting improves contrast significantly.
Enclosure and Netting
Use multi-layered impact netting rated for golf ball speeds (at least 170 mph). Frame kits made from aluminum or steel tubing provide structural integrity. Ceiling-mounted systems save floor space but require secure joist anchoring. Always include side net extensions to protect walls and equipment.
“Accuracy begins with proper alignment. Even the best launch monitor will underperform if not level and correctly positioned.” — David Lang, Golf Technology Consultant
Software and Course Compatibility
The software transforms raw data into an immersive experience. Top platforms include E6 Connect, The Golf Club (TGC 2019), and WGT Golf. Each offers realistic course simulations, multiplayer modes, and practice tools like driving ranges and target games.
Choose software based on your priorities:
| Software | Best For | Compatible Monitors |
|---|---|---|
| E6 Connect | Professional training & course realism | SkyTrak, TrackMan, Foresight |
| TGC 2019 | Custom course creation & mod support | SkyTrak, Mevo+, Rapsodo |
| WGT Golf | Casual play & mobile integration | Mevo+, Arccos |
Ensure your computer meets minimum specs—most simulators require at least an Intel i7 processor, 16GB RAM, and a dedicated GPU (NVIDIA GTX 1060 or better). Solid-state drives reduce load times and improve responsiveness.
Step-by-Step Installation Guide
Follow this sequence to assemble your simulator efficiently and safely:
- Clear and prep the room: Remove obstacles, clean floors, and mark wall anchor points.
- Assemble the frame: Erect upright poles and crossbars according to manufacturer instructions. Use a level to ensure vertical alignment.
- Install netting and screen: Attach primary impact net first, then drape the projection screen over the front. Secure all clips and Velcro straps tightly.
- Mount the projector: Position on a rear shelf or ceiling mount. Align with the center of the screen and adjust focus and keystone settings.
- Set up the launch monitor: Place on a stable mat or tripod directly behind the tee position. Calibrate using manufacturer guidelines.
- Connect and test: Link all devices to your PC or console. Run a diagnostic shot to verify data capture and video rendering.
- Optimize environment: Install flooring (artificial turf or rubber mat), add lighting controls, and soundproof if needed.
Real-World Example: Converting a 12x10 Basement Room
Tom, a weekend golfer from Chicago, transformed his unfinished basement into a functional simulator space. With 8.5-foot ceilings and concrete floors, he prioritized durability and compact design. He used a SkyTrak launch monitor paired with TGC 2019 software on a gaming laptop. An aluminum frame with dual-net system protected the walls, while a short-throw projector delivered a 100-inch image. Artificial turf with a removable tee area gave a realistic feel. Despite tight clearance, Tom adjusted his stance slightly closed and found the system accurate enough for swing analysis and weekly virtual matches with friends. Total cost: under $4,500. “It’s become my favorite room in the house,” he said. “I’ve improved my iron consistency just by practicing after dinner.”
Do’s and Don’ts of Simulator Design
| Do’s | Don’ts |
|---|---|
| Use soft, indirect lighting to avoid screen glare | Overlook ventilation—heat buildup damages electronics |
| Invest in quality turf to simulate real grass feedback | Place sensors where they’ll be hit during follow-through |
| Sound-dampen walls if noise is a concern | Run cables across walkways without securing them |
| Leave 2–3 feet behind the tee for backswing clearance | Use consumer-grade projectors not designed for constant use |
FAQ
Can I build a simulator in a garage with poor insulation?
Yes, but temperature extremes affect both electronics and ball behavior. Avoid leaving devices in sub-freezing or above-90°F environments. Consider insulating the area or using climate-resistant gear.
How much does a fully functional DIY simulator cost?
A capable entry-level system starts around $2,500 (SkyTrak, basic frame, screen, and projector). Mid-range builds with premium software and better visuals run $4,000–$6,000. High-end setups exceed $10,000.
Is a projector necessary, or can I use a large TV?
You can use a large flat panel (75” or larger), but it limits screen size and increases risk of damage. Projectors offer larger, more immersive displays and are easier to replace if something goes wrong.
Essential Checklist Before Launch
- ✅ Confirm room dimensions meet minimum requirements
- ✅ Choose launch monitor compatible with desired software
- ✅ Purchase impact-rated screen and multi-layer netting
- ✅ Verify computer meets software hardware specs
- ✅ Install short-throw projector with proper mounting
- ✅ Test swing path for clearance issues
- ✅ Calibrate launch monitor on a level surface
- ✅ Organize cables and power sources safely
Conclusion
Building a custom golf simulator isn’t about replicating a pro studio—it’s about creating a personalized space that fits your lifestyle, skill level, and available square footage. With thoughtful planning and the right components, even modest areas can deliver powerful training benefits and endless entertainment. From selecting accurate sensors to optimizing visual immersion, each decision shapes the quality of your experience. The technology is accessible, the results are measurable, and the enjoyment is immediate.


 浙公网安备
33010002000092号
浙公网安备
33010002000092号 浙B2-20120091-4
Comments
No comments yet. Why don't you start the discussion?